 Eng
Eng  Rus
Rus  Deu
Deu  Ital
Ital  Esp
Esp  Port
Port  Jap
Jap  Chin
Chin How to achieve good video quality using HyperCam

By Olga Krovyakova - modified February 27, 2024, created April 2, 2019
Sometimes when you record something of your desktop you get the poor video quality of your records and you would like to use such programs and to make such settings to have the best video quality that is possible. HyperCam can easily help you with this task! The video quality of the feature records usually depends on the video compressor used for the record, rate in frames to second settings, bitrate, crispness, buffer delay and some other options.

Simply follow the steps below:
1) Start HyperCam from its record icon on the desktop or from the Start -> All programs -> HyperCam 6 Home Edition
The main window of the program will be opened.
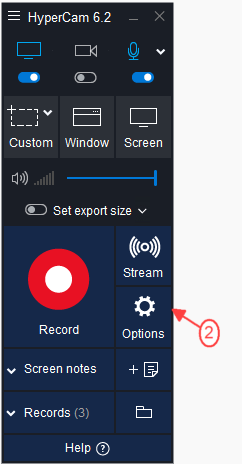
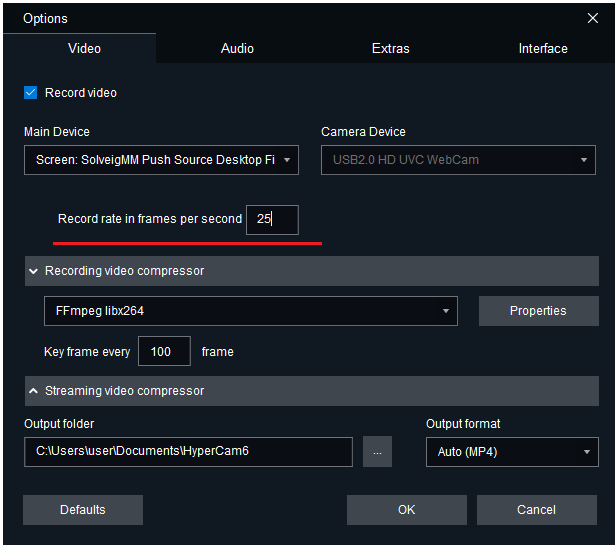
2) Click on the "Options" tab to open HyperCam settings.
3) You will see the "Video" tab of HyperCam where you can choose the certain settings.
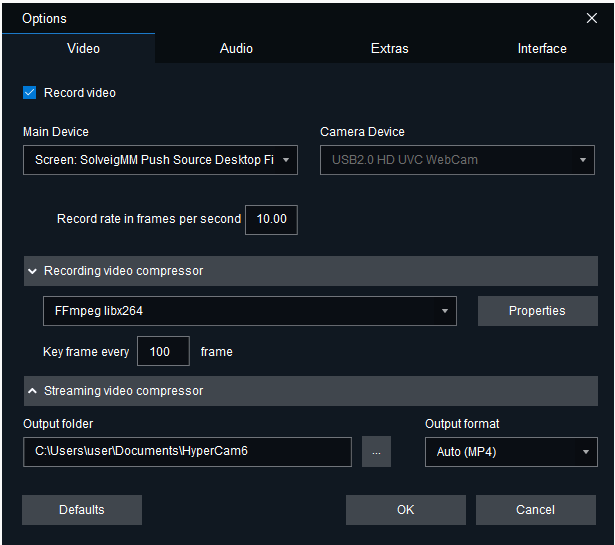
4) For the best video quality we recommend to make such settings:
- Choose the WMVideo9 Encoder DMO or Xvid as the Video Compressor
Note: To get the records of the minimum file size you can choose MSScreen 9 Encoder DMO as the video compressor. But in this case you will get the low-quality records.
The file size also depends on the bitrate value. To get the file of the less size try to decrease bitrate. But in this case you will get the records of the lower quality. The size of the chosen area also effects on the file size (width and height of the chosen window for record), the smaller dimensions of the chosen window, the smaller file size of the record you get.
- By clicking on the "Properies" button of the encoder you can select the encoding mode and its properties. We recommend to leave the default settings (constant bitrate with the default settings)
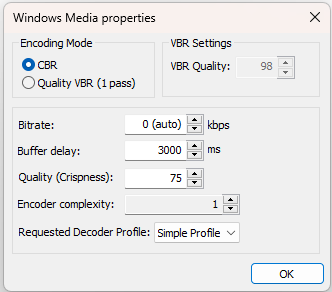
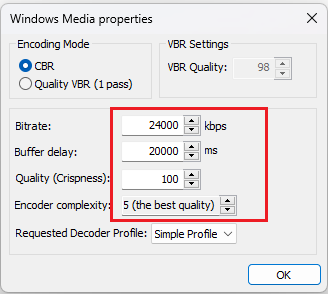
You can also try to make the quality of your record better by increasing the settings of the above window. They are "Bitrate", "Quality (Crispness)" and "Encoder complexity".
The higher value of Bitrate you choose, the higher quality records you get and of higher file size. So keep in mind that the higher bitrate settings case the large file size recordings.
"Quality (Crispness)" setting you can change to 100.
For "Encoder complexity" you can set "5". In this case the quality will be the best, but this setting effect on the computer efficiency, the higher value you choose the more efficiency your computer need. So if you have the average efficiency PC, leave the default setting ("1") as the high setting of the encoder complexity can cause the PC hanging while the recording. So the "5" value of this setting we recommend for powerful PCs.
- Enter to the "Rate in frames per second" area for the "Record" and "Playback" fields the value between 23.97 to 30 fps. The optimal is 25 fps.
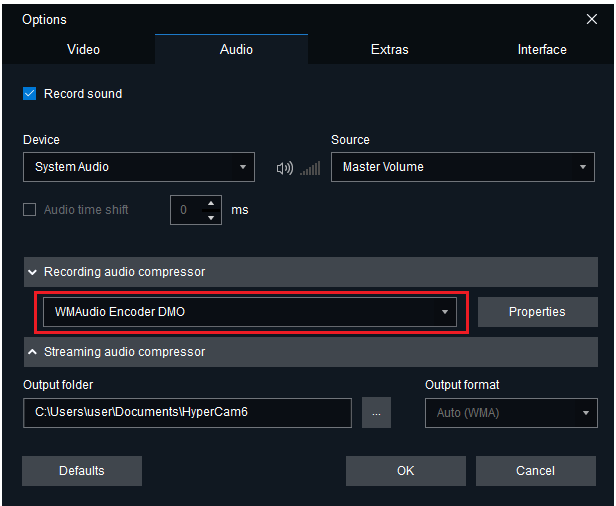
Make the following recommended audio settings:
5) Choose "WMAudio Encoder DMO" as the audio compressor.
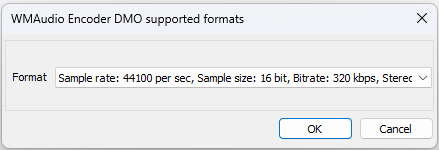
6) For the best audio quality we recommend to choose the maximum values of "Bitrate" and "Sample size" parameters.
Bitrate is the number of bits that are conveyed or processed per unit of time (1 second usulally). So if you will increase its value please keep in mind that the size of the output record can increase too. Bitrate is more more significant setting than the Sample size. So please set the maximum bitrate value to get the records of higher quality.
Sample size is the depth of sound, the number of data that is transmitted for each sample. The higher value of sample rate you set the higher quality records you get.
Please keep in mind that the higher values of "Bitrate" and "Sample size" you choose the file of higher size you get.
You can choose the "Bitrate" and "Sample size" parameters in the window that will be opened after you click on the "Properties" button.
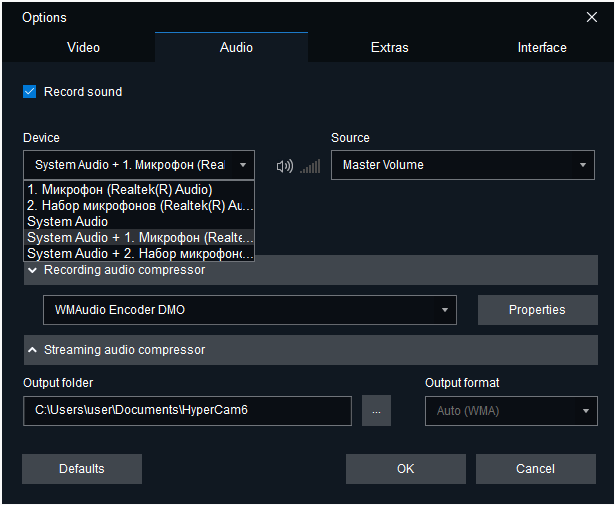
7) Choose devices you need for your record.
If you would like to record only the sound of your system (goes usually from speakers) please set "System audio" setting in the "Device" combobox.
If you would like to record the system sound and your annotations from the microphone, leave the default setting - "System audio + Microphone".
If you would like to record sound goes to microphone select in the combobox the appropriate setting - "Microphone".
7) Click OK button to save your settings and close the "Options" window.
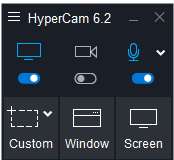
8) Choose the area for the recording (using Region, Window or Full Screen) buttons.
9) Click the "Record" button to start the record or the F2 hot key.
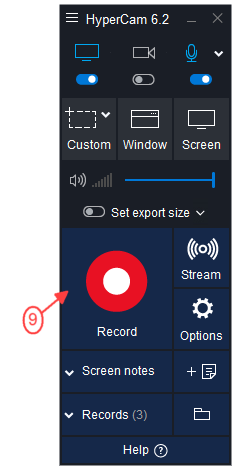
10) To stop the record click on the "Stop" button of the tray tool bar of HyperCam or F3 hot key.
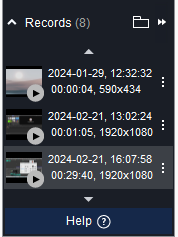
Your record will appear in the "Recent records" window of HyperCam. Now you can open it using "Browse" button or edit it in the HyperCam Media Editor using "Edit" button.
- https://www.solveigmm.com/en/howto/hypercam-3-tutorial/
- https://www.solveigmm.com/en/howto/how-to-record-a-skype-session-with-hypercam/
 Olga Krovyakova is the Technical Support Manager in Solveig Multimedia since 2010.
She is the author of many text and video guidelines of company's products: Video Splitter, HyperCam, WMP Trimmer Plugin, AVI Trimmer+ and TriMP4.
She works with programs every day and therefore knows very well how they work. Сontact Olga via support@solveigmm.com if you have any questions. She will gladly assist you!