 Esp
Esp  Eng
Eng  Rus
Rus  Deu
Deu  Ital
Ital  Port
Port  Jap
Jap  Chin
Chin Cómo editar un archivo WMV

By Olga Krovyakova - March, 27 2019
SolveigMM Video Splitter permite eliminar fragmentos innecesarios del archivo de vídeo sin pérdida de calidad de vídeo/audio. Esta guía explica cómo editar un archivo WMV.
PRUEBA el divisor de vídeo GRATIS

Understanding of some basic terms used in this guide will help you to start using SolveigMM Video Splitter in most comfortable way.
|
|
Marker is set to a current cursor position. |
|
|
The selected marker is highlighted with blue color. |
Markers can be added or deleted. Such operations as deleting and positioning are applied to the selected markers only.
Fragment is a part of video (or audio) file limited by two markers to be removed or kept in a final movie, e.g. commercial block you want to cut off. Fragments marked as 'cut off' are colored with brown-red color.
Examples of fragments are provided in table below:
| Color of Fragment | Description |
|---|---|
 |
This fragment was set to be deleted. It will not be presented in final movie |
 |
This fragment was set to be kept. It will be presented in final movie |
 |
This fragment was set to be deleted. It will not be presented in final movie. Yellow slider on it means you can edit it (delete, set it to be kept, etc.) |
 |
This fragment was set to be kept. It will be presented in final movie. Yellow slider in it means you can edit it (delete, set it to be cut off, etc.) |
Control Panel contains main tools for file processing.
| Window Element | Description | Shortcut Key |
|---|---|---|
|
|
Button "Add Marker": Adds a new marker to current slider cursor position. |
M
|
|
|
Button "Remove Marker(s)": Removes a current marker or fragment. |
Delete
|
|
|
Button "Invert": Inverts time line fragments. |
I
|
|
|
Button "Set audio silence": Sets the audio silence for the selected fragment. | |
|
|
Button "Save": Starts trimming or Batch Processing (if batch queue has any task). |
Ctrl+T
|
|
|
Edit box of a left marker cursor time position. You can edit this value by manually. | |
|
|
Edit box of a right marker cursor time position. You can edit this value by manually. | |
|
|
Button "Zoom In/Out": Increases/descreases a slider timeline resolution for more comfortable editing neighbor markers (*). |
Num+ Num- |
|
|
Button "Browse output file(s)": opens folder in the File Explorer with the output file. | |
|
|
Audio off/on: turns off/on sound of the whole video track Story board or audio wave off/on: turns off/on the story board or audio wave
|
|
|
(*) - To view timeline areas after Zoom In you can use a scroll bar (below a timeline slider) and "Alt + Left arrow" and "Alt + Right Arrow" hot keys. |
||
In our example we will edit initial WMV file by cutting off two fragments with frame accuracy in one pass. In our final movie only the video stream will present, the audio stream will be disabled .
En nuestro ejemplo, editaremos el archivo WMV inicial cortando dos fragmentos con precisión de fotograma en una sola pasada. En nuestra película final solo se presentará la transmisión de video, la transmisión de audio estará deshabilitada .
1. Seleccione el comando Abrir archivo multimedia... en el menú Archivo .
2. Seleccione el archivo que desea editar.
3. Haga clic en el botón para abrir el archivo seleccionado. Si el archivo seleccionado no tiene índices, aparece la ventana de diálogo que se muestra en Figura 2.1 .
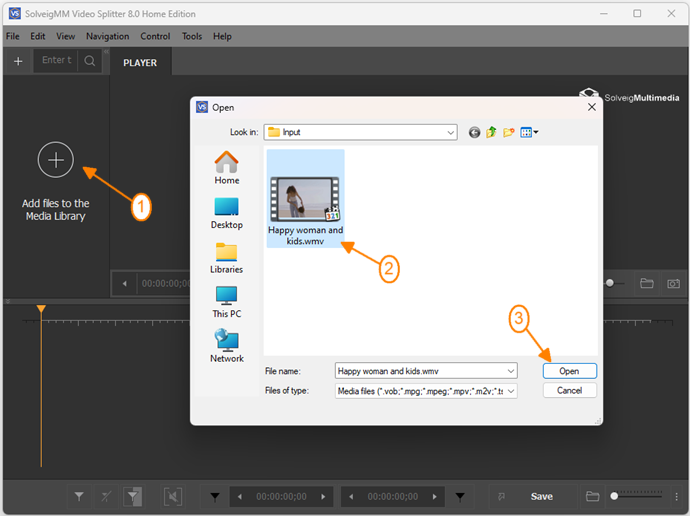
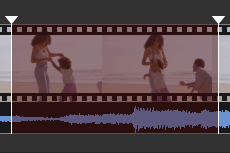
Figura 1
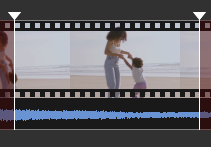
4. Move the file from the Media library to the timeline.
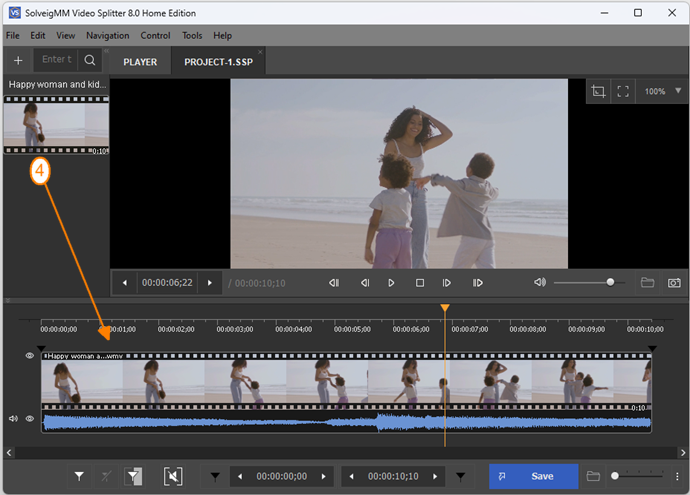
Figure 2
4. Desmarque la casilla de verificación Audio en el menú Control para desactivar la transmisión de audio en la película final.
5. Haga clic en el botón Acercar para aumentar la resolución de la línea de tiempo del control deslizante. Esto permitirá editar marcadores vecinos de forma más cómoda. Aparece la barra de desplazamiento debajo de la línea de tiempo.
6. Encuentre el comienzo de la primera parte de su película usando el control deslizante Vídeo .
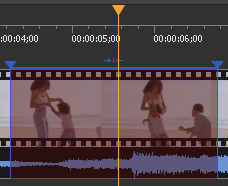
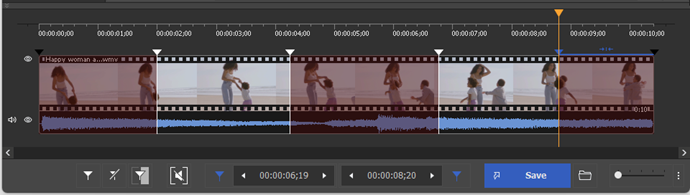
7. Haga clic en el botón Agregar marcador . También puede agregar el marcador seleccionando el comando Establecer nuevo marcador del menú contextual o usando la tecla [M] . Luego agrega el marcador al final del fragmento. Los marcadores dividen la película en varios fragmentos (consulte Términos básicos). En nuestro ejemplo dividimos nuestra película en cuatro fragmentos agregando marcadores en los lugares requeridos.
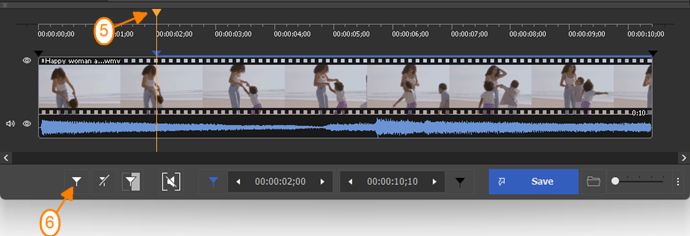
Figura 3
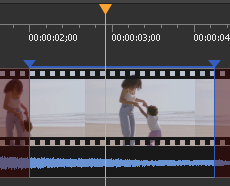
8. Seleccione el fragmento que desea cortar de la película haciendo clic con el botón izquierdo del mouse.
9. Abra el menú contextual haciendo clic con el botón derecho del mouse y seleccione el comando Cortar fragmento seleccionado . El fragmento seleccionado se marcará con color blanco (consulte Términos básicos).
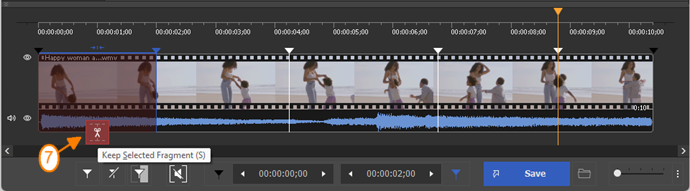
Figura 4
10. Seleccione otros fragmentos que desee cortar de la película. En nuestro ejemplo marcamos el segundo fragmento como "cortado" como se describe en 9.
11. Seleccione el comando Herramientas->Administrador de lotes->Agregar tarea a la cola de lotes o presione la tecla [A] para agregar la tarea a la cola de lotes.
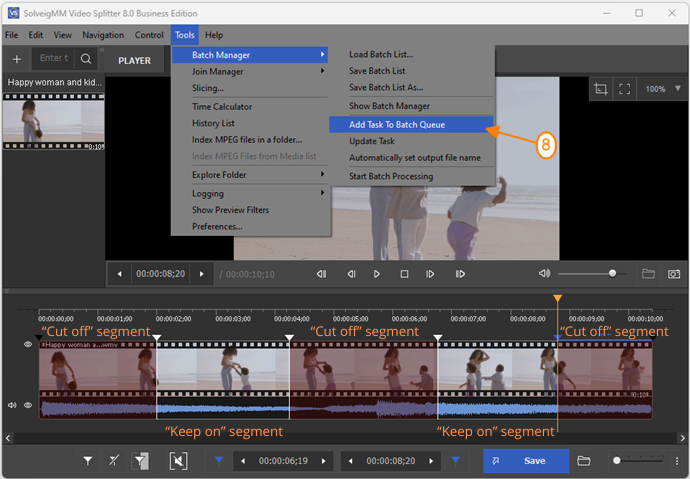
Figura 5
12. Ingrese el nuevo nombre del archivo en la ventana Guardar como queaparece.
13. Haga clic en el botón Guardar . Verá el progreso actual de la división. Puede agregar varias tareas a la cola por lotes.
14. Seleccione el comando Herramientas->Administrador de lotes->Mostrar Administrador de lotes para abrir Administrador de lotes. En la ventana que aparece (Figura 7) puede ver la lista de tareas agregadas.
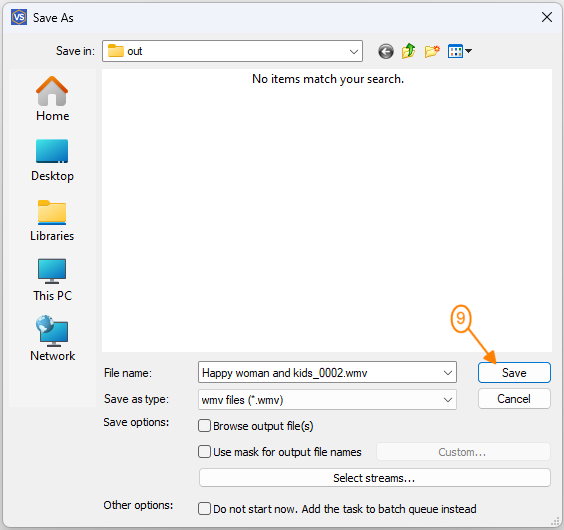
Figura 6
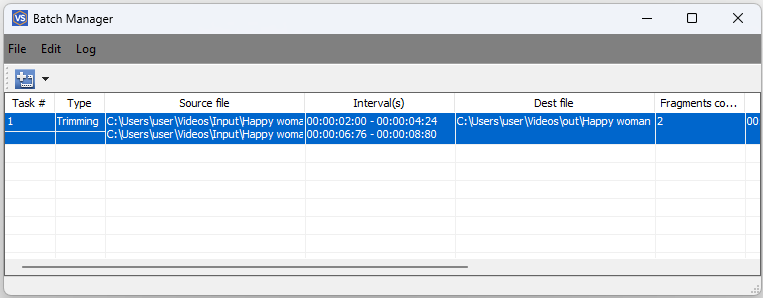
Figura 7
15. Abra el menú contextual en la ventana Administrador de lotes haciendo clic con el botón derecho del mouse.
16. Luego seleccione el comando Iniciar procesamiento por lotes en el menú contextual (Figura 8) para iniciar la realización de las tareas.
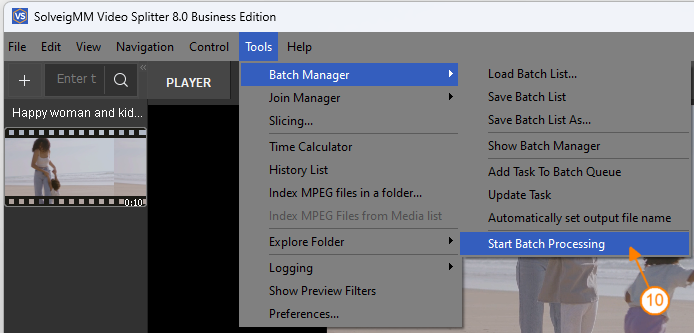
Figura 8
Aparece la ventana que contiene información sobre el proceso de división (Figura 9.1). Cuando finaliza el proceso de recorte, aparece la ventana que se muestra en
Se abre la Figura 9.2 .
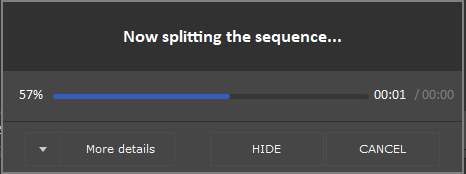
Figura 9.1
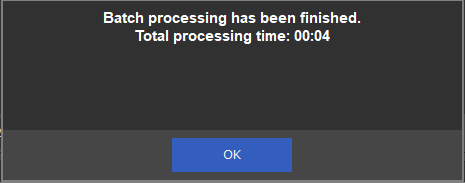
Figura 9.2
Se deben realizar todas las tareas de la lista. En nuestra lista teníamos tres tareas, por lo que al final del procedimiento tenemos tres archivos editados. Uno de ellos consta de dos fragmentos. Se eliminaron de la película dos fragmentos seleccionados como "cortados.
PRUEBA el divisor de vídeo GRATIS
- https://www.solveigmm.com/en/support/howto/how-to-register-solveigmm-video-splitter/
- https://www.solveigmm.com/en/support/howto/how-to-make-ringtone-for-cellphone-with-wmp-trimmer-plugin/
- https://www.solveigmm.com/en/support/howto/how-to-edit-your-video-and-audio-within-windows-media-player/
 Olga Krovyakova is the Technical Support Manager in Solveig Multimedia since 2010.
She is the author of many text and video guidelines of company's products: Video Splitter, HyperCam, WMP Trimmer Plugin, AVI Trimmer+ and TriMP4.
She works with programs every day and therefore knows very well how they work. Сontact Olga via support@solveigmm.com if you have any questions. She will gladly assist you!