![]()
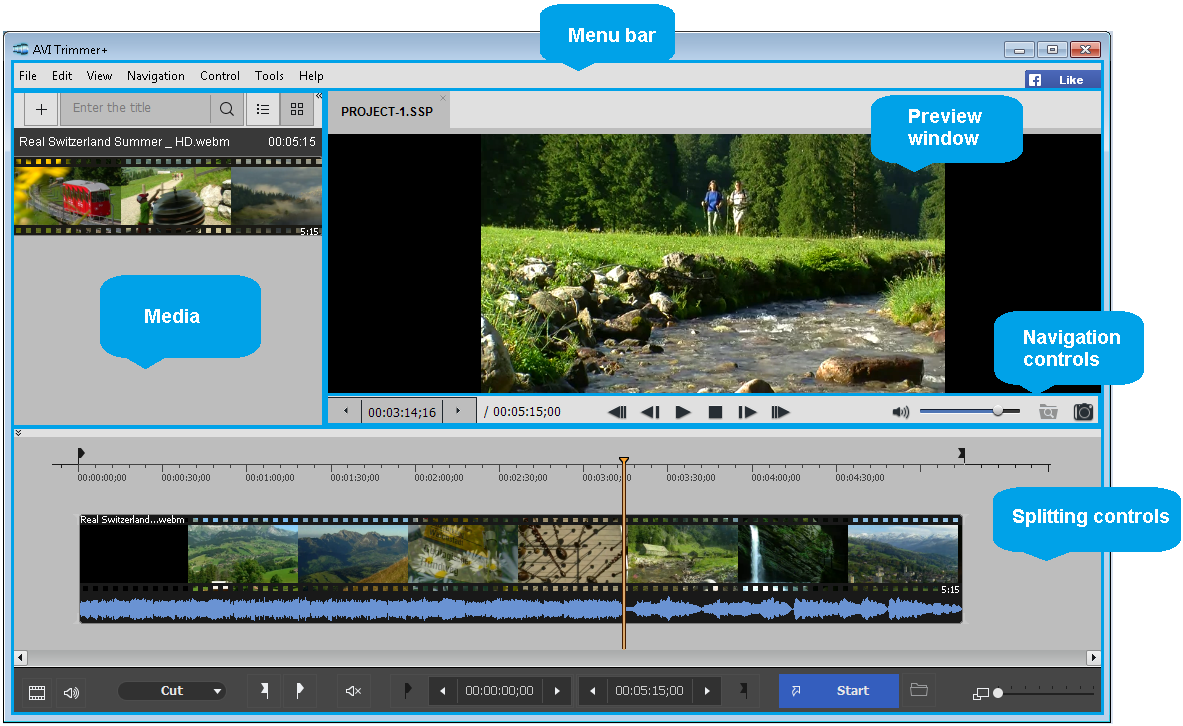
AVI Trimmer+ interface
The AVI Trimmer+ user interface consist of five main parts: Menu bar, Media, Navigation controls, Splitting controls and Preview window.
AVI Trimmer+ main window is depicted below:
In this section:
- Menu bar
- Stream selection window
- Navigation controls
- Splitting controls
- Preview window
- Media panel
- Progress window
- Splitter in system tray
- Filters info window
- Batch manager
- Join manager
- Slicing window
- Preferences window
Menu bar
You can use commands in the menu bar to perform tasks in AVI Trimmer+. These commands are described in this document.


| Menu item | Description | Shortcut key |
| Add Media Files... | Select a supported media file to be opened and edited | Ctrl + O |
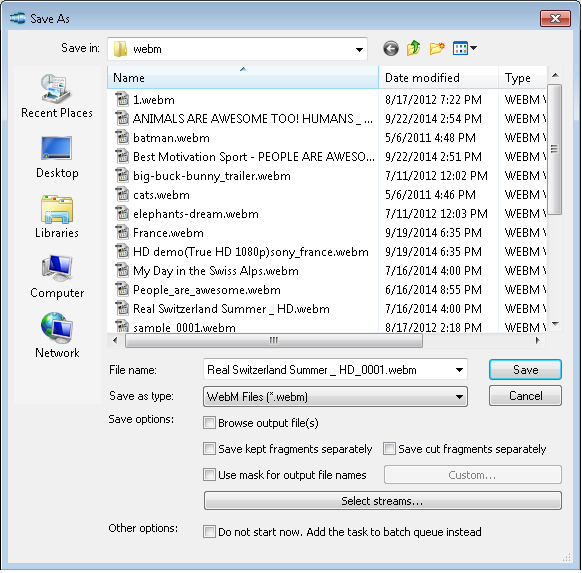
| Save Media File As... | Specify the output file name and immediately save it (start the trimming process) | |
| Save Selected Fragment As... | Specify the output file name and immediately save it (start the trimming process) | |
| Save All Fragments As... | Specify the output file name and immediately save all fragments (start the trimming process) | |
| Close | Close the input and output files | Ctrl + W |
| Load project... | Open a Video Splitter project file | |
| Save project | Save the project file (*) | Ctrl + S |
| Save project As... | Save the project file to the specified folder (*) | F12 |
| Load Batch List... | Load a task list to the Batch Manager (*) | |
| Save Batch List | Save the batch list (*) | |
| Save Batch List As... | Save the batch list to the specified folder (*) | |
| Load Join List... | Load a join list to the Join Manager (*) | |
| Save Join List | Save the join list (*) | |
| Save Join List As... | Save the join list to the specified folder (*) | |
| Recent Files... | Open recently edited files | |
| Import EDL... | Load a project in EDL format (*) | |
| Exit | Close the program |
(*) - The feature is supported only in the paid product SolveigMM Video Splitter
File menu -> Recent Files
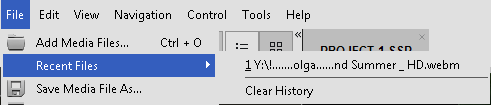
| Menu item | Description |
| Clear History | Allows to clear history of recent files |
| Menu item | Description | Shortcut key |
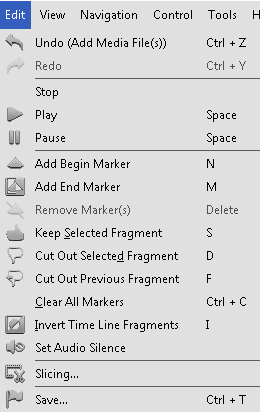
| Undo (Marker Move) | Undo the action | Ctrl + Z |
| Redo | Redo the action | Ctrl + Y |
| Stop | Stop playback | |
| Play | Start playback | Space |
| Pause | Pause playback | Space |
| Add Begin Marker | Add a new end marker (*) | M |
| Add End Marker | Add a new begin marker (*) | M |
| Remove Marker(s) | Remove the selected marker or markers (*) | Delete |
| Keep Selected Fragment | Keep the selected fragment (*) | S |
| Cut Out Selected Fragment | Cut the selected fragment (*) | D |
| Cut Out Previous Fragment | Cut the previous fragment (*) | D |
| Clear All Markers | Remove all markers | Ctrl + C |
| Invert Time Line Fragment | Invert all timeline fragments on the slider (*) | I |
| Calculate Destination File Size | Calculate destination file size (available for AVI, MP3) | Ctrl + F |
| Save... | Start the trimming process (*) |
Ctrl + T |
| Slicing... | Opens slicing window | |
| Set audio silence | Allows to mute sound of the selected fragment |
(*) - These operations are available from the menu and from the context menu. For details, see Navigation controls, Splitting controls
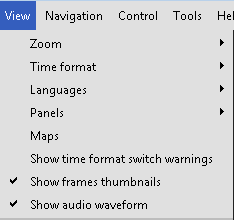
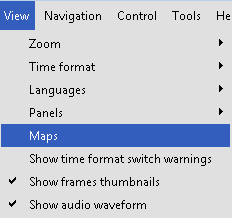
| Menu item | Description | Shortcut key |
| Time format | Opens the submenu | - |
| Show frames thumbnails | Allows to show or hide frames thumbnails | - |
| Show time format switch warnings | Allows to turn of or turn on format switch warnings | - |
| Zoom | Opens the submenu | - |
| Languages | Opens the submenu language of interface selecting | - |
| Panels | Opens the submenu | - |
| Maps | Opens the submenu | - |
| Show audio waveform | Allows to show or hide audio waveform | - |
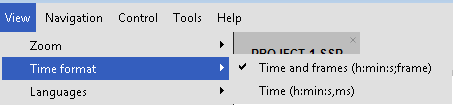
| Menu item | Description | Shortcut key |
| Times and frames | Allows to show timeline in HH:MM:SS;frames format | - |
| Time | Allows to show timeline in HH:MM:SS;ms format | - |
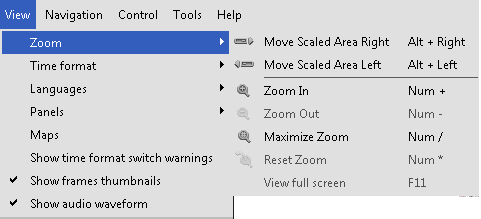
| Menu item | Description | Shortcut key |
| Move Scaled Area Right | Move the zooming scrollbar right | Alt + Right Arrow |
| Move Scaled Area Left | Move the zooming scrollbar left | Alt + Right Arrow |
| Zoom In | Zoom in the timeline slider | NumPad + |
| Zoom Out | Zoom out the timeline slider | NumPad - |
| Maximize Zoom | Set the max scale rate | NumPad / |
| Reset Zoom | Reset the scale rate to 1 (initial scale) | NumPad * |
| View full screen | Allow to view full screen |
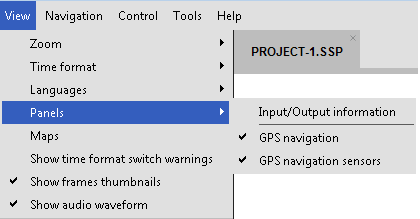
| Menu item | Description |
| Input/Output information | Shows information about input and output files |
| GPS navigation | Shows GPS information if file contains such |
| GPS navigation sensors | Shows GPS navigation sensors: speedometer, compass and accelerometer (if file contains such information) |
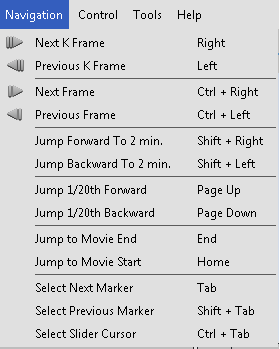
| Menu item | Description | Shortcut key |
| Next K Frame | Go to the next K Frame | Right Arrow |
| Previous K Frame | Go to the previous K Frame | Left Arrow |
| Next Frame | Go to the next Frame | Ctrl + Right Arrow |
| Previous Frame | Go to the previous Frame | Ctrl + Left Arrow |
| Jump 2 min Forward | Jump 2 minutes forward | Shift + Right Arrow |
| Jump 2 min Backward | Jump 2 minutes backward | Shift + Left Arrow |
| Jump 1/20th Forward | Jump 1/20th of movie length forward | Page Up |
| Jump 1/20th Backward | Jump 1/20th of the movie length backward | Page Down |
| Jump to Movie End | Jump to the movie end | Home |
| Jump to Movie Start | Jump to the movie start | End |
| Select Next Marker | Select the next marker | Tab |
| Select Previous Marker | Select the previous marker | Shift + Tab |
| Select Slider Cursor | Select the slider cursor | Ctrl + Tab |
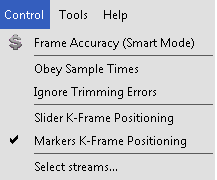
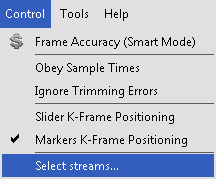
| Menu item | Description |
| Frame Accuracy (Smart Mode) |
Enable the frame accurate trimming mode. (*) |
| Obey samples times |
Use an alternative synchronization algorithm. By default, it is disabled. If the resulting file is out of sync after repeated trimming selecting this option should improve audio/vido synchronization. |
| Select streams... |
Select audio and/or video streams to be rendered into the final movie. For details, see Using AVI Trimmer+. |
| Ignore Trimming Errors | Ignore trimming errors. Note: It is reccommended to keep it disabled by default. |
| Slider K-Frame Positioning | If this option is enabled, the cursor jumps to the nearest previous K Frame after you position the slider. This mode implements the What You See Is What You Get feature. If this option is disabled, you can navigate through all movie frames. |
| Markers K-Frame Positioning | If this option is enabled, the marker jumps to the nearest previous K Frame after you position it. This mode implements the What You See Is What You Get feature. If this option is disabled, you can set the marker at any movie frame. Note: If the start marker of a fragment is disabled, the fragment in the final movies will be started with the K Frame anyway. Note: If the end marker of a fragment is disabled, the fragment in the final movies will end with the frame at the marker position. |
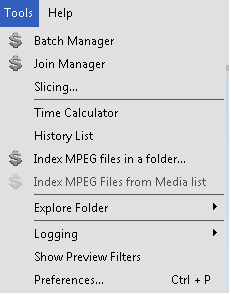
| Menu item | Description |
| Batch Manager | Open the sumbenu of the Batch Manager item (*) |
| Join Manager | Open the Join Manager window (*) |
| Time Calculator | Show the time calculator |
| History List | Open the history list of actions |
| Index MPEG files in folder... |
Create index for MPEG files in the selected folder (*) |
| Index MPEG File | Create index for the MPEG2 video file (*) |
| Explore Folder | Open Windows Exporer in the folder with the Input or Output media files |
| Logging | Open menu for actions with log files |
| Show Preview filters | Show the list of filters used for preview |
| Preferences... |
Open preferences window |
| Slicing... | Open slicing window |
(*) - The feature is supported only in the paid product Video Splitter. Batch Manager available in the Business Edition version only.
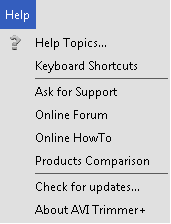
| Menu item | Description | Shortcut key |
| Help topics... | Open the help file | F1 |
| Keyboard ShortCuts | Shows the Keyboard Shortcuts section in the help file | |
| Ask for Support | Open Solveig Mltimedia support section of the website | |
| Online Forum | Open the Solveig Multimedia forum Open comparison table of SolveigMM products |
|
| Online HowTo | Open HowTo section of the website | |
| Product Comparison | Check if the latest AVI Trimmer + version is installed | |
| Check for updates | Check if the latest AVI Trimmer + version is installed | |
| About AVI Trimmer + | Open the About dialog box |
Stream selection window
Stream selection window allows stream selecting for preview and editing. This window appears automatically after opening of file with multiple video or audio tracks. You can also open this window from Control -> Select streams... menu or from "Select streams..." button of the dialog window opens after selecting the trimming operation.
Stream selection window has the following view.
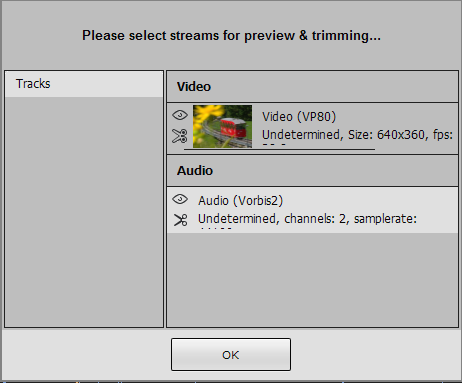
To preview the desired video or audio stream in Video Splitter please
click the icon with an eye ( ) near this
stream.
) near this
stream.
To save the stream in the resulted output video file please click the
icon with scissors ( ) near this
stream.
) near this
stream.
| Item of Window | Description | Shortcut key |
|
The stream is selected for preview | - |
|
The stream is selected for editing. It will be saved in the output file. | - |
 |
The stream is not selected for preview | - |
 |
The stream is not selected for editing. It will not be saved in the output file. | - |
Navigation controls
Navigation controls are designed for navigation through an open source media file. Using these controls, you can start and stop playback, pause it or search for the necessary position forward and backward. Also, the current position and total duration are displayed.

| Window item | Description | Shortcut key |
 |
Previous K Frame | Left arrow |
 |
Next K Frame | Right arrow |
 |
Play | Space |
 |
Pause | Space |
 |
Previous Frame | Ctrl+ Left arrow |
 |
Next Frame | Ctrl+ Right arrow |
 |
Slider cursor time position. You can edit this value manually | |
 |
Total file length |
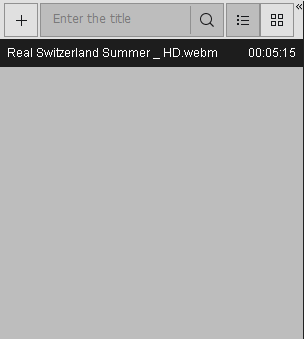
Media panel
Media panel allows adding the multiple files of the same format. Simply
drag-and-drop file to the "Media" panel or click it anywhere to open the
dialog and add files. You could also click the
( ) button to open the new media file.
We would like to draw your attention to the fact that files should be of the same file format and video/audio parameters to be added to the media list.
Files could be dragged to the multi-timeline for editing.
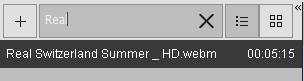
For your convenience there are two possible views of files in the list.
By default the "Extended view" ( ) is
used.
) is
used.
There is also possibility to set "Simple" view ( ) as shown below.
If you have numerous files in the list, you can search appropriate by using special serch string.
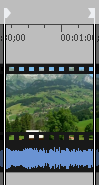
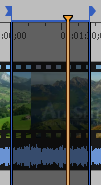
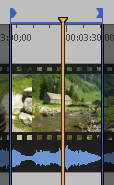
Splitting controls
Splitting controls are the heart of AVI Trimmer+. Using this controls, you can manage the fragments that will or will not be saved in the final movie. You can set fragments to be cut or kept, invert or completely delete fragments from your movie. Finally, the main button that starts the splitting process is located on this panel.

| Window Item | Description | Shortcut key |
 |
Add Begin Marker: Add a new marker to the current slider cursor position. | N |
 |
Add End Marker: Add end marker to the current slider cursor position. | M |
 |
Set audio silence: allows to set audio silence for the chosen fragment | |
 |
Start: Start trimming | Ctrl + T |
 |
Cursor time position. You can edit this value manually | |
 |
Zoom In/Out: Increase/decrease the slider timeline resolution to make editing neighbouring markers more comfortable | NumPad + |
 |
Story board Off/On: turn on/off the story board | |
 |
Audio waveform On/Off: turn off/on the audio waveform | |
 |
Get screenshot: allows to make the screenshot of the chosen video frame | |
 |
Browse screenshot: allows to open folder with the created screenshot |
Context menu of splitting controls consists of the following commands:
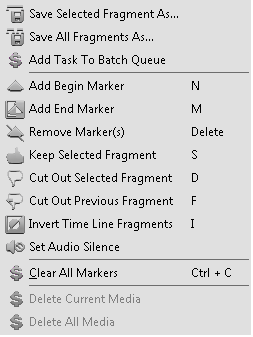
| Menu Item | Menu Description | Shortcut key |
| Save Selected Fragment As... | Allows to save selected fragment |
Page Down |
| Save All Fragments As... | Allows to save all marked fragments | Del |
| Slicing | Opens Slicing window | Page Down |
| Add Task to Barch Queue (*) | Allows to add Task to Batch Queue (*) | A |
| Add Begin Marker |
Add a new begin marker to the current slider cursor position. | N |
| Add End Marker |
Add a new end marker to the current slider cursor position. | M |
| Remove markers |
Remove all markers from the timeline | Delete |
| Keep Selected Fragment |
Allow to keep selected fragment. | S |
| Cut out selected fragment |
Allow to cut out selected fragment | D |
| Cut out previous fragment |
Allows to cut out previous fragment | F |
| Invert Time Line Fragments |
Allows to invert timeline fragments. | I |
| Set audio silence |
Allows to set audio silence on the selected fragment | |
| Clear All Markers |
Allows to delete all markers from the timeline | Ctrl + C |
| Delete Current Media |
Allows to delete current media file from the timeline (*) | |
| Delete All Media |
Allows to delete all media files from the timeline (*) |
(*) - The feature is supported only in the paid product SolveigMM Video Splitter Business Edition
Sample fragments:
| Fragment color | Description |
 |
This fragment is set to be deleted. It will not be present in the final movie |
 |
This fragment is set to be kept. It will be present in the final movie |
 |
This fragment is set to be deleted. It will not be present in the final movie. The blue color means you can edit it (delete, set it to be kept, etc.) |
 |
This fragment is set to be kept. It will be present in the final movie The blue color means you can edit it (delete, set it to be cut, etc. ) |
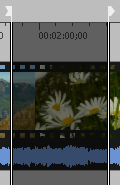
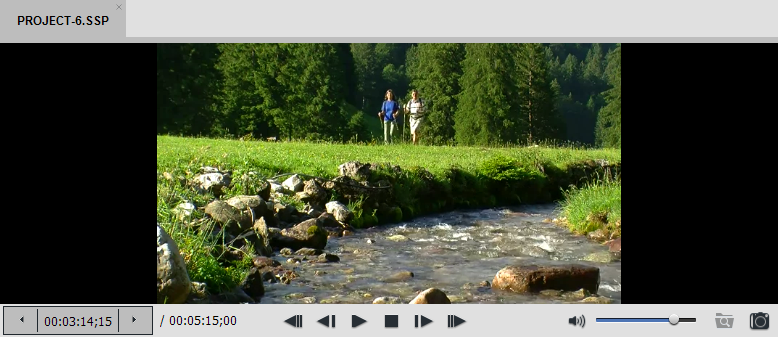
Preview window
The preview window is designed for easy navigation through media files and helps you put splitting markers as precisely as possible.
Progress window
The progress window indicates the current progress in percentage terms. You can cancel splitting by clicking the Cancel button or hide Splitter to the system tray by clicking the Hide button.
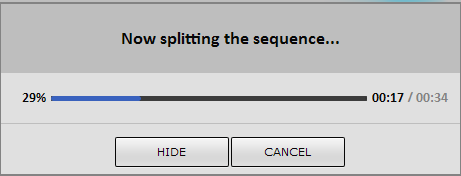
The Hide button hides AVI
Trimmer+ to the system tray.
When trimming is complete, the Splitter window appears.
See also AVI Trimmer+ in system tray
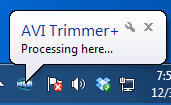
AVI Trimmer+ in system tray
When you click the Hide button, AVI Trimmer + is hiden to the system tray.
The following context menu is available when AVI Trimmer+ is in the system tray:
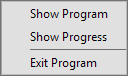
| Menu item | Description |
| Show Program | Restore AVI Trimmer + from the system tray |
| Show Progress | Show the current progress |
| Exit Program | Cancel the trim process and exit |
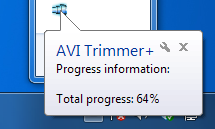
The following progress information will be shown if you click the "Show progress" field of tray context menu:
One trimming task:
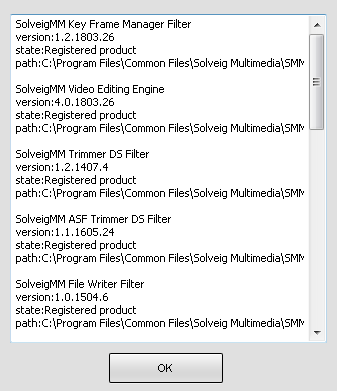
Filters info window
This window contains all the components necessary for AVI Trimmer+ to work properly.
- Click the icon of in the upper left corner of the window (You can use the Alt + Space shortcut)
- Click Info...
Batch manager window
Note: The Batch Manager available only in the paid product Video Splitter Business Edition.
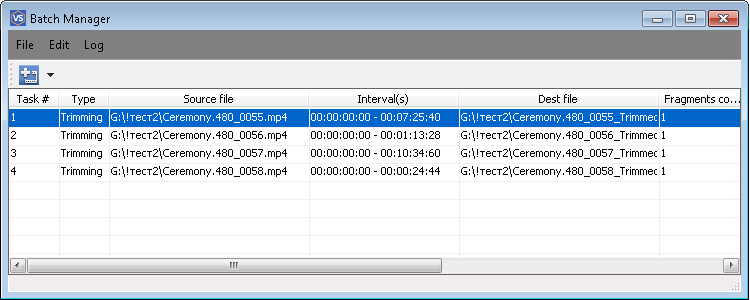
The Batch Manager window is used to edit the batch queue.
Menu description:
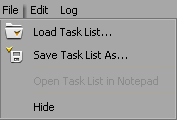
| Menu item | Description | Shortcut key |
| Load Task List... | Load a saved batch queue from a file (*) | Ctrl + O |
| Save Task List As... | Save the batch queue to a file | Ctrl + S |
| Open Task List in Notepad | Open the batch queue in Notepad (*) | |
| Hide | Close this window |
(*) - See Task List syntax in Batch file format
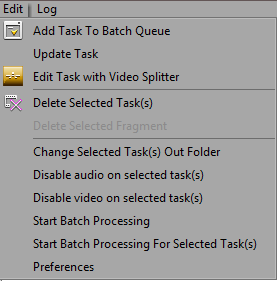
| Menu Item | Description | Shortcut key |
| Add Task To Batch Queue | Add the current AVI Trimmer + task to the batch queue | A |
| Update task | Update the task in the batch queue according to the changes made in AVI Trimmer + | U |
| Edit Task with AVI Trimmer + | Edit the selected task in the AVI Trimmer + main window | Enter |
| Delete Selected Task(s) | Delete the selected task(s) | Delete |
| Delete Selected Fragment | Delete the selected fragment(s) | Delete |
| Change Selected Task(s) Out Folder | Change the output folder for all selected files. The program will not change the output filenames | |
| Disable audio on the selected task(s) |
Allows to disable audio content of the selected tasks | Delete |
| Disable video on the selected task(s) | Allows to disable video content of the selected tasks | |
| Start Batch Processing | Start batch processing | Ctrl + T |
| Start Batch Processing For Selected Task(s) | Start batch processing for the selected tasks | Shift + T |
| Preferences | Open preferences window | Ctrl + T |
| Menu Item | Description |
| Show log | Show or hide the log window |
| Write log file... | Specify the filename all the messages will be written to during the batch manager operation |
| Save log as... | Save all log messages to a file |
| Clear log | Erase all messages |

The list enumerates all tasks in the batch queue:
Column description:
| Menu Item | Description |
| Task # | Task number |
| Source file | Source filename |
| Dest file | Destination filename |
| Fragments count | Number of fragments to be cut |
| Full time | Total final file length |
| Audio stream | Audio stream number (*) |
| Video stream | Video stream number (*) |
| Obey samples times | Use an alternative synchronization algorithm. By default, it is disabled. If the final file is out of sync after repeated trimming, enabling this option should improve audio/video synchronization. (*) |
(*) - These fields can be edited in the batch manager window. Just click the cell with the left mouse button two times (not a double-click) or click the mouse wheel. You can select the necessary item from the drop-down list depicted below.
Changing settings in the task list window
Context menu description:
| Menu item | Description | Shortcut key |
| Save Task List As... | Save the batch queue to a task list file. | Ctrl + S |
| Load Task List... | Load a batch queue from a task list file See Task List syntax in Batch file format |
Ctrl + O |
| Start Batch Processing | Start batch processing | Ctrl + T |
| Start Batch Processing For Selected Task(s) | Start batch processing for selected task(s) | Ctrl + T |
| Delete Selected Task(s) | Delete the selected task(s) | Delete |
| Edit Task with AVI Trimmer + | Edit the selected task in the main window | Enter |
| Select All | Select all tasks | Ctrl + A |
| Change Selected Task(s) Out Folder | Change the output folder for all selected files. The program will not change the output filenames | |
| Disable audio on selected task(s) | Allows to disable audio content of the selected tasks | Ctrl + A |
| Disable video on selected task(s) | Allows to disable video content of the selected tasks | |
| Change Source File Name... Change Dest File Name... |
Change the source or destination filenames. This item is available in the Source File and Dest File columns only. | |
| Copy Source File Name Copy Dest File Name |
Copy the source or destination filename to the clipboard. This item is available for the Source File and Dest file columns only. |
All the fragments to be cut out from the selected task are enumerated here.
Fragment list context menu

| Menu item | Description | Shortcut key |
| Delete Selected Fragment | Delete the selected fragment | Delete |
| Show the Fragment in AVI Trimmer+ | Show and select the fragment in the AVI Trimmer+ main window | Enter |
Join manager window
Note: The Join Manager available only in the paid product SolveigMM Video Splitter.
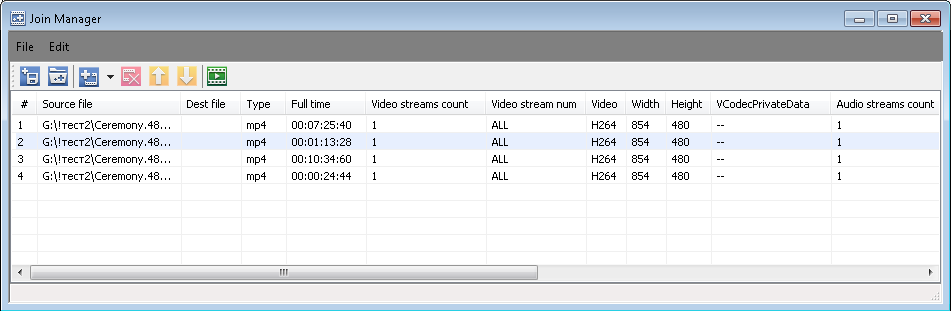
Join manager is used to join file with equal parameters like width/height of the frame, video/audio compression etc. Currently supported formats are listed here. The list enumerates all files to be joined together. Only the whole files can be joined for now.
Columns description:
| Menu Item | Description |
| # | File order |
| Source file | Source file name |
| Full time | Full time of current file to be appended to resulting file |
| Start time | Start time of the current fragment of the current file(*) |
| End time | End time of the current fragment of the current file(*) |
| Audio | Audio encoding |
| Samples/sec | Audio sampling frequency |
| Mode | Audio mode |
| Bitrate | Audio bitrate |
| Video | Video compression |
| Width | Video frame width |
| Height | Video frame height |
| Type | the file type |
(*) - only full files can be joined so start time is the beginning of the file and end time is the duration of the file.
Menu description:
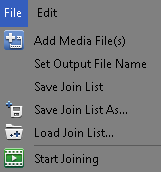
| Menu item | Description | Shortcut key |
| Add Media File(s) | Add files into the list(*) | Ins |
| Save Join List | Save current joining task into the file | |
| Load Join List | Load current task from the file | |
| Start Joining | Start the joining progress for the current task | |
| Set Output File Name | Allows to set output file name |
(*) - if you try to add files with different parameters you will be prompted with the appropriate message in the satus bar of the "Join manager".
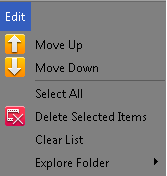
| Menu Item | Description | Shortcut key |
| Move Up | Move selected file up in the list | Page Up |
| Move Down | Move selected file down in the list | Page Down |
| Delete Selected Items | Delete all selected items from the list | Del |
| Clear List | Delete all items from the list | |
| Explore folder | Opens folder of input or output file |
Conext menu:
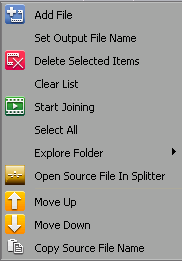
The context menu commands duplicate menu commands for convenience, and it's "Add" and "Move" commands are applied to chosen file in the list ( the highlighted one ). Others are applied to the list in general.
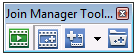
The toolbar also duplicate some commands that allow you to perform joining not opening the main Join Manager window.
| Toolbar Item(left to right) | Description |
| Start Joining | Starts current joining task |
| Show / Hide | Shows / Hides the Join manager main window |
| Add File(s) | Adds files into the list |
| Load List | Loads joining task from file |
Slicing window
Slicing window allows to fulfill splitting of the file into parts. Fragements length can be specified by duration, by size or by number of equal parts.
To open the slicing window, open the file you would like to edit, then select "Slicing..." in the "Edit" menu or "Slicing..." in the Tools menu.
The slicing window is depicted on the screenshot below:
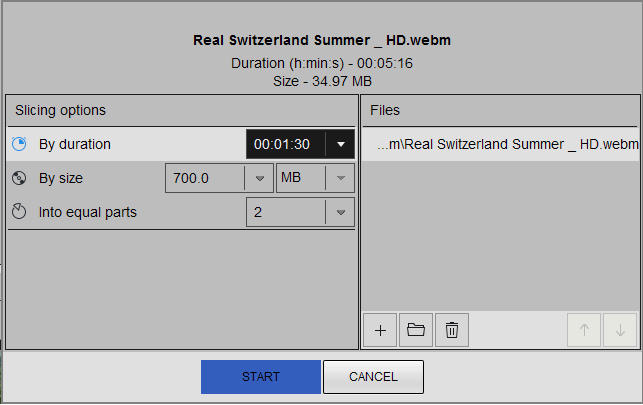
To start slicing, select the type of spliting: by duration, by size,
into equal parts. Enter the value for the selected type of slicing.
It is possible to choose slicing of the selected fragments of current
project (in this case enable "Split
current project") or splitting of the whole file (in this case
enable "Split whole file").
This window also displays the duration and the size of the file or
current project.
Click "Start" to begin the slicing.
Preferences window
"Hot Keys Settings" tab

AVI Trimmer+ allows to choose the defined settings of your desired hot key profile.
Simply enter your hot key for the chosen operation (right column), click Yes in the appeared information window and then enter the desired name for the new profile, then click on the OK button. The new profile will appear in the Current Profile combobox.
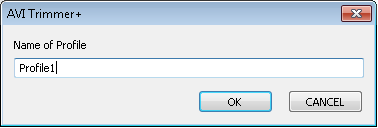
You can remove your profile by selecting the needed one in the "Current profile" combobox and clicking on the Remove button.
"Playback Settings" tab
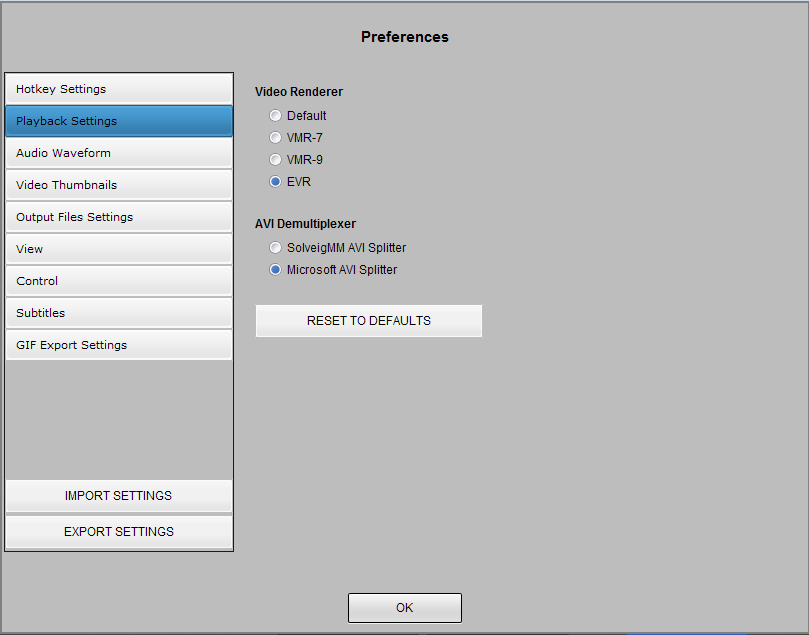
This tab allows to select video renderer.
If the default video renderer is not worked, then it is possible to
select another video renderer.
EVR video renderer is recommended for users of Windows 7 if fps of video
is more then 30.
"Audio Waveform" tab
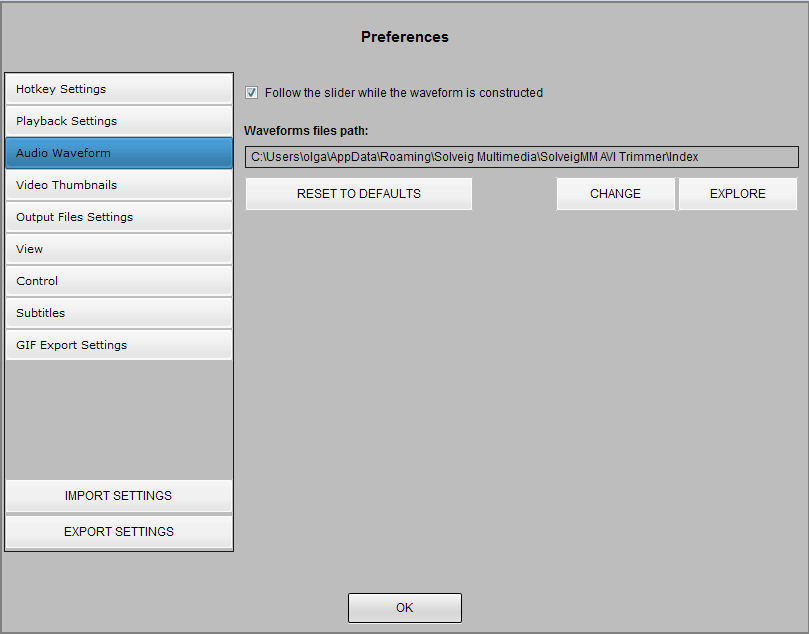
"Waveforms files path" setting defines waveform data cache path, that is used by Media Editor.
"Follow the slider while the waveform is constructed" defines the way of waveform building. When the option is enabled the waveform will be built from the selected by the user slider position. Tick this checkbox if you would like the waveform building follow the slider movements.
If you would like you can change the file path for this file to keep free space on the system drive.
"Video Thumbnails" tab
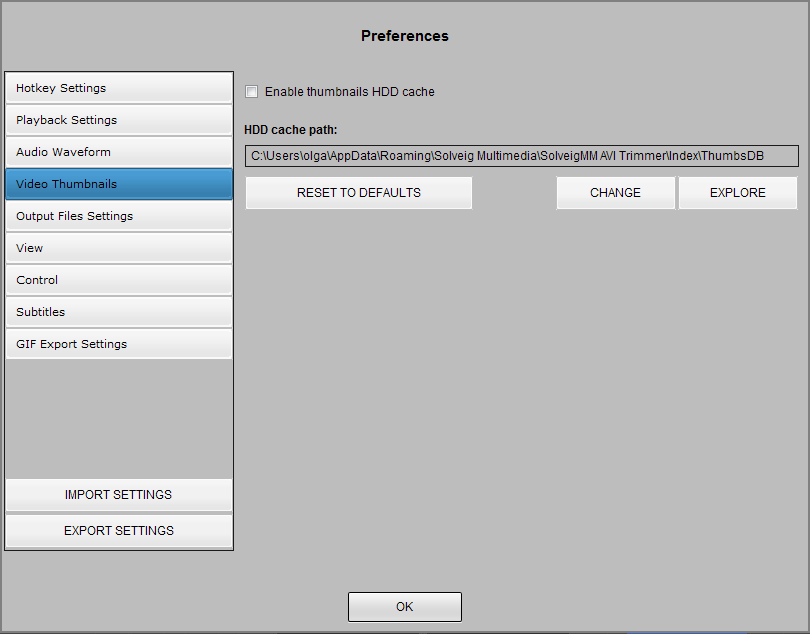
Enable thumbnails HDD cache enables storing thumbnails on your HDD.
HDD cache path setting defines waveform data cache path, that is used by Video Splitter.
"Output Files Settings" tab
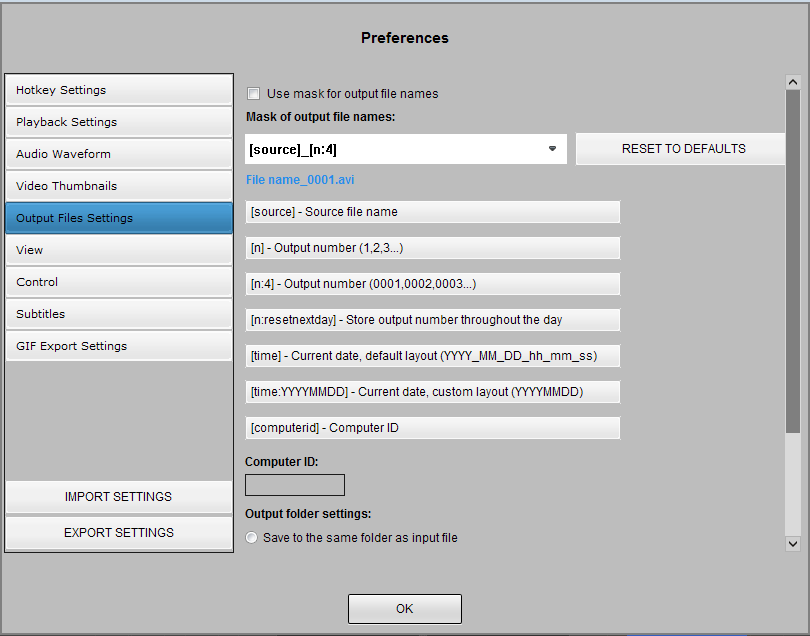
Output files settings tab allows to set mask of the output file and
select output folder settings. The files mask is intended to generate the names of the output files, using build-in macroses.
The mask is the template that consist of macros. It is possible to add predefined macros using special buttons under the "Mask of output file names" line to current cursor position at template edit box.
[source] uses the name of the source file for the target.
[n] macros automatically numbers the (one or more) target. Target will automatically be numbered, if parameter is set, even if source name is not used.
[n:4] macros is the current number of fragment with defined minimum number of characters printed. Zeros are added to the left of the values.
[time] macros is intended for defining the current date time of the output file name.
[n:resetnextday] output number will be incremented during a day and reset nte next day.
[time] output current date and time in the following structure: YYYY_MM_DD_hh_mm_ss.
[time:YYYMMDD] output current date and time in the user-defined structure. in this example - YYYYMMDD.
[computerid] outputs the idendificator of the working PC. It can be set in the Computer ID field.
To add the required macros just click on the button with the macros name and then change it in the Mask of the output files names field if needed.
You can change the order of this macroses to get the files with names that will be suitable for you.
To reset the mask to initial view, just click on the Reset to defaults button.
Below please find examples of mask templates and the output files names.
For example we have the Video.avi input file and would like to save three fragments from the file. We make this operation on September 25, 2012 at 18:50:30.
| The mask template | The output file name |
| [n] | 1.avi 2.avi3.avi |
| [source]_[n] | Video_1.avi Video_2.avi Video_3.avi |
| [source]_[n:2] | Video_01.avi Video_02.avi Video_03.avi |
| [source]_[n]_[time] | Video_1_2012_09_25_18_50_30.avi Video_2_2012_09_25_18_50_30.avi Video_3_2012_09_25_18_50_30.avi |
Output folder settings allows to define the output folder.
It is possible to save to the same folder of the input file, save to the last output folder or save to the specified folder.
"View" tab
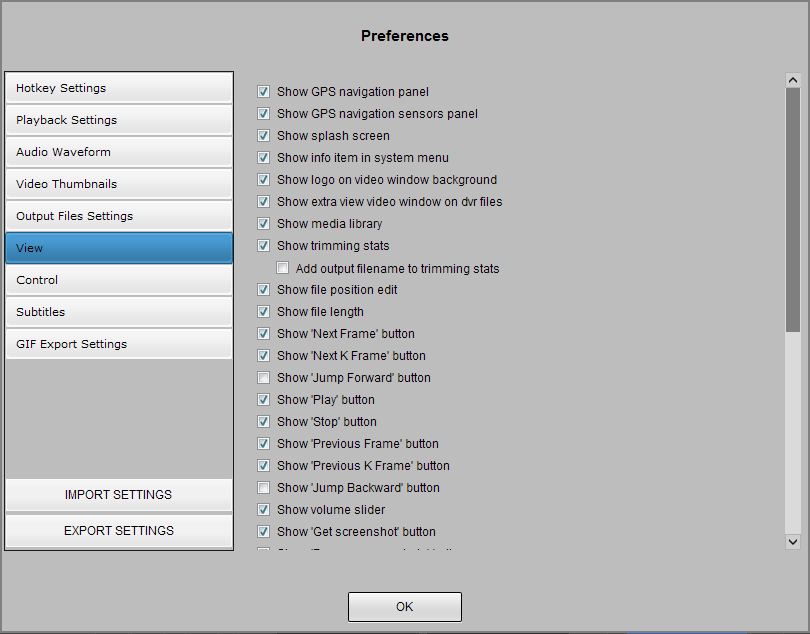
| Setting | Description |
| Show input/output information panel | Allows to show or close input/output information panel |
| Show GPS navigation panel | Allows to show or close GPS navigation panel |
| Show GPS navigation sensors panel | Allows to show or close GPS navigation sensors panel |
| Show splash screen | Allows to show or close splash screen on the product start |
| Show info item in system menu | Allows to show info item in system menu |
| Show logo on video window background | Allows to show or hide logo on video window background |
| Show extra view video window on dvr files | Allows to show extra view video window of rear camera on dvr files |
It is possible to set in this tab the text color for message boxes and text for input/output information panel.
"Control" tab
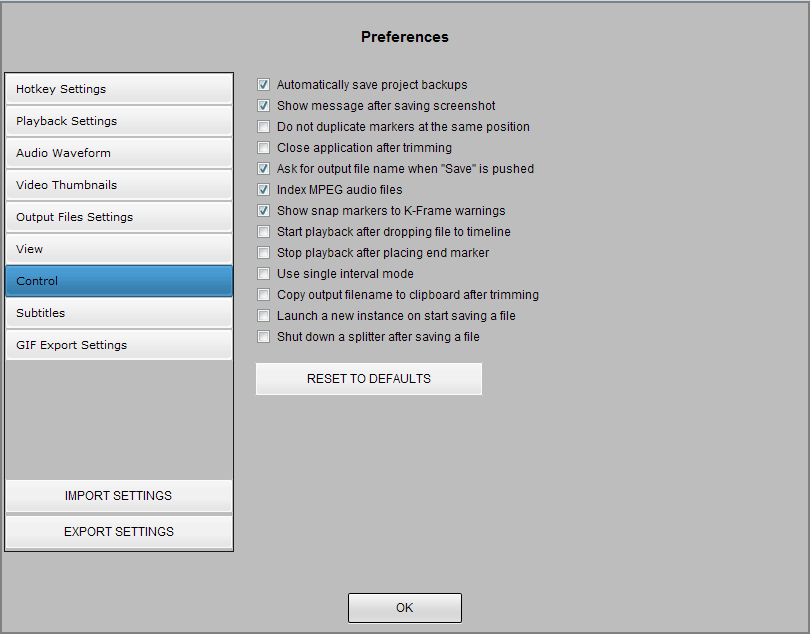
| Setting | Description |
| Automatically save project backups | Allows to automatically save project backups |
| Show message after saving screenshot | Allows to show message after saving screenshot |
| Do not duplicate markers at the same position |
Disallows duplicating markers at the same position |
| Close application after trimming |
Allows to close automatically the application after trimming |
| Ask for output file name when "Save" is pushed | If chosen, the application asks destination file name on trimming |
| Index MPEG audio files | Allows to index MPEG audio files |
| Show snap markers to K-Frame warnings | Allows to show snap markers to K-Frame warnings |
| Start playback after dropping file to timeline | Allows to automatically start playback after dropping file to timeline |
| Stop playback after placing end marker | Allows to automatically Stop playback after placing end marker |
| Use single interval mode | Allows to use single interval mode |
| Copy output file name to clipboard after trimming | Allows to copy output file name to clipboard after trimming |
| Launch a new instance on start saving a file | Opens a new instance on start saving a file |
| Shut down a splitter after saving a file | Allows to shut down a splitter after saving a file |
"Subtitles" tab
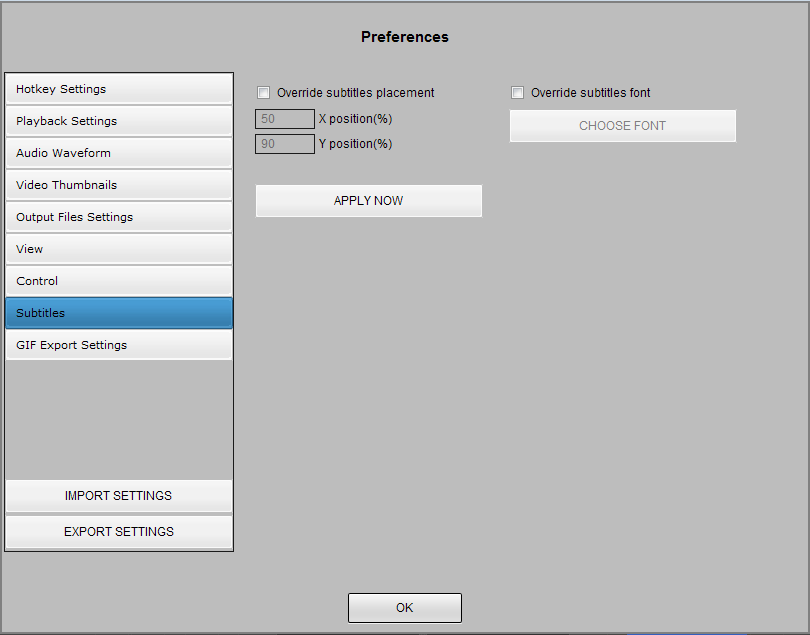
The "Subtitles" tab allows to adjust settings for subtitles placement and font in preview.
It is possible to select new position of subtitles in the resulted file by clicking the "Override subtitles placement" and by entering new values of X, Y positions.
To change the subtitles font, please select "Override subtitles font" and click the "Choose font" button.
"GIF Export Settings" tab
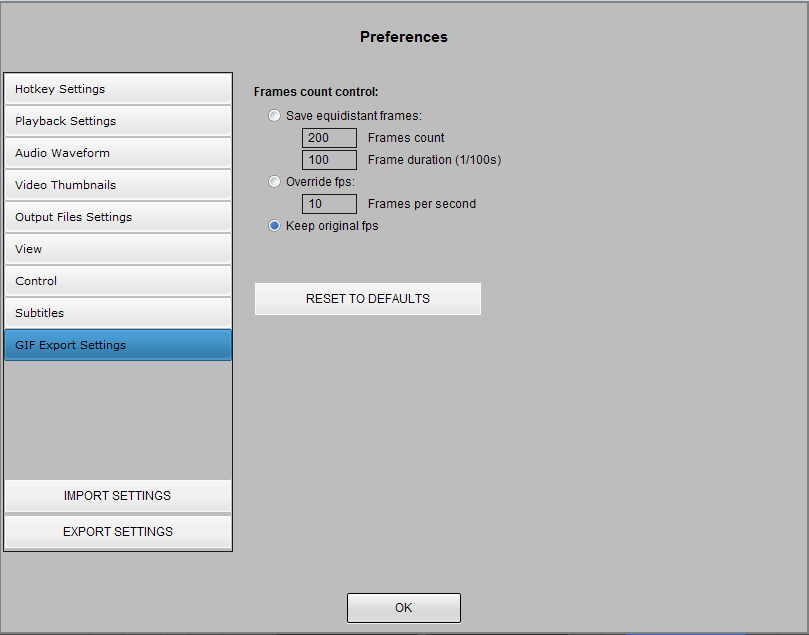
"GIF Export Settings" tab allow to make special settings for GIFs that Video Splitter could create.
You could set frames count control:
- Save equidistant frames:
- Frames count
- Frame duration (1/100s)
- Overide fps - set frames per second value
- Keep original fps