![]()
WMP Trimmer Plugin Usage
WMP Trimmer Plugin appears in the Windows Media Player after installation. To activate WMP Trimmer Plugin please follow these steps:
- Launch Windows Media Player.
- Click the Tools->Plug-ins->WMP Trimmer Plugin item on the main menu as shown in Figure 1.
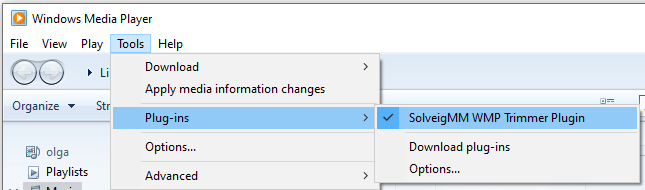
Figure 1. Activating WMP Trimmer Plugin
If the main menu of Windows Media Player is switched off, follow the steps shown in Figure 2.
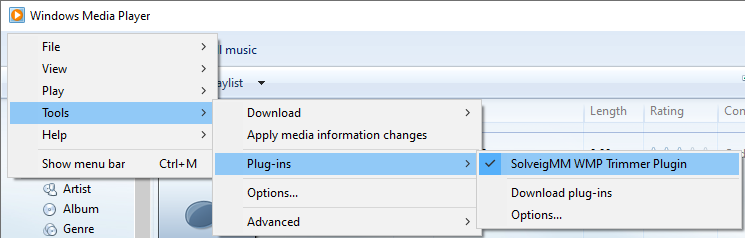
Figure 2. Activating WMP Trimmer Plugin
The way WMP Trimmer Plugin usually looks like inside Windows Media Player is shown in Figure 3.
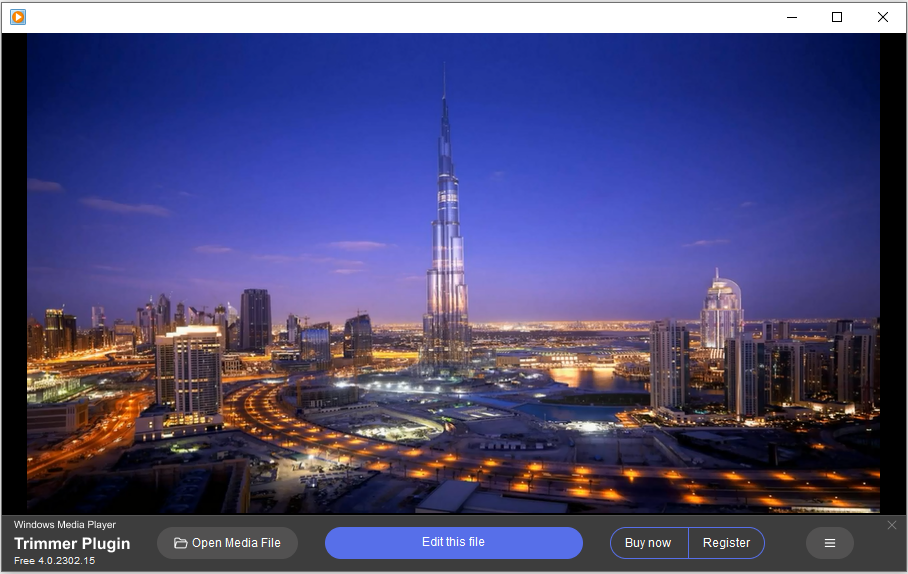
Figure 3. Windows Media Player with WMP Trimmer Plugin
- Open your file using the "Open Media File" button with the icon of folder. Then click on "Edit this file" button to proceed to the interface for editing shown on Figure 4.
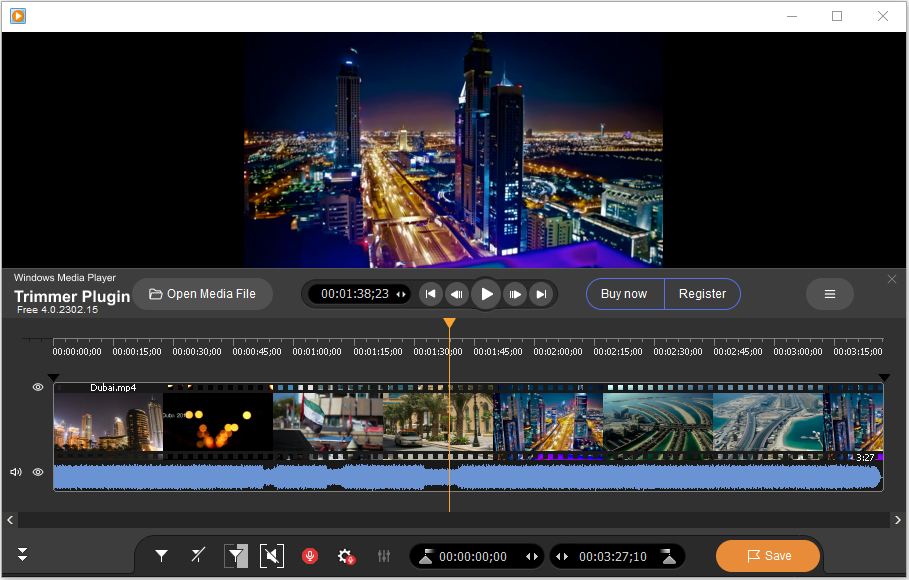
Figure 4. Windows Media Player with WMP Trimmer Plugin in expanded view of the interface
It is possible to minimize expanded view of Plugin's interface for convenience. Figure 5 shows how it looks like after minimization.
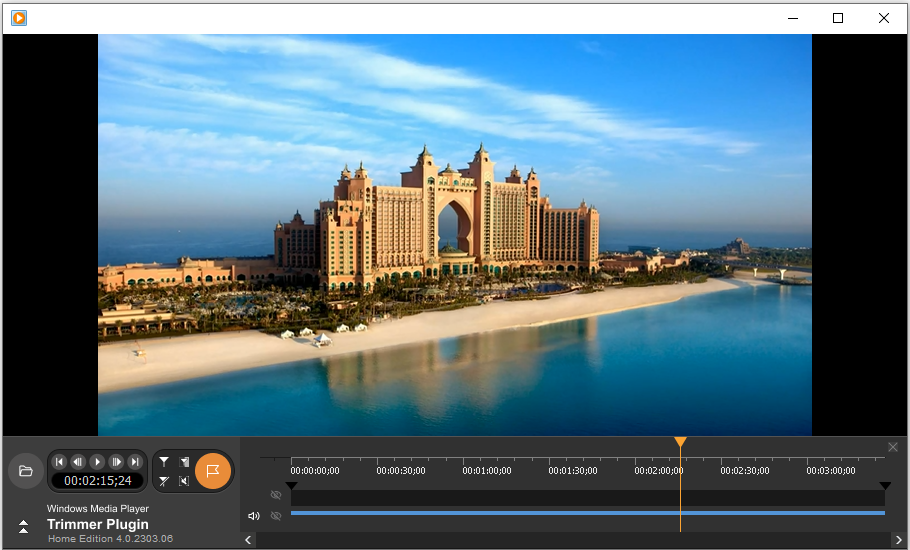
Figure 5. Windows Media Player with WMP Trimmer Plugin in minimized view of the interface
Graphical user interface controls
Below please see the description of GUI controls of Plugin's windows.
Figures 6-8 show the WMP Trimmer Plugin graphical user interface with all the controls enumerated in Table 1.

Figure 6. Authorization, the first window
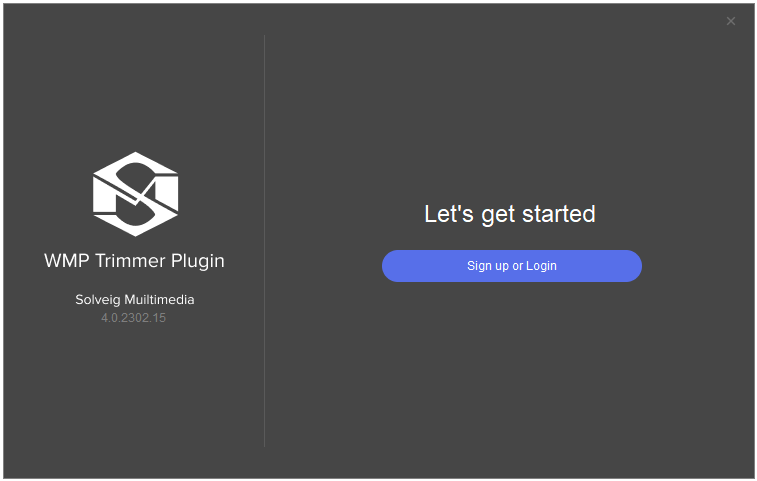
Figure 7. Authorization, the second window
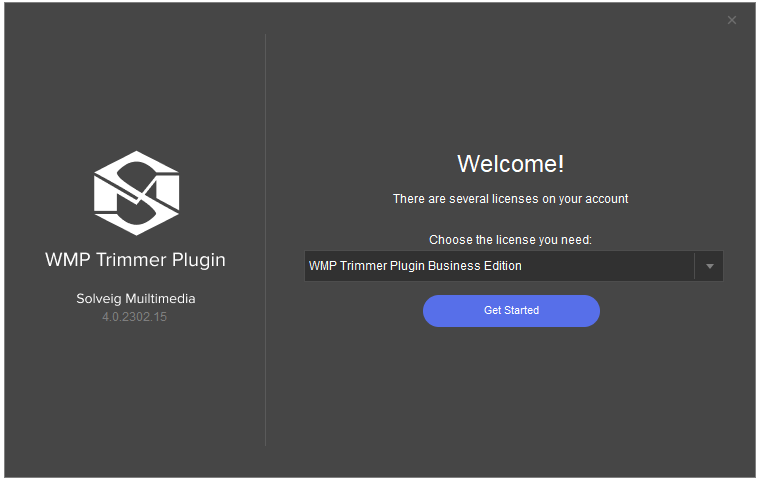
Figure 8. Authorization has been completed, the third window

Figure 9. Authorization, the fourth window
Figures 10-12 show the WMP Trimmer Plugin graphical user interface with all the controls enumerated in Table 1.
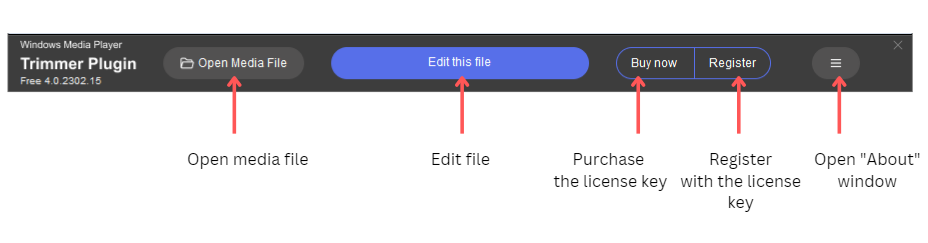
Figure 10. WMP Trimmer Plugin GUI controls (view on Windows Media Player opening)
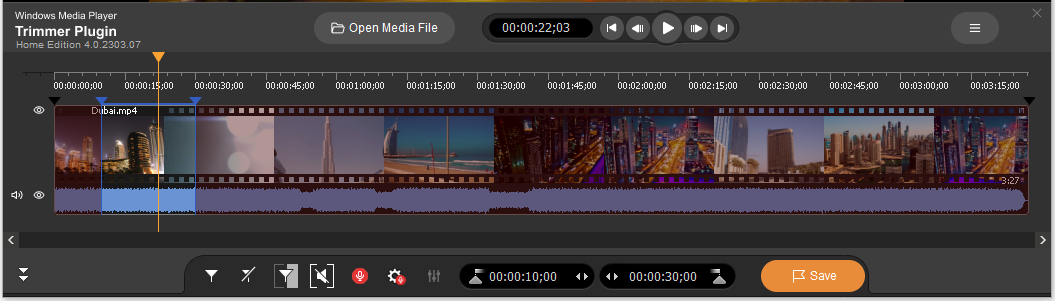
After clicking on "Edit File" button you will get the expanded view of WMP Trimmer Plugin interface (Figure 11).
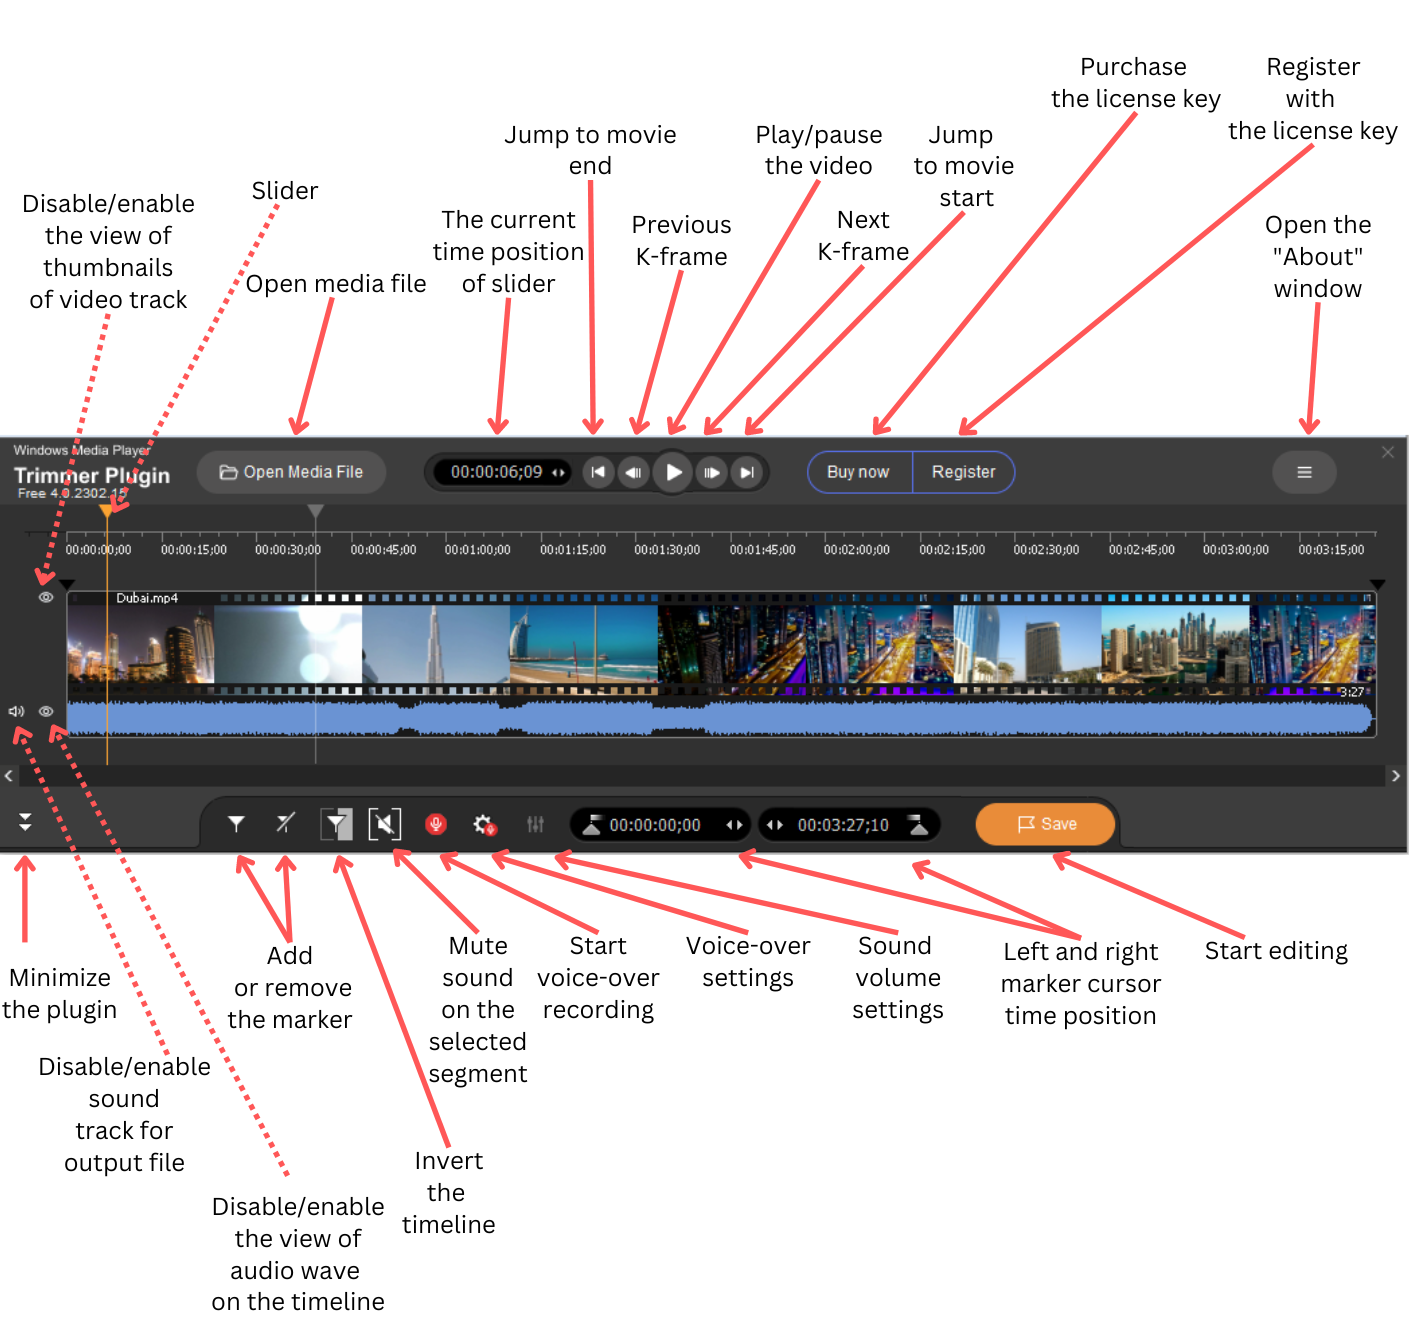
Figure 11. WMP Trimmer Plugin GUI controls (expanded view)
The expanded view can be minimized if needed to another view (Figure 12).
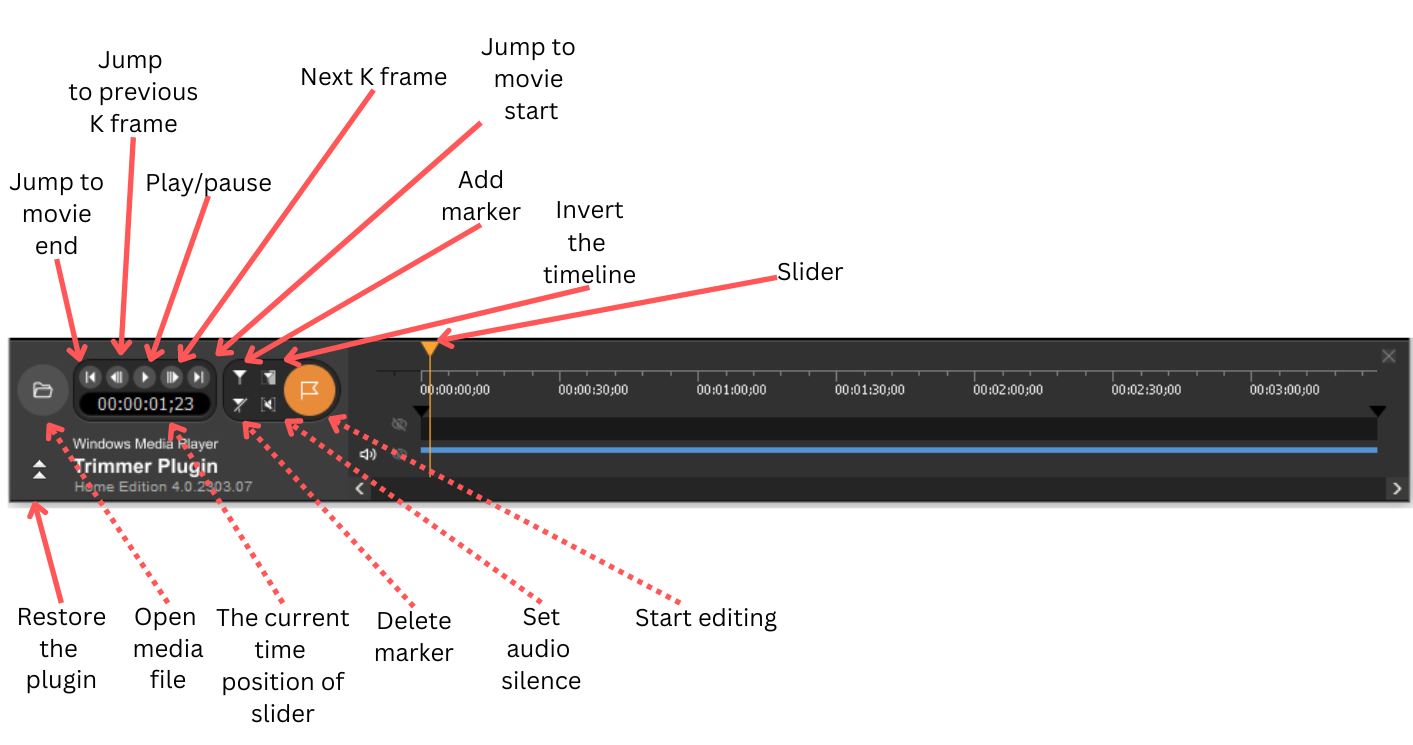
Figure 12. WMP Trimmer Plugin GUI controls (minimized view)
There are several Preferences for voice-over available.
You need to click on the icon ( ) to open the Voice-over preferences.
The following window pops up:
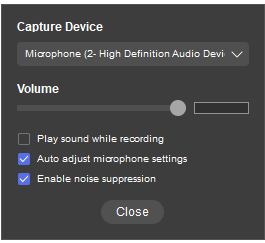
Figure 13. WMP Trimmer Plugin voice-over settings
The “Auto adjust microphone settings” and “Enable noise suppression” options are enabled by default. These options are intended to optimize the quality of your microphone settings to make the voice over recording clear, in good quality.
If you would like to hear the sound from the file being dubbed while adding the voice-over, you need to enable the “Play sound while recording” option at this window.
After the voice over is added to the timeline, you can also set its volume, as well as the volume of the sound of the original file. For this you need to click the button ( ).
).
Then, you’ll see the window with volume settings and change the preferred volume level of the original file’s sound and the volume of recently added voice-over.
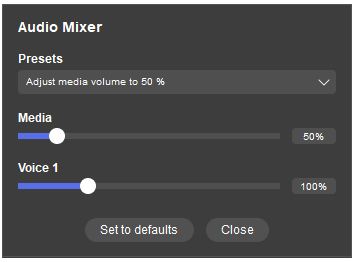
Figure 14. WMP Trimmer Plugin audio mixer settings
Table 1. WMP Trimmer Plugin GUI controls
Control image |
Control name |
Control description |
|
Time Edit Controls |
Used to set the time interval of the video fragment manually |
|
Time contol |
Shows the current time of slider position |
|
Trim button |
Save the selected fragment to a file |
|
Add Marker Remove Marker(s) |
Add a new marker to the current slider cursor position.
|
|
Cut/Keep Selected Fragment | Set the fragment type |
|
Invert time line fragments |
Invert time line fragments |
|
Set audio silence |
Allows to set audio silence for the chosen fragment |
|
Story board Off/On |
Turn on/off the story board |
|
Audio waveform On/Off |
Turn off/on the audio waveform |
 |
Open media file |
Allows to open media file in Windows Media Player |
|
Jump to movie end/start |
Allows to navigate to movie end/start |
|
Jump to previous/next K frame |
Allows to navigate to previous/next K frame |
|
Play/pause |
Allows to start the playback of media file or to set the palyback on pause |
|
Minimize the plugin |
Allows to minimize plugin interface view |
|
About button |
Opens the "About" dialog box |
|
Buy now / Register buttons |
Allows to purchase the license key / Register the Plugin with the license key |
|
Start voice-over recording |
Allows to start voice-over recording |
|
Stop voice-over recording |
Allows to stop voice-over recording |
|
Voice-over settings |
Allows to open voice-over settings |
|
Sound volume settings |
Allows to open sound volume settings |


Here is an example of using WMP Trimmer Plugin.
How to save the segment
Suppose you need to save the segment from a media file (e.g. from the 10th second up to the 30th second) and save it to another file. To do it, follow these step-by-step instructions.
- Launch Windows Media Player.
- Plugin should appear in Windows Media Player window after installation. If it is disabled activate WMP Trimmer Plugin as shown in Figure 1 or Figure 2.
- Open your media file using "Open Media File" button.
- Click the "Edit this file" button.
- Use slider of WMP Trimmer Plugin and playback controls of Windows Media Player to select the start and end time of fragment(s). Also, you can manually set the trimming start time using Time Edit Controls: enter 00:00:10;00 for the fragment beginning into the left and 00:00:30;00 for the fragment end into the right input field. Attention! Using Time Edit Controls provides worse positioning accuracy.
- Move marker (
 ) at the timeline beginning to the required position of the fragment start and marker at the timeline end to the required position of fragment end or simply click the "Add marker" button.
 - Put the slider between start/stop time positions of the fragments you would not like to be saved in the output file and click the scissors button (
 ). The fragment will change its color to red that means it will not be presented in the output video.
 - Click the Trim button to start the editing.
- You will be asked for the name of the file you want to save the necessary fragment in (Figure 5).
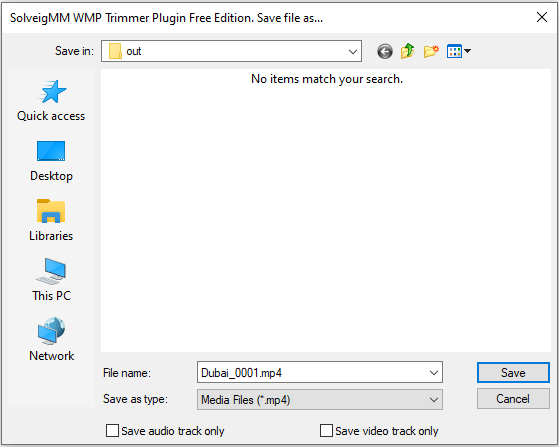
Figure 5. Saving the trimmed file
- Click the Save button.
- Wait for the trimming process to be completed.
How to cut out one or several segments
Also, WMP Trimmer Plugin allows you to cut out fragments you do not need (e.g. commercials) from a media file. Assume, we would like to cut out one fragment from the video file.
You can do it in the following way:
- Launch Windows Media Player.
- Plugin should appear in Windows Media Player window after installation. If it is disabled activate WMP Trimmer Plugin as shown in Figure 1 or Figure 2.
- Open your media file using "Open Media File" button.
- Click the "Edit this file" button .
- Find the beginning of the commercial using the playback controls of Windows Media Player or slider and move the marker at the beginning of Plugin timeline to this position or simply click the "Add marker" button ().
- Navigate to the end of the commercial using the playback controls of Windows Media Player or slider and move the marker at the beginning of Plugin timeline to this position or simply click the "Add marker" button ().
- Put the slider between start/stop time positions of the fragment and click the scissors button ().

- Click the "Save" button to start the editing.
- You will be asked for the name of the file you want to save the necessary fragment in (Figure 5).
- Click the "Save" button again in the opened dialog window.
- Wait for the trimming process to be completed.
© 2007-2023 Solveig Multimedia. All rights reserved Privacy Policy Terms of Use