![]()
Using Video Splitter
In this section:
- Opening a source file
- Using the splitting controls
- Starting the trimming process
- Working with the batch queue
- Working with MPEG-2 files
Opening a source file
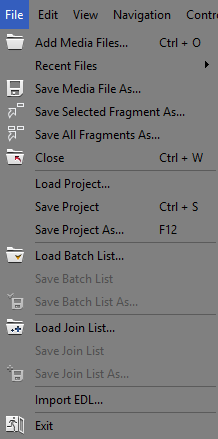
Operations with files are performed via the menu bar in Video Splitter.
To open a source file, go to the menu bar, select File -> Open Media File... Select your video file in standard Open File dialog box. This file will not be changed, deleted or moved during the splitting process.
To set the destination file, select File -> Output File... and specify the name for the destination file. If a file with the same name already exists, you will be asked if you want to replace the old file with the new one. You can overwrite the old file or specify a new filename for the destination file.
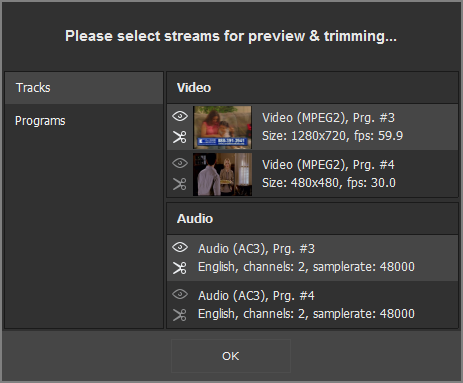
If the file you edit contains several audio and/or video streams then after the file opening you will see Stream selection window, where you can select video and audio tracks for preview and editing.
See also: File menu, Stream selection window.
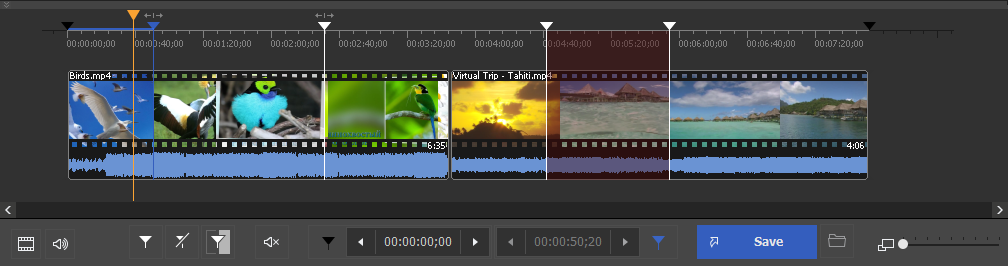
Using the splitting controls
Before you start the trimming process, you should define the intervals you want to be cut or kept in the output file.
To add a new interval to the slider:
- Navigate to the beginning of the future interval
- Press the Set New Marker key (M) or select the Edit -> Set New Marker menu item from the menu bar
- Navigate to the end of the future interval
- Repeat step 2
- If necessary, mark the interval as "Cut Off" by selecting Edit -> Cut Off Selected Fragment (D) or pushing the "Scissors" (
 ) button
 - If you need to change the start or stop interval positions, just double click on the collapsed marker and drag the markers to their new positions
Sample intervals:
| Interval color | Description |
 |
This interval is set to be kept. It will be present in the final movie. The blue color of markers means you can edit it (delete, set it to be kept, etc.) |
A: 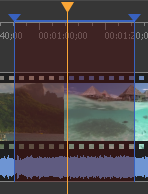 B: B:  |
A: Deployed state of the cut out fragment. This fragment is set to be deleted. It will not be present in the final movie The blue color of markers means you can edit it (delete, set it to be kept, etc.). B: Collapsed state of the cut out fragment. |
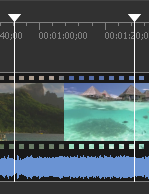 |
This interval is set to be kept. It will be present in the final movie. The white color of markers means that this interval can not be edited. |
A: 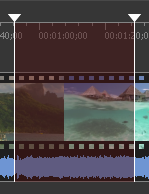 B: B:  |
A: Deployed state of the cut out fragment. This fragment is set to be deleted. It will not be present in the final movie. The white color of markers means that this fragment can not be edited. B: Collapsed state of the cut out fragment. |
Splitting controls
| Window Item | Description | Shortcut key |
 |
Add Marker: Add a new marker to the current slider cursor position. | M |
 |
Delete Marker: Remove selected marker or markers. | Delete |
 |
Set audio silence: allows to set audio silence for the selected interval | |
 |
Start trimming or batch processing (if there are any tasks in the batch queue) | Ctrl + T |
 |
Browse output file | |
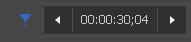 |
Left marker cursor time position. You can edit this value manually | |
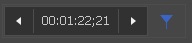 |
Right marker cursor time position. You can edit this value manually | |
 |
Zoom: Increase or Decrease the slider timeline resolution to make editing neighbouring markers more comfortable (*) | NumPad + NumPad - |
 |
Displays zoom popup menu | |
 |
Invert intervals selection | |
 |
Get screenshot: allows to make the screenshot of the chosen video frame Browse screenshot: allows to open folder with the created screenshot |
|
 |
Mute selected audio track. Muted track will not be present in either the preview or the output file. | |
 |
Minimize selected track on the timeline. |
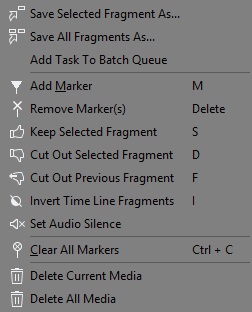
Slider context menu
| Menu item | Description | Shortcut key |
| Save Selected Fragment As... | Specify the output filename and immediately save the selected interval (start the trimming process) | |
| Save All Fragments As... | Specify the output filename and immediately save all intervals (start the trimming process) | |
| Add Task To Batch Queue | Allows to add Task to Batch Queue | |
| Add New Marker | Add a new marker to the current slider cursor position | M |
| Remove Marker(s) | Remove the current marker or interval | Delete |
| Keep Selected Fragment | Sets the type of the selected interval to be kept | S |
| Cut Out Selected Fragment | Set the type of the selected interval to be cut | D |
| Cut Out Previous Fragment | Set the type of the previous interval to be cut | F |
| Invert Time Line Fragments | Invert time line fragments | I |
| Set audio silence | Allows to mute sound of the selected interval | |
| Clear All Markers | Remove all markers | Ctrl + C |
| Delete Current Video | Allows deleting the current video file from the multitimeline |
Starting the trimming process
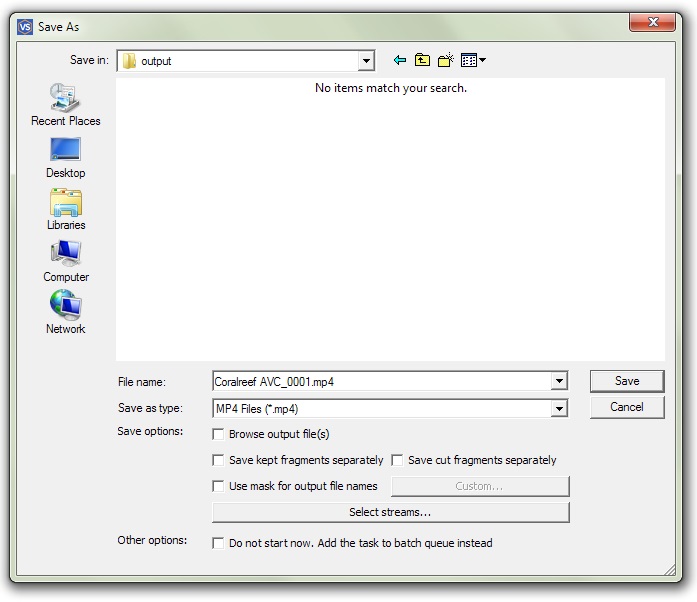
To start the trimming process after you set all the intervals you want to be deleted/saved, click the Save button (for details, see Splitting controls) or select File -> Save Media File As... (for details, see File menu) or click the Save Media File As.. quick button.
Note: You can save (trim) any selected interval using the Save Selected Fragment As.. item from the slider context menu (for details, see Splitting controls)
Working with the batch queue
The Batch Manager available only in Video Splitter Business Edition. For more information see distinction between Home Edition and Business Edition.
To create a new batch queue (task list):
Open the media file you want to edit, set all the intervals you want to be saved/removed. For details, see Opening source file and Video Splitter interface
Add the task to the queue. To do it, select Tools ->Batch Manager ->Add Task To Batch Queue
Repeat steps 1 and 2 for all the files you want to process.
See also Tools menu, Keyboard shortcuts
Also, you can add a task to the queue by selecting File -> Save Media File As... from the menu, or selecting the Save selected fragment as.. item from the slider context menu (for details, see Splitting controls). You should select the Don't start now. Add the task to batch queue instead checkbox as shown below:
To open the Batch Manager window, select Tools -> Batch Manager -> Show Batch Manager on the menu or select Tools -> Batch Manager -> Load Task List... to open a task list file.
The Batch Manager window allows you to change audio/video streams, the Obey samples times attribute, delete any intervals, etc. For details, see Tasks queue field.
To edit a task, you have to open it in Video Splitter, change its intervals or settings and update it:
Select the task you need to edit. Select the Edit -> Edit Task with Video Splitter menu item or the Edit Task with Video Splitter item from the context menu or press the Enter hot key. For details, see Tasks queue field, Keyboard shortcuts
Edit the task in the Video Splitter main window. To view the existing fragments in Video Splitter, you can use the Fragment list field. To do it, select Show the Fragment in Video Splitter from the context menu or press the Enter hot key. For details, see Keyboard shortcuts.
After you edit the trimming settings in Video Splitter, update the task in the batch queue by selecting the Tools -> Batch Manager -> Update Task menu item or the Edit -> Update Task item in the Batch Manager window.
Working with MPEG-2 files
This section describes how to use the Video Splitter with MPEG-2 video.
Open the MPEG-2 video file you want to split:
Select File -> Open Media File... from the menu.
The standard Windows Open File dialog box will appear.

Select the video file and click Open.
Note. Indexing the MPEG file is recommended but not required.
With no index, you will not be able to use K-Frames and the trimming process can be inaccurate. You could enable/disabple option in the Preferences -> Control tab to "Index MPEG audio" or "Index MPEG video files".
If you cancel the indexing process or choose not to index the file, you can index it later in the following way: select Tools -> Index MPEG file in the folder or Tools -> Index MPEG files from Media list from the menu.
If MPEG2 file contains several video or audio tracks then the Stream selection window will be opened.
It contains two tabs: Programs and Tracks, where you can select the desired stream by clicking the icon near the appropriate stream.
The icon with an eye ( ) shows what stream is
selected for preview.
) shows what stream is
selected for preview.
The icon with the scissors ( ) shows what stream is selected for editing.
| Item of Window | Description |
|
The stream is selected for preview |
|
The stream is selected for editing. It will be saved in the output file. |
 |
The stream is not selected for preview |
 |
The stream is not selected for editing. It will not be saved in the output file. |
What to do next is described in the How-to section.