 Chin
Chin  Eng
Eng  Rus
Rus  Deu
Deu  Ital
Ital  Esp
Esp  Port
Port  Jap
Jap 如何在Citrix XenApp环境下使用HyperCam 3

By Olga Krovyakova - April, 2 2019
HyperCam 3 对客户端’的桌面内容进行编码,并将其压缩到启动应用程序的 PC 上。 为了避免通过网络传输大量数据,应设置 Citrix XenApp 环境,以便在客户端’的 PC 上启动 HyperCam 3。 也就是说,HyperCam 3 应配置为流式应用程序.
例如,我们在Windows Server 2008 R2 x64(作为服务器)和Windows 7 SP1 x64(作为客户端PC)上使用Citrix XenApp 6.5和HyperCam 3.6.1507.2.

1. 在客户端PC上的Streaming Profiler中创建一个新的配置文件(图1),将其名称设置为 HyperCam3Streamed (图2),设置目标操作系统和语言(图3).

图片1
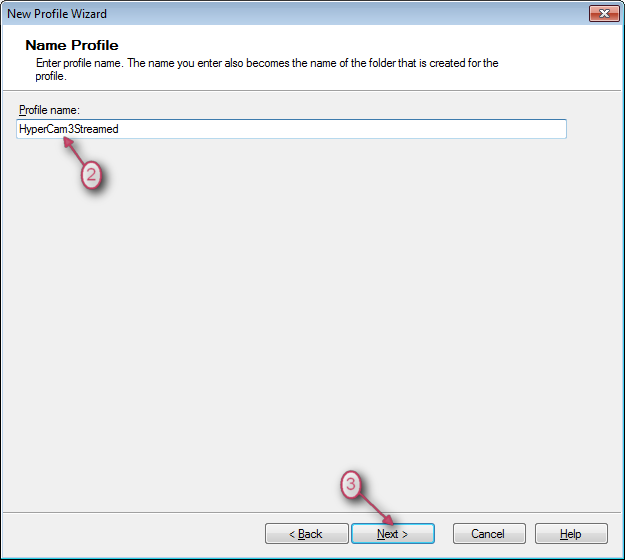
图2
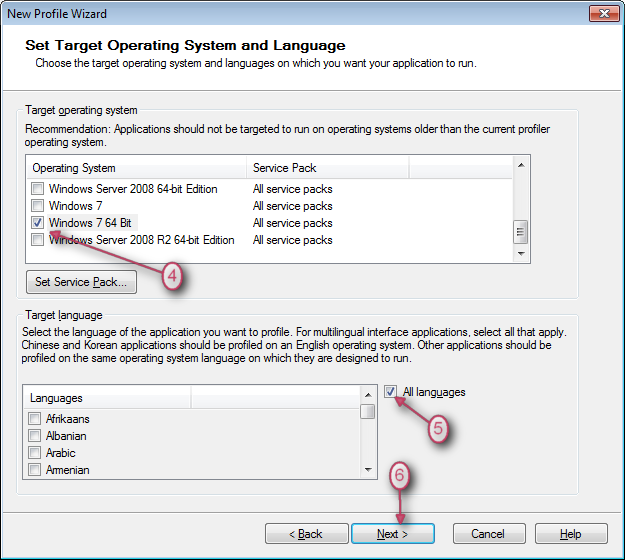
图3
2.设置HyperCam 3安装文件并安装。 请使用以下命令行参数:
|
SolveigMM_HyperCam_3_6_1507_2.exe -var:"SerialNumber=Your_Serial_Number" var:"XenAppStreamed=1" |
单击“下一个”按钮。 之后将启动安装过程(见图4).
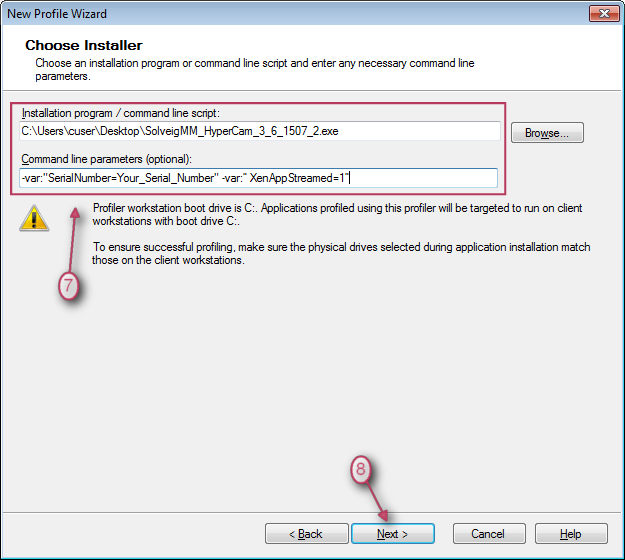
图4
3. 应用程序将出现在列表中(见图5).
现在,您可以选择 检查HyperCam 3是否已正确安装,方法是选择应用程序并单击“运行”按钮.
启动时,HyperCam 3 和 HyperCam Media Editor 应启动、激活并正常工作.

图5
4. 单击“添加”按钮选择应用程序,设置其余选项并完成配置文件创建(图6).
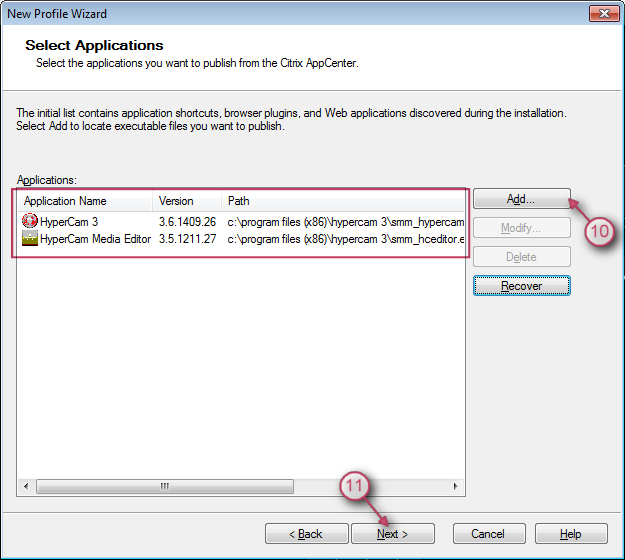
图6
5. 单击“浏览”按钮或键入以下路径来选择配置文件目录。 输入 HyperCam3Streamed 作为配置文件名称.
将配置文件保存到共享文件夹(图7).
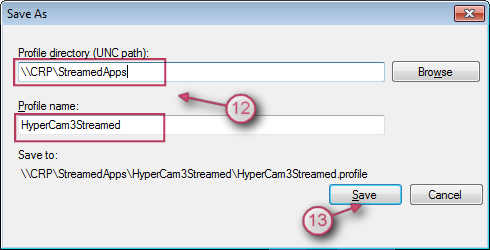
图7
6. 在服务器上的 Streaming Profiler 中打开刚刚保存的配置文件,并通过单击“编辑”中的“添加新目标...”添加新目标 ]”菜单(图8).

图8
7. 按照之前 Windows Server 2008 R2 x64 的步骤 2-5 中所述安装 HyperCam 3.
8. 使用创建的配置文件将 HyperCam 3 在 Citrix AppCenter 中发布为流式应用程序(图 9-12).
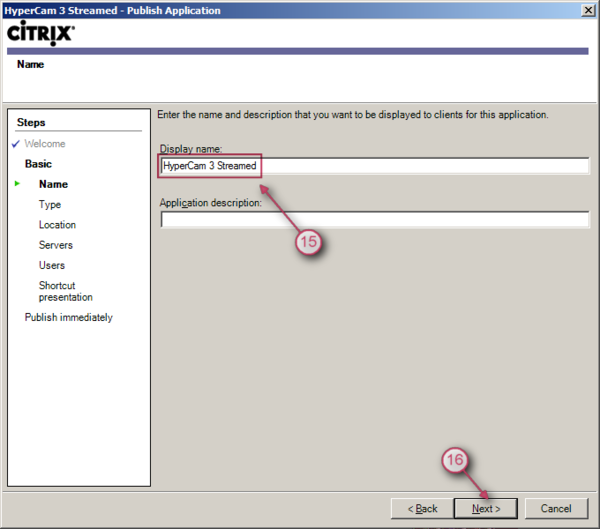
图9
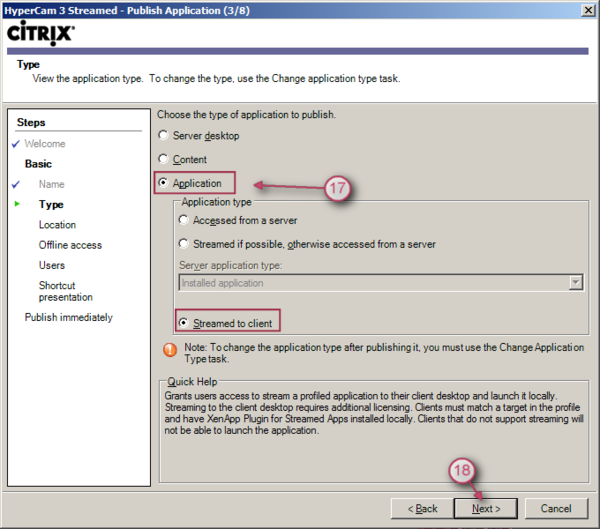
图10
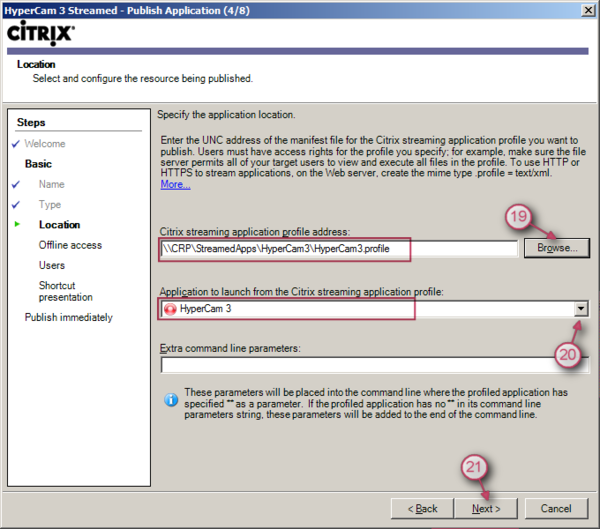
图11
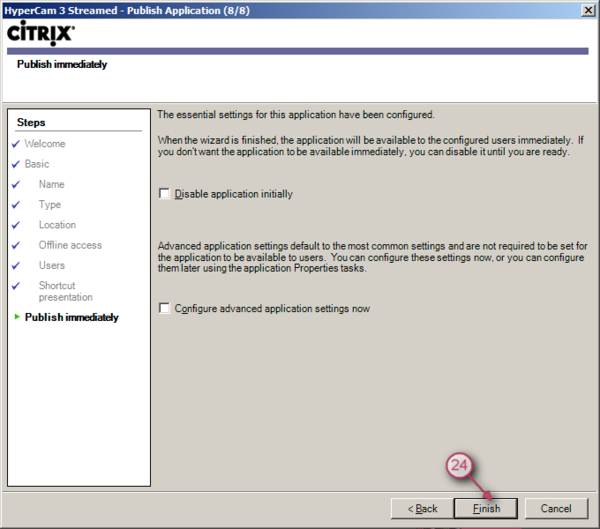
图12
9. 将 HyperCam 3 Media Editor 发布为流应用程序
10. 在客户端 PC 上,安装 Citrix Receiver Enterprise 和 Citrix Offline 插件。 接收器应与 “LEGACYFTAICONS” 选项一起安装,例如.:
|
CitrixReceiverEnterprise.exe /includeSSON /ENABLE_SSON=Yes STORE0="Appstorename;http://server.url/storename/PNAgent/config.xml;on;XenApp 上的应用程序 " /LEGACYFTAICONS=True |
11. 登录 Citrix Receiver.
"可以从桌面启动“HyperCam 3 Streamed”和“HyperCam Media Editor”。 应用程序将使用客户端 PC 上安装的编解码器.
就这样! 感谢您的阅读!
 Olga Krovyakova is the Technical Support Manager in Solveig Multimedia since 2010.
She is the author of many text and video guidelines of company's products: Video Splitter, HyperCam, WMP Trimmer Plugin, AVI Trimmer+ and TriMP4.
She works with programs every day and therefore knows very well how they work. Сontact Olga via support@solveigmm.com if you have any questions. She will gladly assist you!