SolveigMM Video Splitter ist ein einfach zu bedienender und verlustfreier Videoeditor, der das Bearbeiten und Zusammenfügen von Dateien verschiedener gängiger Dateiformate wie FLV, AVC/H264, MP4, MOV, AVCHD, MKV, MPEG-2, MPEG-1, WMV, AVI, MP3, WMA beherrscht.
Seit Version 5 ermöglicht Video Splitter die Bearbeitung von MP4- , MKV-, AVI- und WEBM-Dateien mit mehreren Audiospuren.
Wenn Sie beispielsweise nur wertvolle Fragmente von Videodateien speichern und alle oder nur einige bestimmte Audiospuren davon speichern möchten, befolgen Sie die Schritte, um MKV-Dateien mit mehreren Audiostreams mit SolveigMM Video Splitter zu bearbeiten.
1. First, please download and install Video Splitter on your computer.
2. Start Video Splitter via its icon on the desktop or follow Start -> All Programs -> Solveig Multimedia -> SolveigMM Video Splitter Home Edition to open the program.
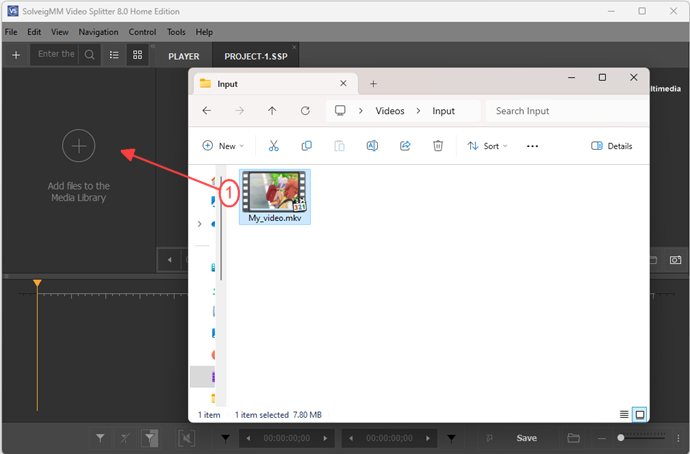
3. Now open the file that contains several audio tracks.There are several ways in which the original file can be opened.
To open the file use drag & drop to the Media library of Video Splitter or to the timeline or follow the menu item File -> Add Media Files...
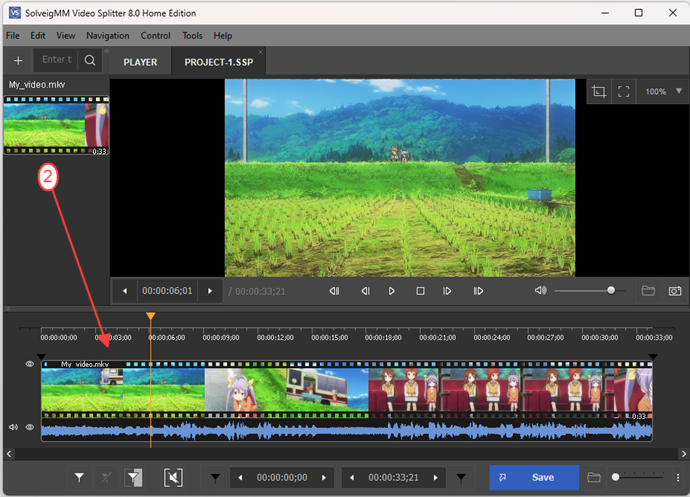
4. Move the file from the Media library to the timeline.
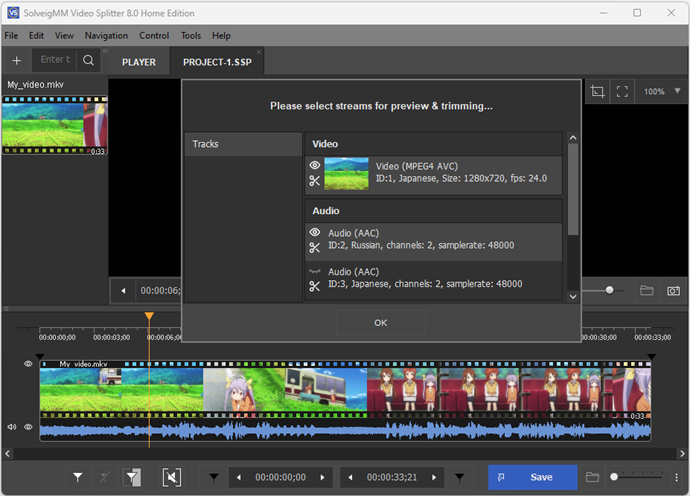
5. You can change the audio tracks for preview and for saving in the output file by following to "Control" -> "Select streams..." menu item.
6. You will see the "Please select streams for preview & trimming" window.
By default Video Splitter saves all audio tracks contained in the file and preview one audio track.
7. Let's change the audio track for preview and editing.
In our example the file contains two audio tracks: AAC track in Russian language and AAC track in Japanese.
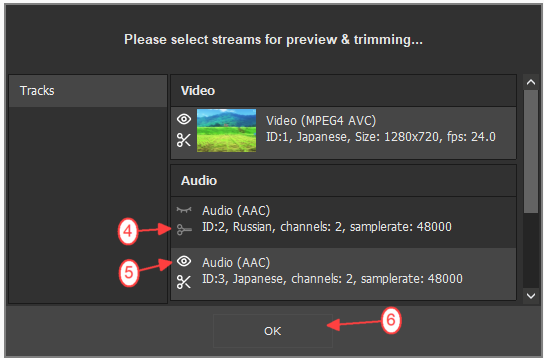
If you would like to save only some specific audio track then you should disabled audio track that should not be presented in the output video file.
We will disable the first track for editing by clicking the grey icon of scissors (4) and enable the preview of the second track in Japanese by clicking the icon of the eye (5).
So, we will get the file with the Japanese track on preview and in the output file after the trimming.
Now when all the desired audio tracks for saving were selected, click the "OK" button of the "Please select streams for preview & trimming" window.
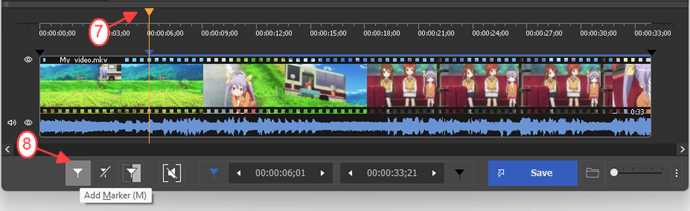
8. If you need to save only some segments from the file, you need to select them on the timeline.
First of all mark the first fragment that you would like to be deleted. Select time position of start using the Video Splitter's slider and the "Add marker" button or press the "M" hot key.
You can also use time fields of the marker to correct the time position of the marker by selecting the desired marker and manually entering the appropriate time of the marker.
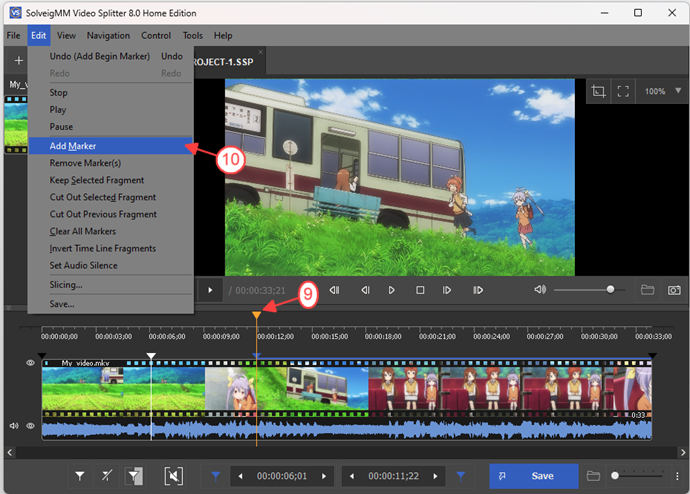
9. By the same way place the second marker of the fragment end time position or use Edit / Add Marker menu item. You will get the first fragment for saving or deleting.
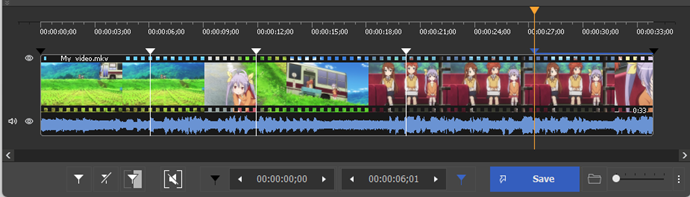
10. Add markers of the start and stop time positions of all other fragments for saving or deleting.
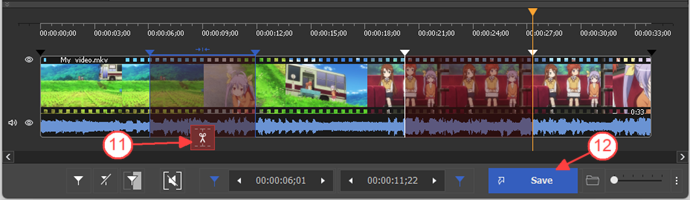
11. Now define fragments you would like to be deleted and start the editing.
Move the mouse cursor between two markers of the fragment for deleteing and click the "scissors" button that will arise.
Mark the same way all other segments you want to be deleted.
To save your result to the output file click the "Save" button or follow to "Edit" -> "Save..." menu item.
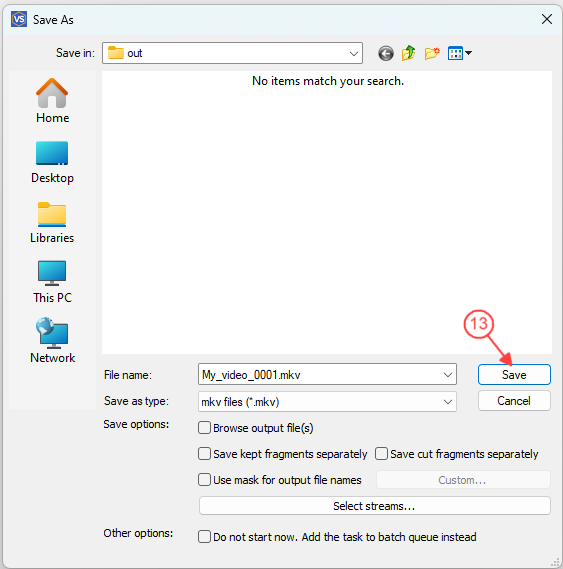
12. In the opened "Save As" dialog window enter the name of output file and select the folder for saving.
Please note, that this window also contains the "Select streams" button that opens the "Please select streams for preview & trimming" window for case if you would like to check the audio stream(s) that were selected for the saving or if you have decided to change the settings of the streams that are going to be saved.
Click the "Save" button again. This will start the editing.
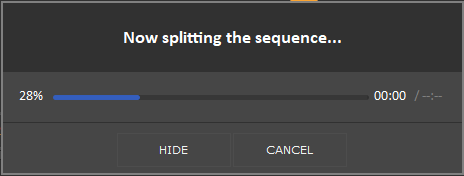
You will see the editing progress window that helps to understand when the editing process will be ended.
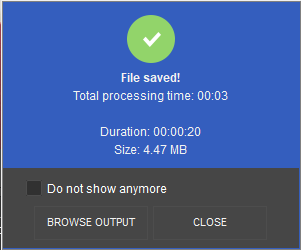
After the editing will be completed, you willl be able to open the resulted video file.
Click the "Browse ouput" button to open the folder with it.
 Deu
Deu  Eng
Eng  Rus
Rus  Ital
Ital  Esp
Esp  Port
Port  Jap
Jap  Chin
Chin 


 Olga Krovyakova ist seit 2010 Technical Support Manager bei Solveig Multimedia.