 Port
Port  Eng
Eng  Rus
Rus  Deu
Deu  Ital
Ital  Esp
Esp  Jap
Jap  Chin
Chin Como editar arquivo WMV

By Olga Krovyakova - March, 27 2019
SolveigMM Video Splitter permite excluir fragmentos desnecessários do arquivo de vídeo sem perda de qualidade de vídeo/áudio. Este guia explica como você pode editar um arquivo WMV.
EXPERIMENTE o divisor de vídeo GRATUITAMENTE

Understanding of some basic terms used in this guide will help you to start using SolveigMM Video Splitter in most comfortable way.
|
|
Marker is set to a current cursor position. |
|
|
The selected marker is highlighted with blue color. |
Markers can be added or deleted. Such operations as deleting and positioning are applied to the selected markers only.
Fragment is a part of video (or audio) file limited by two markers to be removed or kept in a final movie, e.g. commercial block you want to cut off. Fragments marked as 'cut off' are colored with brown-red color.
Examples of fragments are provided in table below:
| Color of Fragment | Description |
|---|---|
 |
This fragment was set to be deleted. It will not be presented in final movie |
 |
This fragment was set to be kept. It will be presented in final movie |
 |
This fragment was set to be deleted. It will not be presented in final movie. Yellow slider on it means you can edit it (delete, set it to be kept, etc.) |
 |
This fragment was set to be kept. It will be presented in final movie. Yellow slider in it means you can edit it (delete, set it to be cut off, etc.) |
Control Panel contains main tools for file processing.
| Window Element | Description | Shortcut Key |
|---|---|---|
|
|
Button "Add Marker": Adds a new marker to current slider cursor position. |
M
|
|
|
Button "Remove Marker(s)": Removes a current marker or fragment. |
Delete
|
|
|
Button "Invert": Inverts time line fragments. |
I
|
|
|
Button "Set audio silence": Sets the audio silence for the selected fragment. | |
|
|
Button "Save": Starts trimming or Batch Processing (if batch queue has any task). |
Ctrl+T
|
|
|
Edit box of a left marker cursor time position. You can edit this value by manually. | |
|
|
Edit box of a right marker cursor time position. You can edit this value by manually. | |
|
|
Button "Zoom In/Out": Increases/descreases a slider timeline resolution for more comfortable editing neighbor markers (*). |
Num+ Num- |
|
|
Button "Browse output file(s)": opens folder in the File Explorer with the output file. | |
|
|
Audio off/on: turns off/on sound of the whole video track Story board or audio wave off/on: turns off/on the story board or audio wave
|
|
|
(*) - To view timeline areas after Zoom In you can use a scroll bar (below a timeline slider) and "Alt + Left arrow" and "Alt + Right Arrow" hot keys. |
||
In our example we will edit initial WMV file by cutting off two fragments with frame accuracy in one pass. In our final movie only the video stream will present, the audio stream will be disabled .
Em nosso exemplo, editaremos o arquivo WMV inicial cortando dois fragmentos com precisão de quadro em uma única passagem. No nosso filme final apenas o stream de vídeo será apresentado, o stream de áudio será desabilitado .
1. Selecione o comando Abrir arquivo de mídia... no menu Arquivo .
2. Selecione o arquivo a ser editado.
3. Clique no botão para abrir o arquivo selecionado. Se o arquivo selecionado não possuir índices, a janela de diálogo mostrada em Figura 2.1 será exibida.
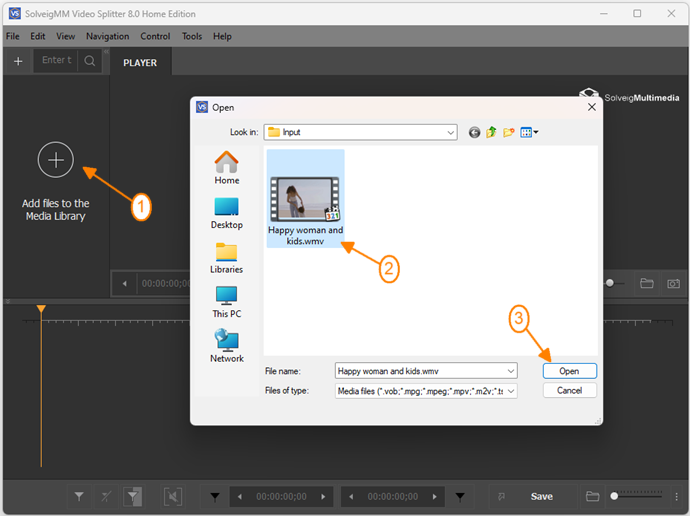
Figura 1
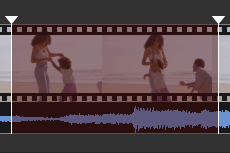
4. Move the file from the Media library to the timeline.
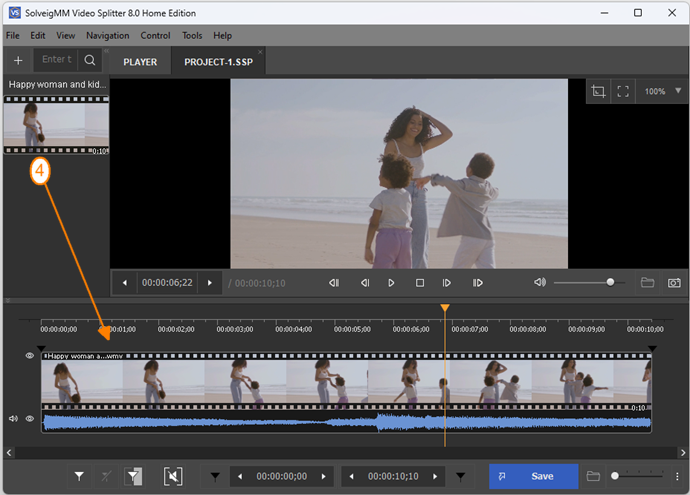
Figure 2
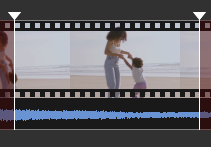
4. Desmarque a caixa de seleção Áudio no menu Controle para desativar o fluxo de áudio no filme final.
5. Clique no botão Zoom In para aumentar a resolução da linha do tempo do controle deslizante. Isso permitirá uma edição mais confortável dos marcadores vizinhos. A barra de rolagem abaixo da linha do tempo aparece.
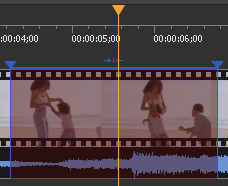
6. Encontre o início da primeira parte do seu filme usando o controle deslizante de vídeo .
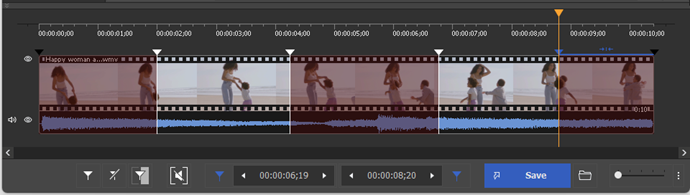
7. Clique no botão Adicionar marcador . Também é possível adicionar o marcador selecionando o comando Definir Novo Marcador do menu contextual ou utilizando a tecla [M] . Em seguida, adicione o marcador no final do fragmento. Os marcadores dividem o filme em vários fragmentos (consulte Termos básicos). No nosso exemplo dividimos nosso filme em quatro fragmentos adicionando marcadores nos locais necessários.
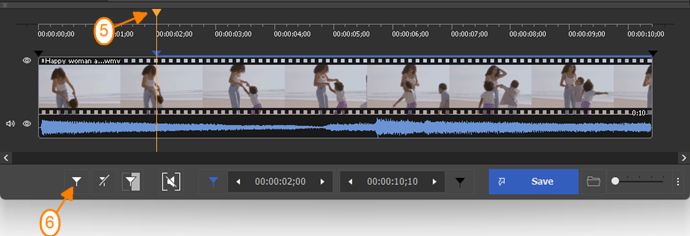
Figura 3
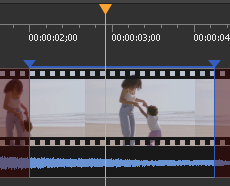
8. Selecione o fragmento que deseja cortar do filme clicando com o botão esquerdo do mouse.
9. Abra o menu contextual clicando com o botão direito do mouse e selecione o comando Cortar fragmento selecionado . O fragmento selecionado será marcado com a cor branca (ver Termos Básicos).
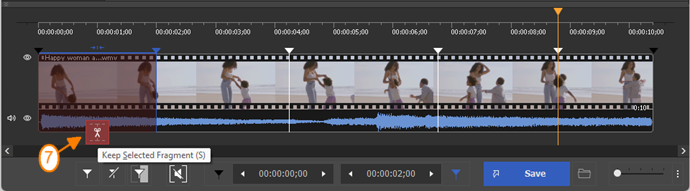
Figura 4
10. Selecione outros fragmentos que deseja cortar do filme. No nosso exemplo marcamos o segundo fragmento como 'cortado' conforme descrito em 9.
11. Selecione o comando Ferramentas ->Gerenciador de lote ->Adicionar tarefa à fila de lote ou pressione a tecla [A] para adicionar tarefa à fila de lote.
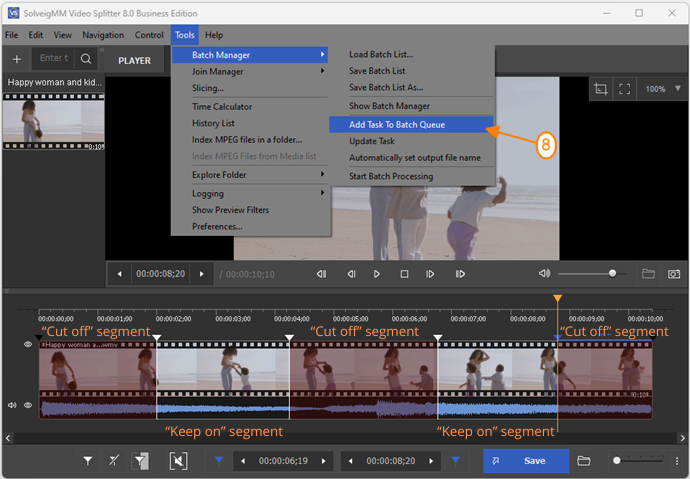
Figura 5
12. Digite o novo nome do arquivo na janela Salvar como exibida.
13. Clique no botão Salvar . Você verá o progresso atual da divisão. Você pode adicionar diversas tarefas à fila em lote.
14. Selecione o comando Ferramentas->Batch Manager->Mostrar Batch Manager para abrir Batch Manager. Na janela exibida (Figura 7) você pode ver a lista de tarefas adicionadas.
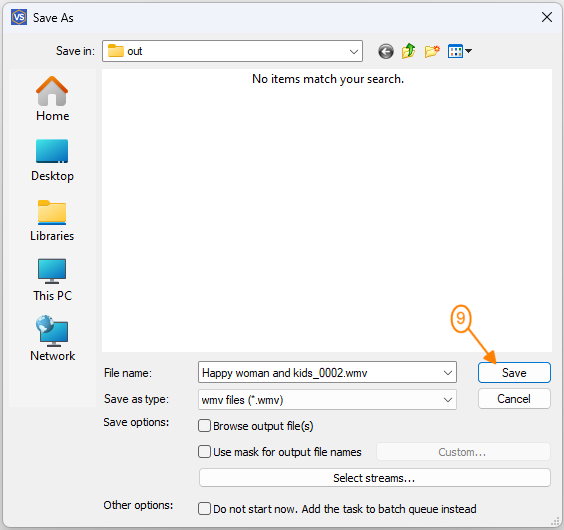
Figura 6
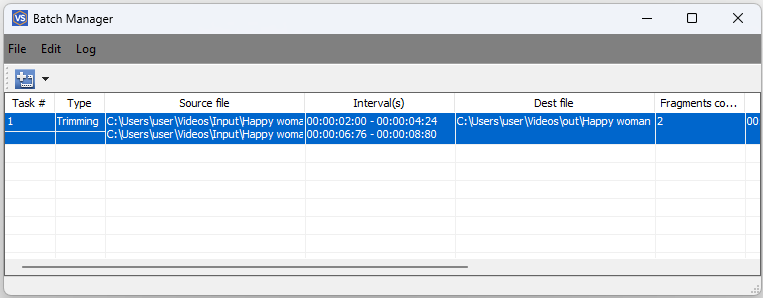
Figura 7
15. Abra o menu contextual na janela Batch Manager clicando com o botão direito do mouse.
16. Em seguida selecione o comando Iniciar Processamento em Lote no menu contextual (Figura 8) para iniciar a execução das tarefas.
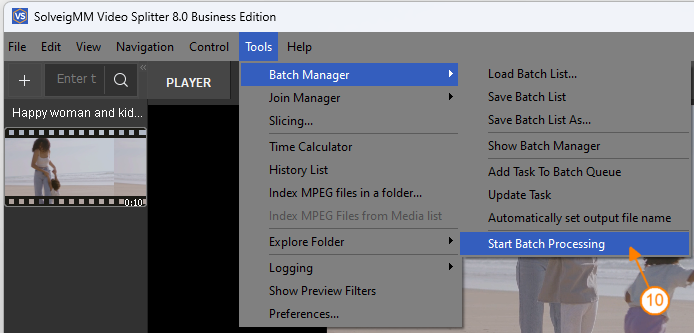
Figura 8
A janela contendo informações sobre o processo de divisão (Figura 9.1) aparece. Quando o processo de corte terminar, a janela mostrada na
A Figura 9.2 é aberta.
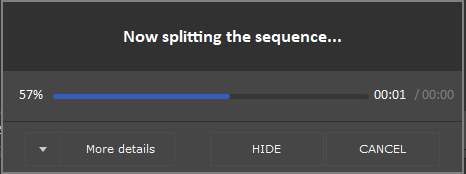
Figura 9.1
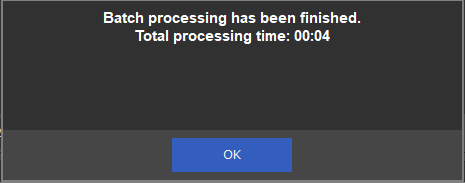
Figura 9.2
Todas as tarefas da lista devem ser executadas. Em nossa lista tínhamos três tarefas, portanto ao final do procedimento temos três arquivos editados. Um deles consiste em dois fragmentos. Dois fragmentos selecionados como 'cortados' foram excluídos do filme.
EXPERIMENTE o divisor de vídeo GRATUITAMENTE
- https://www.solveigmm.com/en/support/howto/how-to-register-solveigmm-video-splitter/
- https://www.solveigmm.com/en/support/howto/how-to-make-ringtone-for-cellphone-with-wmp-trimmer-plugin/
- https://www.solveigmm.com/en/support/howto/how-to-edit-your-video-and-audio-within-windows-media-player/
 Olga Krovyakova is the Technical Support Manager in Solveig Multimedia since 2010.
She is the author of many text and video guidelines of company's products: Video Splitter, HyperCam, WMP Trimmer Plugin, AVI Trimmer+ and TriMP4.
She works with programs every day and therefore knows very well how they work. Сontact Olga via support@solveigmm.com if you have any questions. She will gladly assist you!