 Deu
Deu  Eng
Eng  Rus
Rus  Ital
Ital  Esp
Esp  Port
Port  Jap
Jap  Chin
Chin So bearbeiten Sie ein Webinar-Video

Von Olga Krovyakova - geändert am 11. Juni 2024, erstellt am 29. März 2019
Ein aufgezeichnetes Webinar kann sehr nützlich sein, da Sie es für weitere Schulungen nutzen können, z.B. Um einige der besprochenen Punkte noch einmal durchzugehen, können Sie das Webinar auch mit denjenigen teilen, die nicht daran teilnehmen konnten. Es kann von Fall zu Fall erforderlich sein, einige Teile des Webinars zu bearbeiten, um unwichtige Informationen des aufgezeichneten Webinars zu löschen.
Mit SolveigMM Video Splitter können Sie das bearbeitete Webinar mit nur wenigen Mausklicks abrufen und die ursprüngliche Qualität bleibt erhalten. Das Programm unterstützt beliebte Dateiformate wie MP4, FLV, WebM, AVCHD, MPEG2, MKV, WMV, WAV, MP3 und andere.
Testen Sie Video Splitter KOSTENLOS

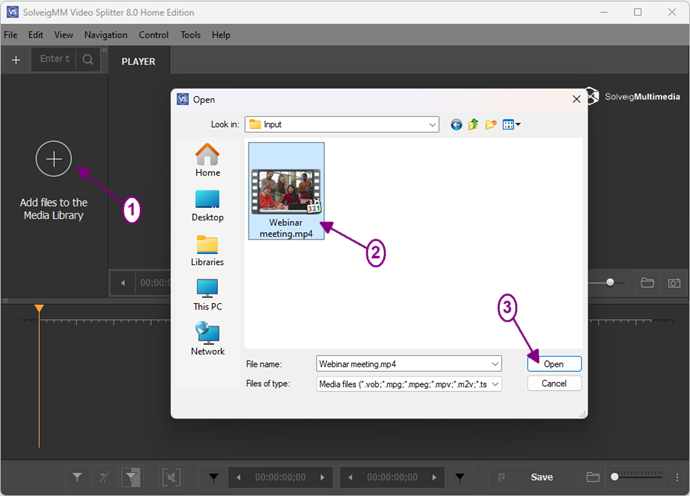
Picture 1
4. Move the file from the Media library to the timeline.
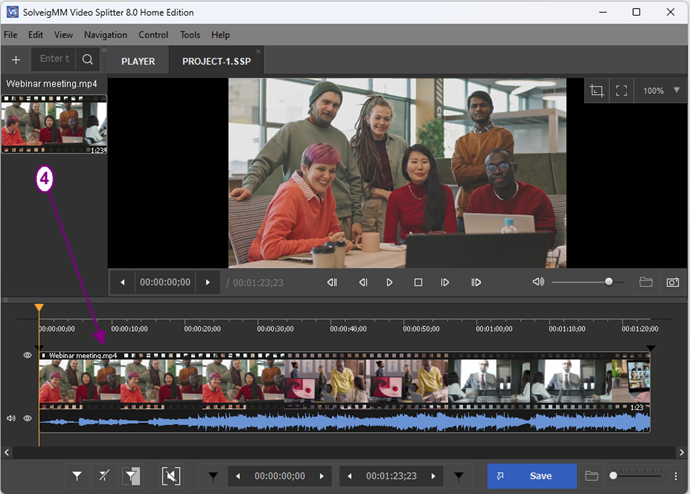
Picture 2
4. Wählen Sie Fragmente aus, die Sie speichern und löschen möchten. Setzen Sie Markierungen, die End- und Startzeitpositionen von Fragmenten definieren, indem Sie auf die Schaltfläche „Markierung hinzufügen“ klicken oder den Hotkey „M“ drücken.
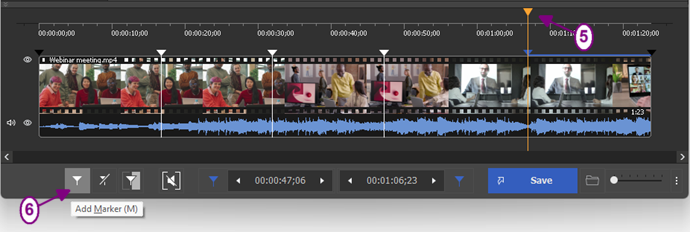
Picture 3
Mit dem Video-Splitter können Sie mithilfe der visuellen Zeitleiste den benötigten Frame der End-/Stoppposition auswählen. Sie können den Maßstab mit der Schaltfläche „Vergrößern/Verkleinern“ ändern. Es ist möglich, die Zeitskala mit einer Frame-Genauigkeit auszuwählen.
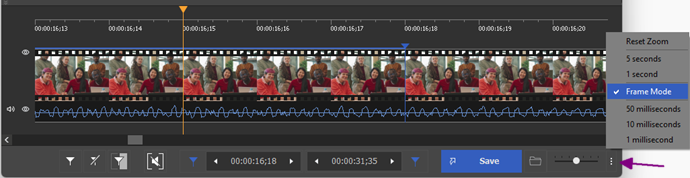
Picture 4
5. Jetzt müssen die Fragmente definiert werden, die im endgültigen Video gespeichert und gelöscht werden. Verwenden Sie die Schaltfläche „Ausgewähltes Fragmentausschneiden“.
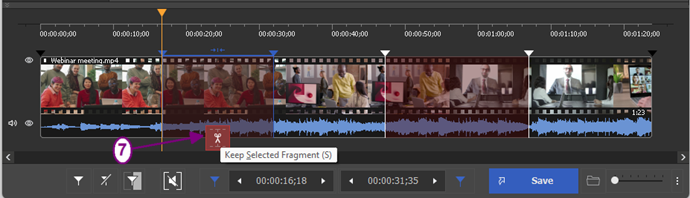
Picture 5
6. Um mit der Bearbeitung zu beginnen, drücken Sie einfach die Schaltfläche „Trimmen“.
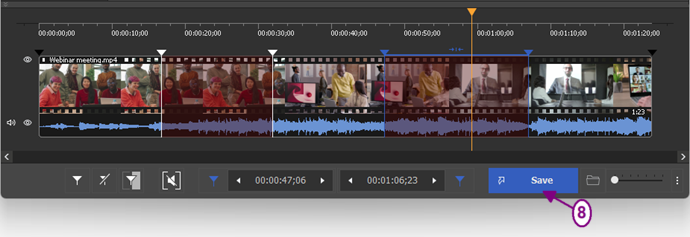
Picture 6
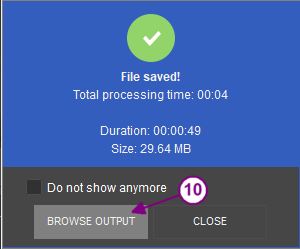
7. Wählen Sie im geöffneten Dialogfenster den Ordner zum Speichern aus, legen Sie den Namen der Ausgabedatei fest und klicken Sie auf die Schaltfläche „Speichern“.
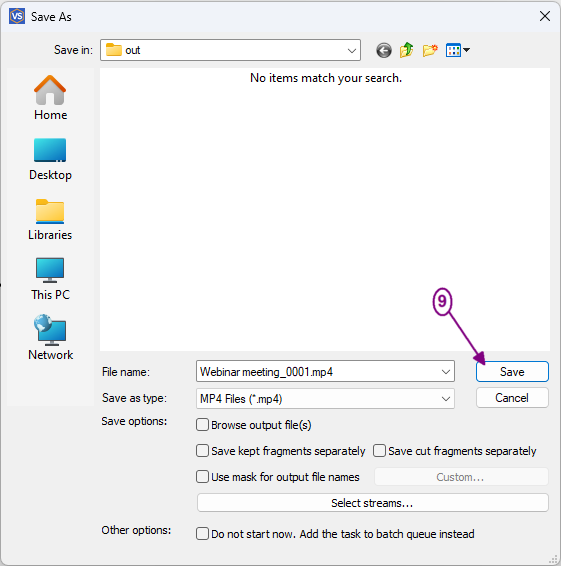
Picture 7
Danach wird der Bearbeitungsvorgang gestartet und Sie sehen das entsprechende Fenster, das den Status des Zuschneidens anzeigt.
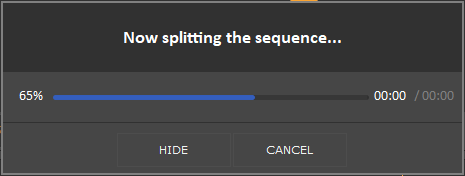
Picture 8
Picture 9
Testen Sie Video Splitter KOSTENLOS
- https://www.solveigmm.com/de/howto/how-to-edit-mp4-file-with-video-splitter/
- https://www.solveigmm.com/it/howto/how-to-record-a-webinar-with-hypercam-3/
 Olga Krovyakova ist seit 2010 Technical Support Manager bei Solveig Multimedia.
Sie ist Autorin zahlreicher Text- und Video-Richtlinien für Produkte: Video Splitter, HyperCam, WMP Trimmer Plugin, AVI Trimmer+ und TriMP4.
Sie arbeitet jeden Tag mit Programmen und weiß daher sehr gut, wie sie funktionieren. Wenden Sie sich bei Fragen an Olga über support@solveigmm.com.
Sie hilft Ihnen gerne weiter!