 Eng
Eng  Rus
Rus  Deu
Deu  Ital
Ital  Esp
Esp  Port
Port  Jap
Jap  Chin
Chin How to edit a webinar video

By Olga Krovyakova - modified June 11, 2024, created March 29, 2019
Recorded webinar can be very useful, since you will be able to use it for further education, e.g. to revisit some points that were discussed also you can share the webinar with those who could not attend it. There is case by case the need to edit some parts of webinar to delete unimportant information of the recorded webinar.
Using SolveigMM Video Splitter you can get the edited webinar with just few mouse clicks and the initial quality will be preserved. The program supports such popular file formats as MP4, FLV, WebM, AVCHD, MPEG2, MKV, WMV, WAV, MP3 and others.

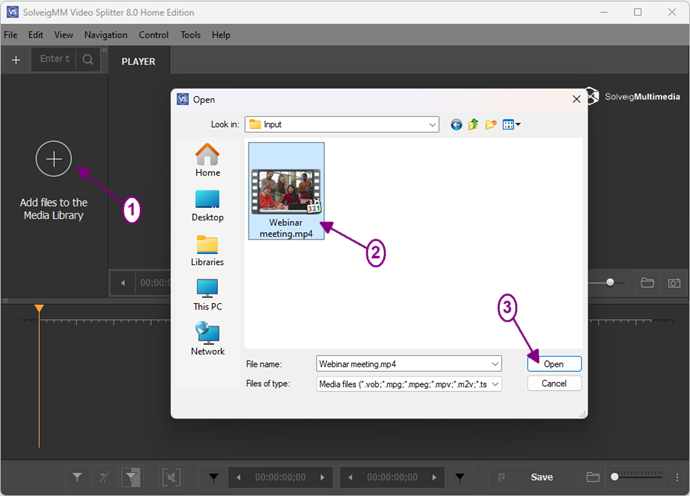
Picture 1
4. Move the file from the Media library to the timeline.
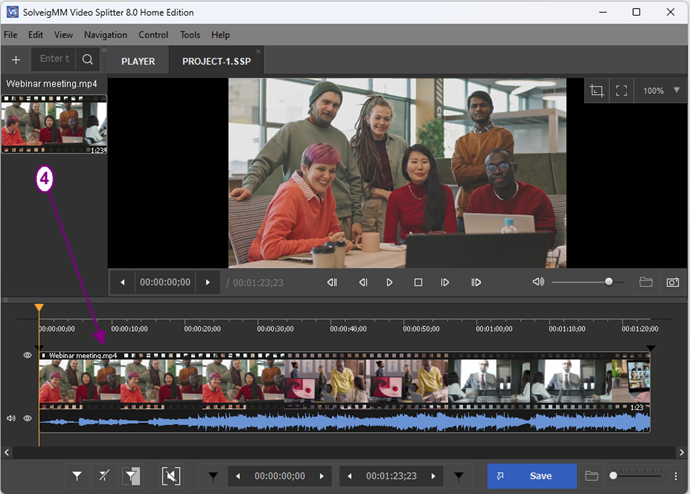
Picture 2
5. Select fragments you would like to be saved and deleted. Put markers that define end and start time positions of fragments by clicking the "Add marker" button or press "M" hot key.
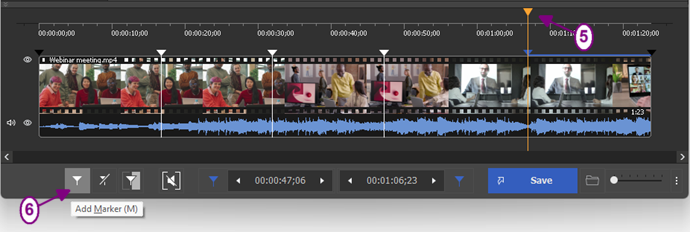
Picture 3
Video Splitter allows to select the needed frame of end\stop position with help of visual time line. You can change the scale with "Zoom" button. It is possible to select the time scale with up to frame accuracy.
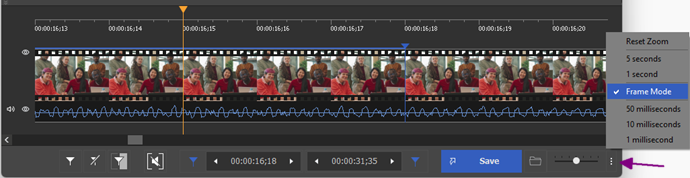
Picture 4
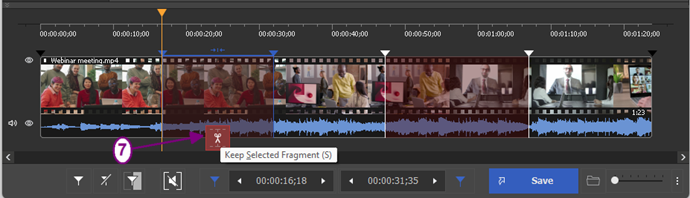
6. Now it is necessary to define the fragments that will be saved and deleted in the final video. Move the mouse cursor to the fragment that you would like to be deleted and use the "scissors" button.
Picture 5
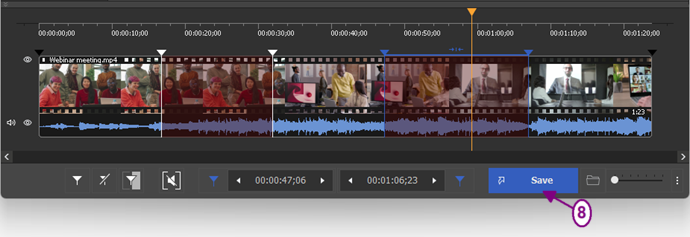
7. To start the editing just press the "Save" button.
Picture 6
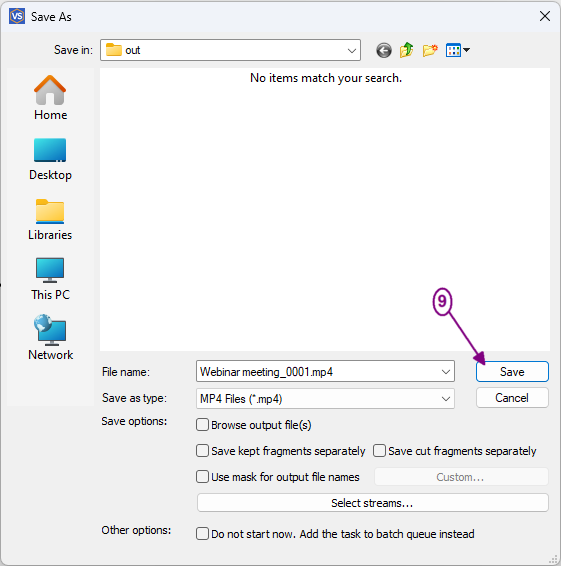
8. In the opened dialogbox window select the folder for saving, set the output file name and click the "Save" button.
Picture 7
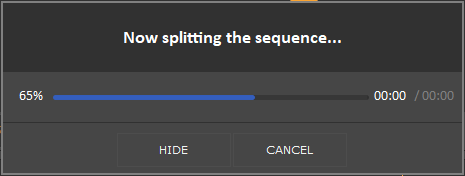
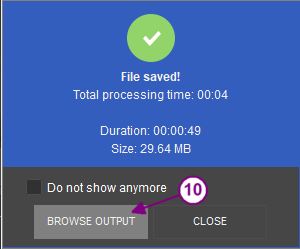
After that the editing progress will be started and you'll see the appropriate window that shows the status of trimming.
Picture 8
Picture 9
- https://www.solveigmm.com/en/howto/how-to-edit-mp4-file-with-video-splitter/
- https://www.solveigmm.com/en/howto/how-to-record-a-webinar-with-hypercam-3/
 Olga Krovyakova is the Technical Support Manager in Solveig Multimedia since 2010.
She is the author of many text and video guidelines of company's products: Video Splitter, HyperCam, WMP Trimmer Plugin, AVI Trimmer+ and TriMP4.
She works with programs every day and therefore knows very well how they work. Сontact Olga via support@solveigmm.com if you have any questions. She will gladly assist you!