 Eng
Eng  Rus
Rus  Deu
Deu  Ital
Ital  Esp
Esp  Port
Port  Jap
Jap  Chin
Chin How to use HyperCam 3 under Citrix XenApp environment

By Olga Krovyakova - April, 2 2019
HyperCam 3 encodes client’s desktop content and compresses it on the PC where the application is launched. To avoid transmitting huge data over a network, Citrix XenApp environment should be set so that HyperCam 3 is started on client’s PC. That is, HyperCam 3 should be configured as a streamed application.
For example, we use Citrix XenApp 6.5 and HyperCam 3.6.1507.2 on Windows Server 2008 R2 x64 (as a server) and Windows 7 SP1 x64 (as a client PC).

1. Create a new profile in the Streaming Profiler on a client PC (Picture 1), set its name as HyperCam3Streamed (Picture 2), set target OS and language (Picture 3).
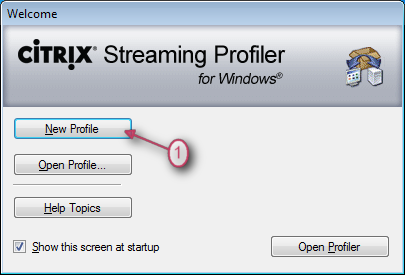
Picture 1
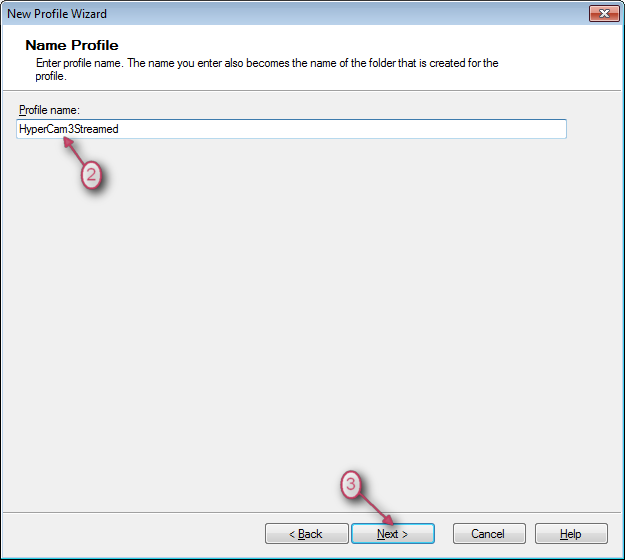
Picture 2
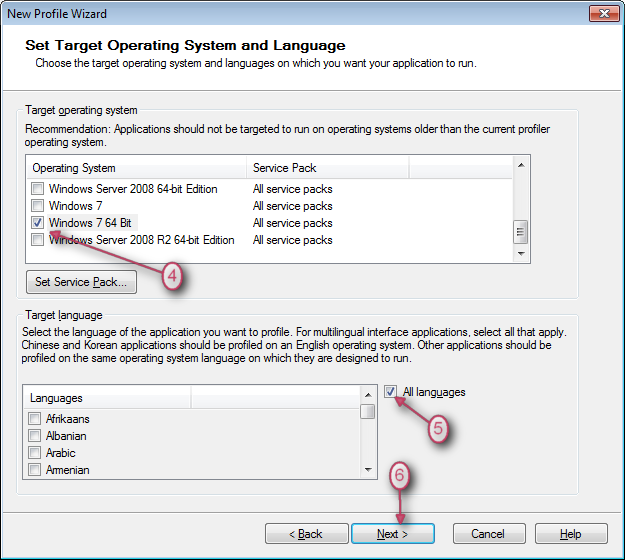
Picture 3
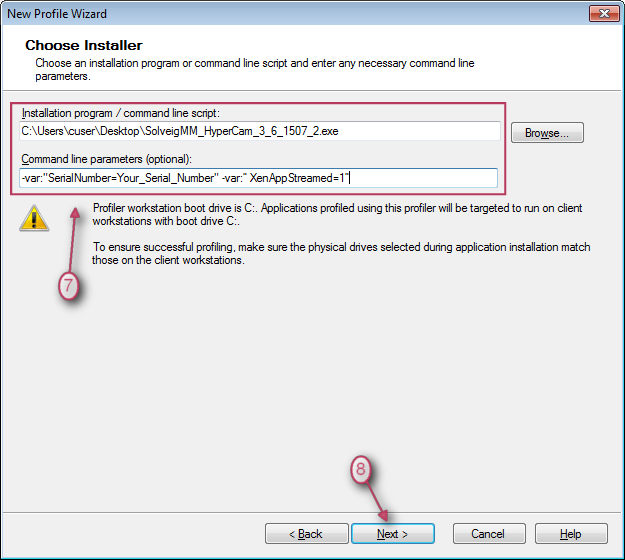
2. Set HyperCam 3 installation file and install it. Please use the following command line parameters:
|
SolveigMM_HyperCam_3_6_1507_2.exe -var:"SerialNumber=Your_Serial_Number" var:"XenAppStreamed=1" |
Click the "Next" button. After that the installation process will be launchded (see Picture 4).
Picture 4
3. The applications will appear in the list (see Picture 5).
Now you can optionally check, if HyperCam 3 was installed correctly by selecting the application and clicking the "Run" button.
When starting, HyperCam 3 and HyperCam Media Editor should be launched, activated and work correctly.

Picture 5
4. Select applications by clicking the "Add" button, set the remaining options and finish creating the profile (Picture 6).
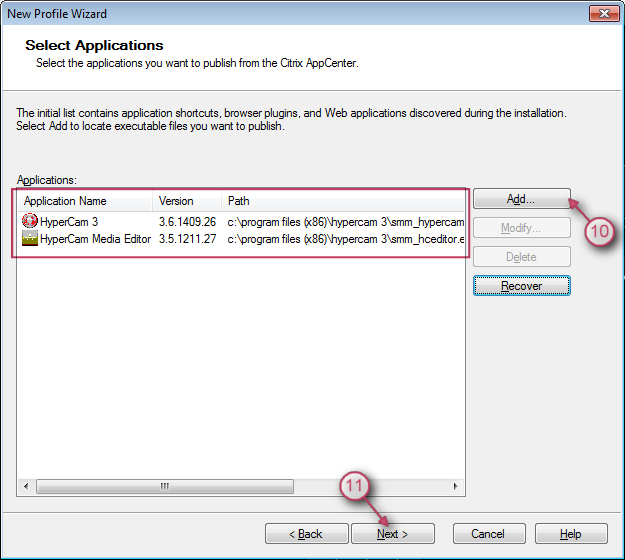
Picture 6
5. Select profile directory by clicking the "Browse" button or typing the following path. Enter HyperCam3Streamed as profile name.
Save the profile to the shared folder (Picture 7).
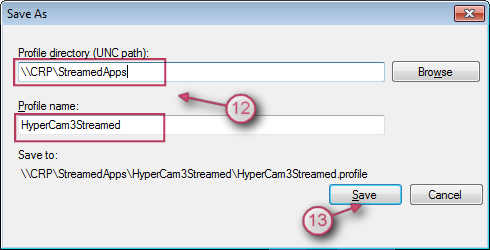
Picture 7
6. Open the just saved profile in the Streaming Profiler on the server and add a new target by clicking "Add New Target..." in the "Edit" menu (Picture 8).

Picture 8
7. Install HyperCam 3 as previously described in steps 2-5 for Windows Server 2008 R2 x64.
8. Publish HyperCam 3 in Citrix AppCenter as a streamed application using the created profile (Pictures 9-12).
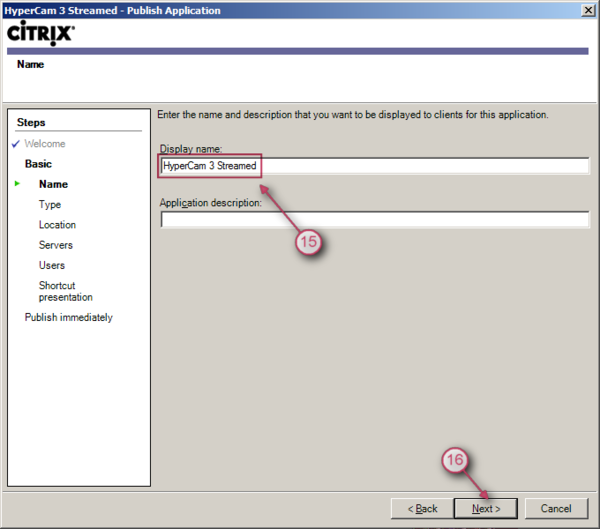
Picture 9
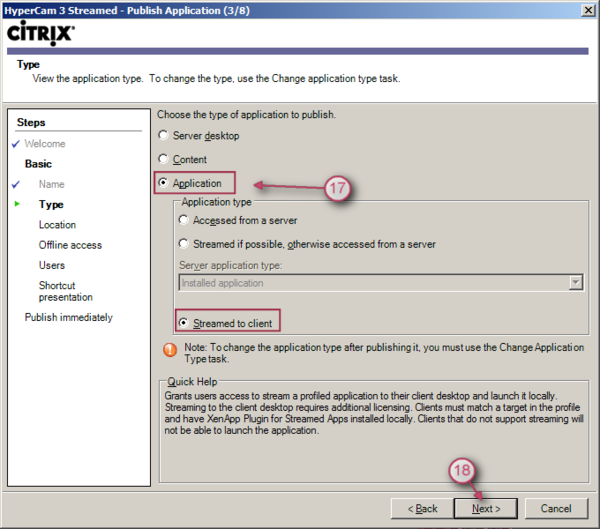
Picture 10
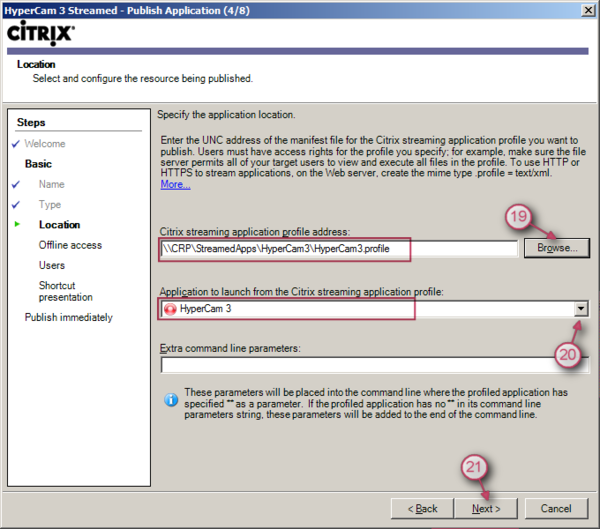
Picture 11
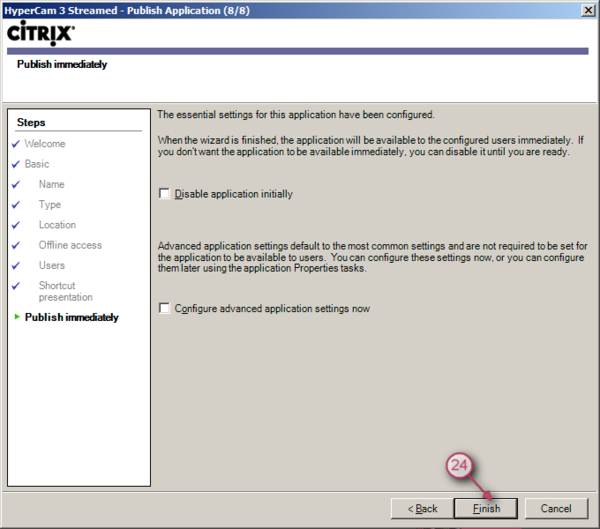
Picture 12
9. Publish HyperCam 3 Media Editor as a streamed application
10. On a client PC, install Citrix Receiver Enterprise and Citrix Offline Plugin. The Receiver should be installed with the “LEGACYFTAICONS” option e.g.:
|
CitrixReceiverEnterprise.exe /includeSSON /ENABLE_SSON=Yes STORE0="Appstorename;http://server.url/storename/PNAgent/config.xml;on;Apps on XenApp" /LEGACYFTAICONS=True |
11. Login in Citrix Receiver.
"HyperCam 3 Streamed" and "HyperCam Media Editor" can be launched from the Desktop. The applications will use codecs installed on the client PC.
That's all! Thank you for reading!
 Olga Krovyakova is the Technical Support Manager in Solveig Multimedia since 2010.
She is the author of many text and video guidelines of company's products: Video Splitter, HyperCam, WMP Trimmer Plugin, AVI Trimmer+ and TriMP4.
She works with programs every day and therefore knows very well how they work. Сontact Olga via support@solveigmm.com if you have any questions. She will gladly assist you!