 Eng
Eng  Rus
Rus  Deu
Deu  Ital
Ital  Esp
Esp  Port
Port  Jap
Jap  Chin
Chin How to add webcam overlay to the video with HyperCam?

By Olga Krovyakova - modified July 01, 2026, created February, 22 2022
The modern world is genuinely overwhelmed with video communications, making it somewhat complicated to stand out of the crowd with an individual voice of yours. Yet, our nature still requires some human presence at the other end, so that with the help of webcam overlays, you get a chance to share some additional information during the course of a video call as well as highlight your own unique identity. Hence, the need to add webcam overlay appears to be more of a necessity within the turbulent waters of video communications, not to mention such benefits of using webcam overlay in-game walkthroughs, reaction videos, and/or lecture notes. Every single category, in its turn, can be taken much further by means of employing webcam overlay, adding a greater degree of interaction and excitement.
Technically speaking, adding webcam overlay falls under the category of video superpositions. In its turn, webcam overlay should also be divided into different webcam overlay modes, and those may come in picture, text, video, image, etc., depending upon the choice provided by the custom webcam overlay you use, allowing an adding a particular webcam overlay. In our specific case, indeed, we are talking of SolveigMM HyperCam.
Here is the algorithm for webcam overlay onto a video using HyperCam app.
First of all, make sure that the webcam is actually connected to the computer:
1) Start HyperCam by clicking on its icon and make sure it works smoothly;
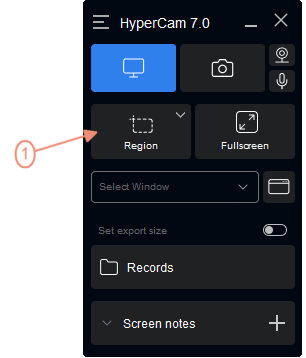
2) Select the recording mode: Region, Fullscreen or Window with appropriate control buttons on the main interface window.
Let's assume we need to annotate the video file that we already have with our voice and webcam image.
For this we need to record the visiable area of some player and turn on the microphone setting and enable the webcam.
Firstly, we select the Region button.
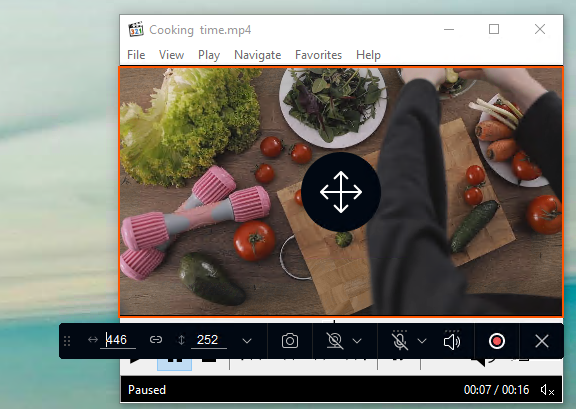
3) You will see the crosslines that will help you to select the desired area of your screen.
Left mouse click and hold it while selecting the needed desktop area.
Release the mouse button — the orange recording frame with the convenient control bar will appear.
Here you can make some main settings before the recording start.
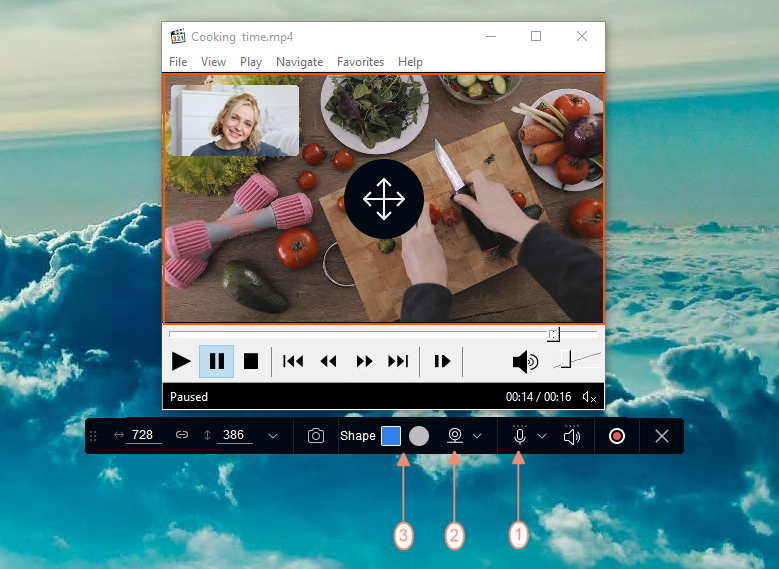
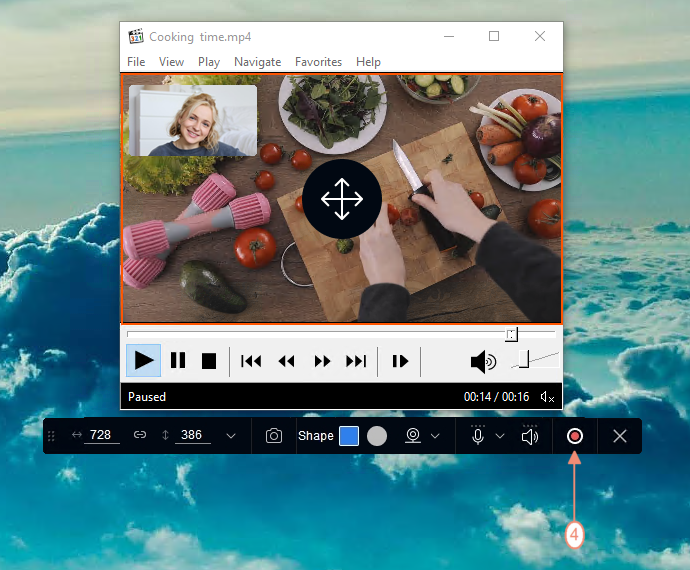
4) We enable microphone recording (1) and webcam (2). You can also choose the desired frame for the webcam image: square or circle (3).
Please note that these controls should switch into “on” status.
Give that a few cameras are connected to your computer, then you can also select in the drop down list near the camera icon which webcam should be used — just click on the arrow near this webcam control.
You can put the webcam image on any place of your selected recording area.
You can also change the size of this webcam overlay image by moving its edges.
Make also shure that your microphone is enabled in your system and the sound volume of the player and microphone is set to desired.
5) Start the recording by pressing the red "Start recording" button on the control bar or the F2 hotkey.
6) Start the player playback by clicking the Play button or the Space hotkey.
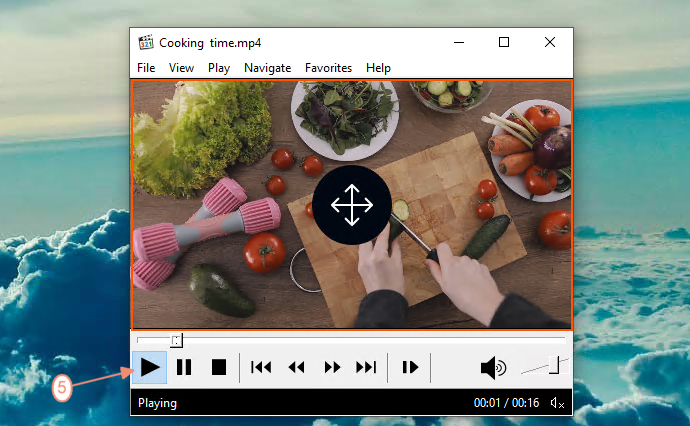
7) Annotate your video record as you would like.
Remember that you can pause your recording at any time by clicking the appropriate button of the control bar or the F2 hotkey.
8) To stop the recording press the "F3" hotkey or the "Stop recording" button of the control bar.
Congratulations! Now your recorded file with the webcam overlay is ready!
You can easily share it with the friends, collegues, or anyone else by submitting this to YouTube, Facebook or any other popular website.
See the frequently asked questions section below for deeper understanding of the subject.

Frequently Asked Questions
Can I turn the webcam overlay on/off during recording?
What are the benefits of using a webcam overlay?
Do I need to install additional applications to use the webcam overlay?
- https://www.solveigmm.com/en/howto/how-to-use-game-recorder-hypercam/
- https://www.solveigmm.com/en/howto/how-to-record-streaming-video-with-hypercam/
 Olga Krovyakova is the Technical Support Manager in Solveig Multimedia.
She is the author of many text and video guidelines of company's products: Video Splitter, HyperCam, WMP Trimmer Plugin, AVI Trimmer+ and TriMP4.
She works with programs every day and therefore knows very well how they work. Сontact Olga via support@solveigmm.com if you have any questions. She will gladly assist you!