 Eng
Eng  Rus
Rus  Deu
Deu  Ital
Ital  Esp
Esp  Port
Port  Jap
Jap  Chin
Chin How to edit ASF file

By Olga Krovyakova - modified March 15, 2024, created March 27, 2019
SolveigMM Video Splitter allows deleting unnecessary fragments from video file without video/audio quality loss. This guide explains how you can edit ASF file.

Understanding of some basic terms used in this guide will help you to start using SolveigMM Video Splitter in most comfortable way.
|
|
Marker is set to a current cursor position. |
|
|
The selected marker is highlighted with blue color. |
Markers can be added or deleted. Such operations as deleting and positioning are applied to the selected markers only.
Fragment is a part of video (or audio) file limited by two markers to be removed or kept in a final movie, e.g. commercial block you want to cut off. Fragments marked as 'cut off' are colored with brown-red color.
Examples of fragments are provided in table below:
| Color of Fragment | Description |
|---|---|
 |
This fragment was set to be deleted. It will not be presented in final movie |
 |
This fragment was set to be kept. It will be presented in final movie |
 |
This fragment was set to be deleted. It will not be presented in final movie. Yellow slider on it means you can edit it (delete, set it to be kept, etc.) |
 |
This fragment was set to be kept. It will be presented in final movie. Yellow slider on it means you can edit it (delete, set it to be cut off, etc.) |
Control Panel contains main tools for file processing.
| Window Element | Description | Shortcut Key |
|---|---|---|
|
|
Button "Add Marker": Adds a new marker to current slider cursor position. |
M
|
|
|
Button "Remove Marker(s)": Removes a current marker or fragment. |
Delete
|
|
|
Button "Invert": Inverts time line fragments. |
I
|
|
|
Button "Set audio silence": Sets the audio silence for the selected fragment. | |
|
|
Button "Save": Starts trimming or Batch Processing (if batch queue has any task). |
Ctrl+T
|
|
|
Edit box of a left marker cursor time position. You can edit this value by manually. | |
|
|
Edit box of a right marker cursor time position. You can edit this value by manually. | |
|
|
Button "Zoom In/Out": Increases/descreases a slider timeline resolution for more comfortable editing neighbor markers (*). |
Num+ Num- |
|
|
Button "Browse output file(s)": opens folder in the File Explorer with the output file. | |
|
|
Audio off/on: turns off/on sound of the whole video track Story board or audio wave off/on: turns off/on the story board or audio wave
|
|
|
(*) - To view timeline areas after Zoom In you can use a scroll bar (below a timeline slider) and "Alt + Left arrow" and "Alt + Right Arrow" hot keys. |
||
In our example we will edit initial ASF file by cutting off two fragments with frame accuracy in one pass.
1. Click the button or select the Add Media Files... command in the File menu.
2. Select file to be edited.
3. Click the button to open the selected file.
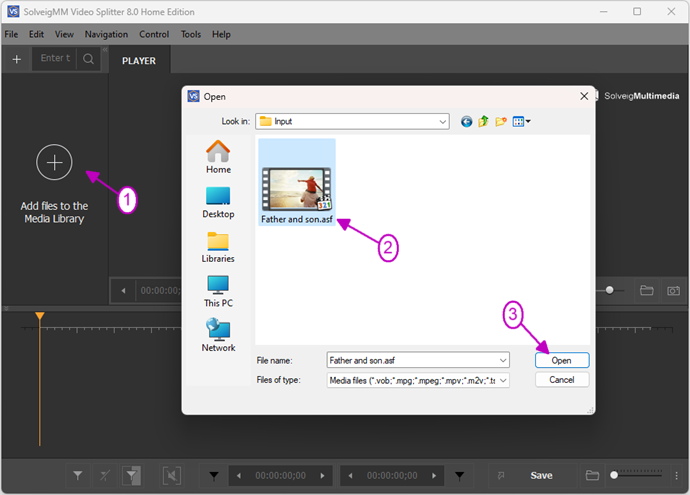
Figure 1
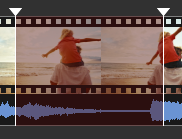
4. Move the file from the Media library to the timeline.
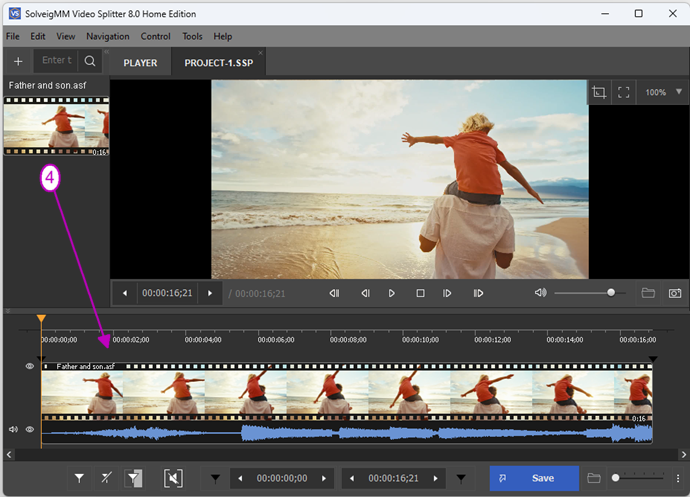
Figure 2
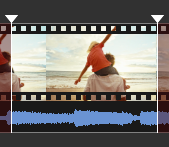
4. Find the beginning of the first part of your movie using Video slider.
5. Select the Add Marker command of the Edit menu or press the [M] key. Then add the marker at the end of the fragment. Markers divide movie into several fragments (see Basic Terms). In our example we divide our movie into four fragments by adding markers in the required places.
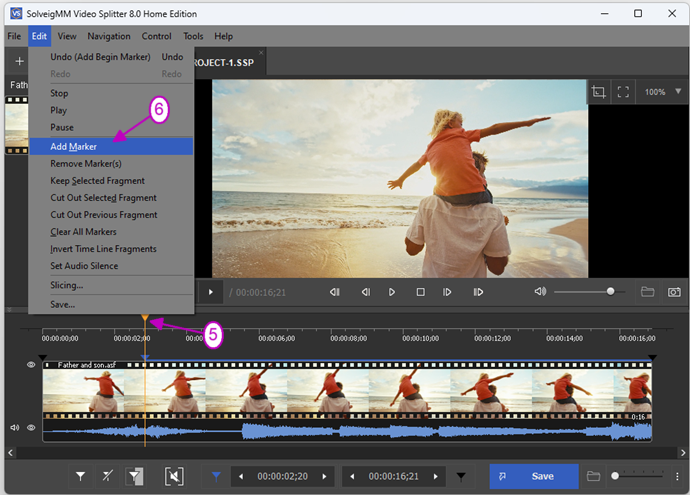
Figure 3
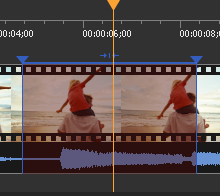
6. Add markers of start/end time positiions for other fragments.
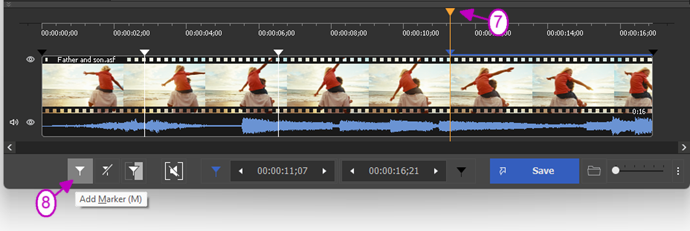
Figure 4
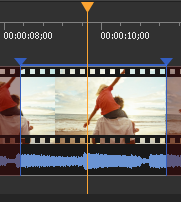
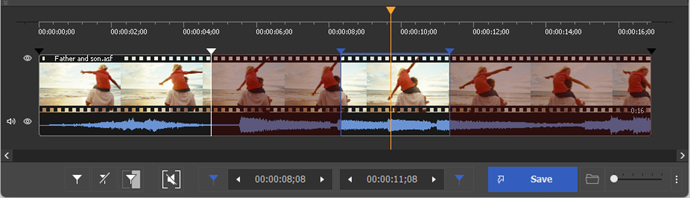
7. Move the mouse cursor between the markers of the fragment you would like to be deleted.
8. Click the button with "scissors" that will apear under the fragment to mark it as 'cut off'. The fragment will be marked with brown-red color (see Basic Terms).
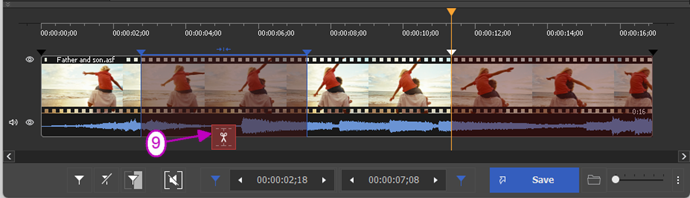
Figure 5
8. Select other fragments you want to cut off from the movie. In our example we marked the last fragment as 'cut off' as described in 7.
9. Select the Save... command of the Edit menu or click the Save button to start the file processing.
10. Enter new file name in the appeared standard Save As window. Click the Save button. In the appeared window you will see current progress of file processing.
The new saved file will not contain two fragments marked as 'cut off'.
Additional information about features of SolveigMM Video Splitter you can find on the website and in SolveigMM Video Splitter User Guide.
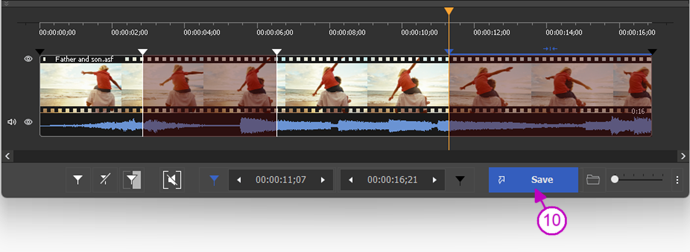
Figure 6
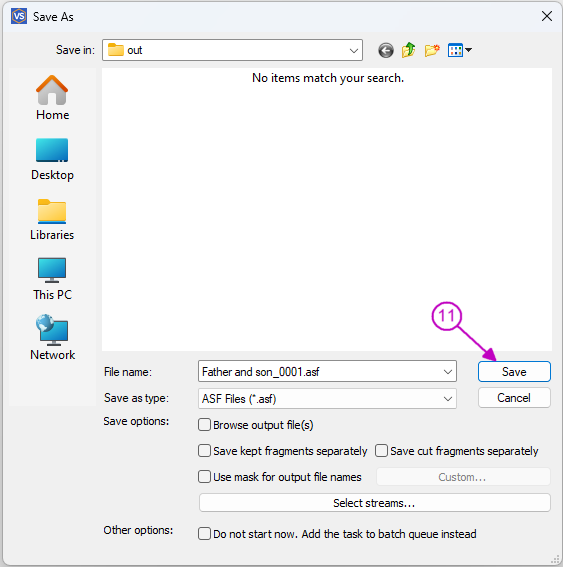
Figure 7
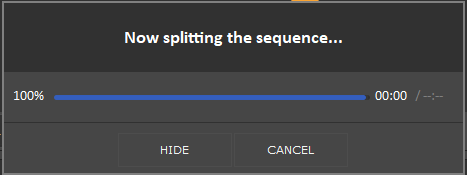
Figure 8
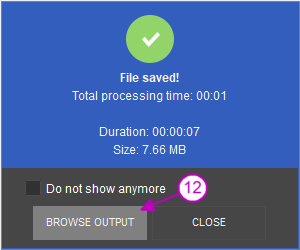
Figure 9
 Olga Krovyakova is the Technical Support Manager in Solveig Multimedia since 2010.
She is the author of many text and video guidelines of company's products: Video Splitter, HyperCam, WMP Trimmer Plugin, AVI Trimmer+ and TriMP4.
She works with programs every day and therefore knows very well how they work. Сontact Olga via support@solveigmm.com if you have any questions. She will gladly assist you!