 Eng
Eng  Rus
Rus  Deu
Deu  Ital
Ital  Esp
Esp  Port
Port  Jap
Jap  Chin
Chin How to record screen on a schedule using HyperCam 3

By Olga Krovyakova - April, 2 2019
Sometimes you need to record specific events occurring on your desktop at a time, without user intervention. For example, if we want to record a web conference or seminar, online broadcasting of sporting event, or any other significant event that broadcasts at an inconvenient time for us, when we can not be near the computer, or we would like to pre-set the task of recording to the program and create a schedule for recording. Such task can be accomplished using HyperCam 3 and the standard Task Scheduler of our system.

Consider the case when you need to start recording of the Web resource strictly at a certain moment of time after turning on the computer. To create a schedule, you can use the standard Task Scheduler together withHyperCam 3. For this you will need to open a web resource at a time, which will be specified in the Scheduler as the start time.
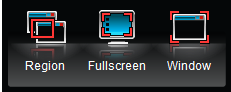
1. Open HyperCam 3 to select the recording area (region, window or full screen). Setting will remain after closing the program and restart the computer.
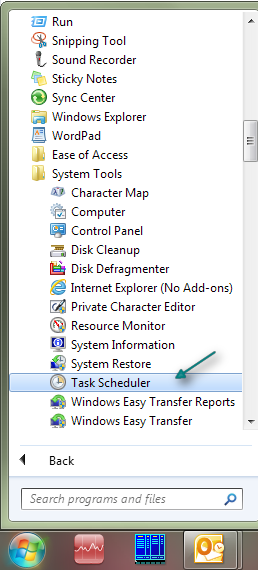
2. Open the Task Scheduler
Start –> All programs –> Accessories -> System Tools -> Task Scheduler
3. We will need to create 3 tasks there:
- To run HyperCam after login
- Starts recording at a given time
- To stop recording
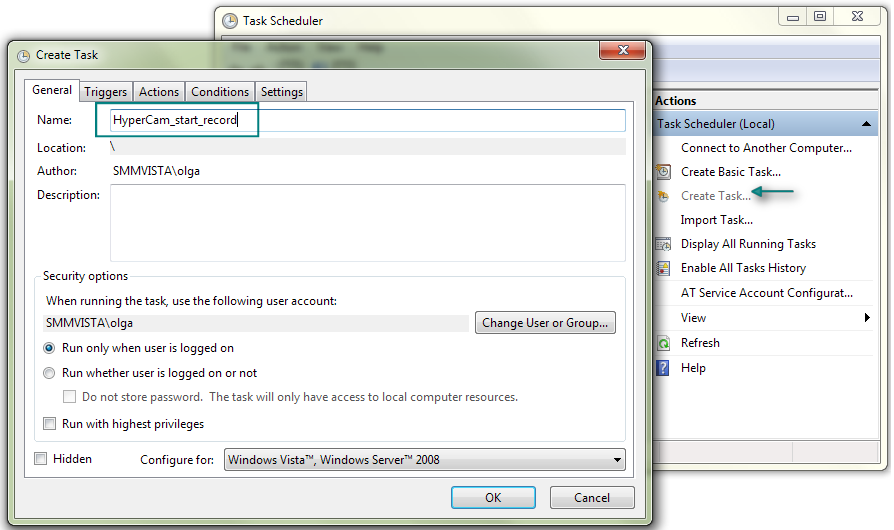
To start HyperCam after login
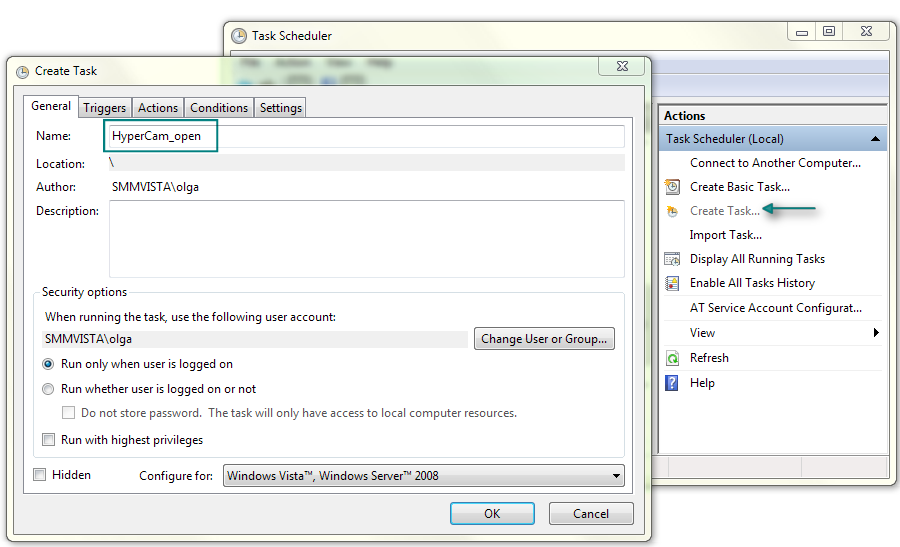
2) Enter the task name in the "General" tab.
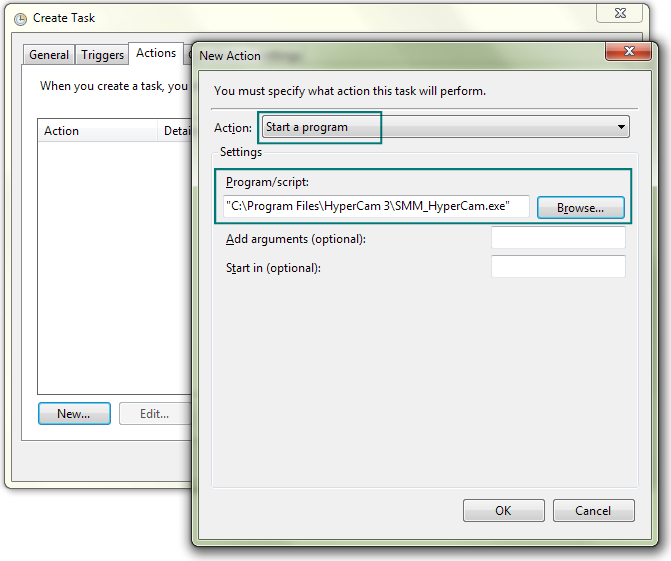
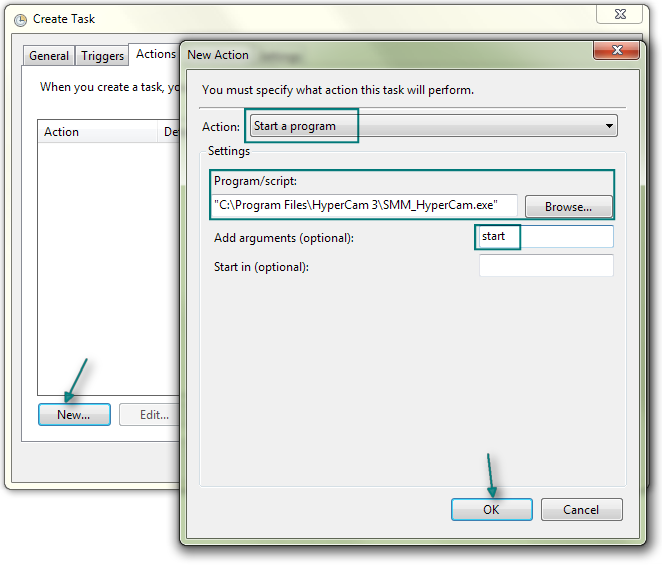
3) Under the "Actions" select "New". In the window that opens, select the action as "Start a program", by pressing the "Browse" button, select "SMM_HyperCam.exe" in the installed folder with the program.
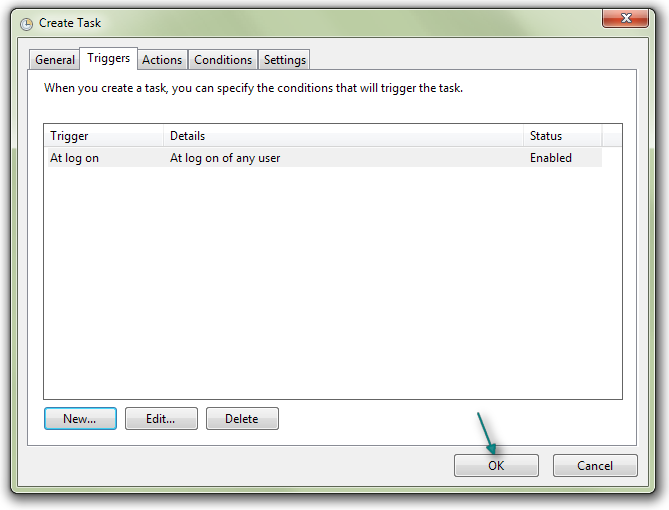
4) Under the "Triggers" tab, select "New" and in the "Start Task" combobox, select "At log on" then click OK.
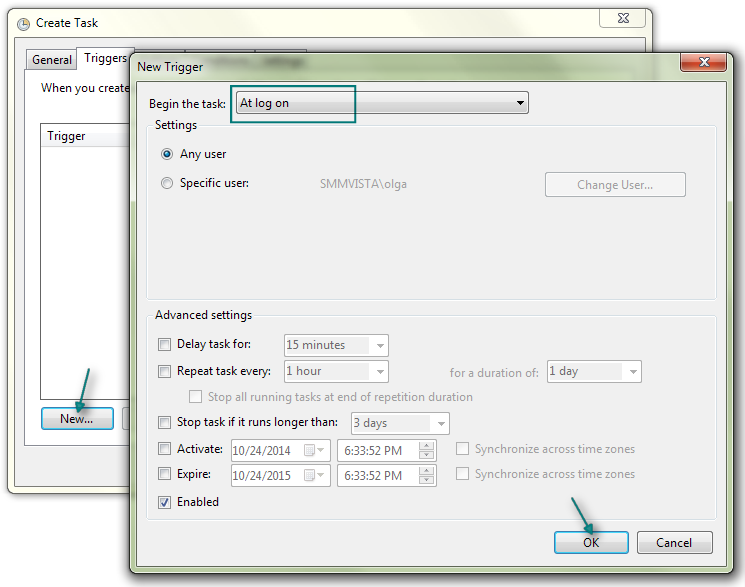
5) Click the ОK button in Trigger tab.
To begin recording at a certain time
1) Select "Create task".
2) Set the name of the task in the "General" tab.
3) Under the "Actions" tab select "New" button and in "Action" combobox select "Start a program". Using the "Browse" button select «SMM_HyperCam.exe» and enter the «start» in the "Add arguments".
4) Under the "Triggers" tab make settings for the recording start time, repeats, etc.
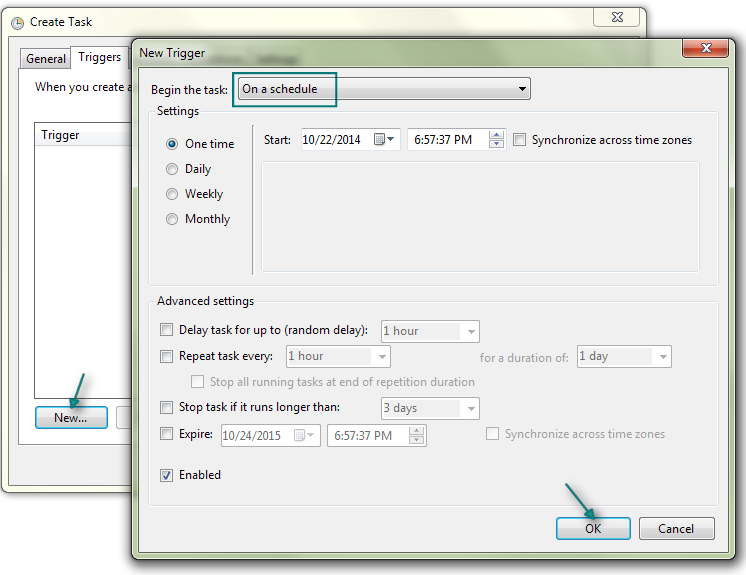
5) Click "OK" in this window and "OK" in the "Create Task" window.
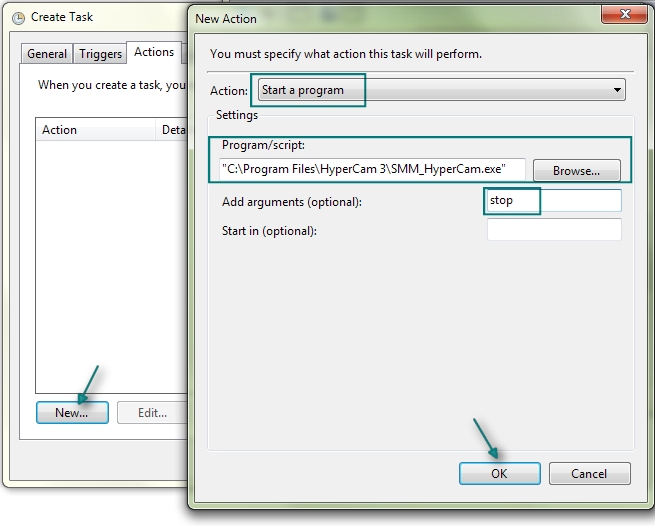
To stop the recording
1) Create a task, enter a name in the "General" tab
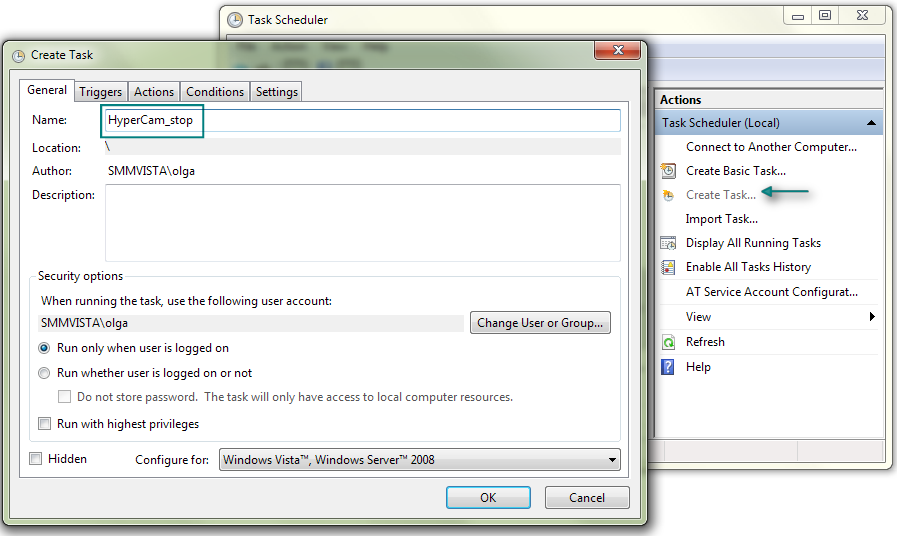
2) Under the "Actions" tab cllick the "New" button and select "Start a program" in the "Actions" combobox. Use the "Browse" button to select «SMM_HyperCam.exe» and enter «stop» in the "Add arguments" field.
3) Under the "Triggers" tab make settings for the time to stop the recording:
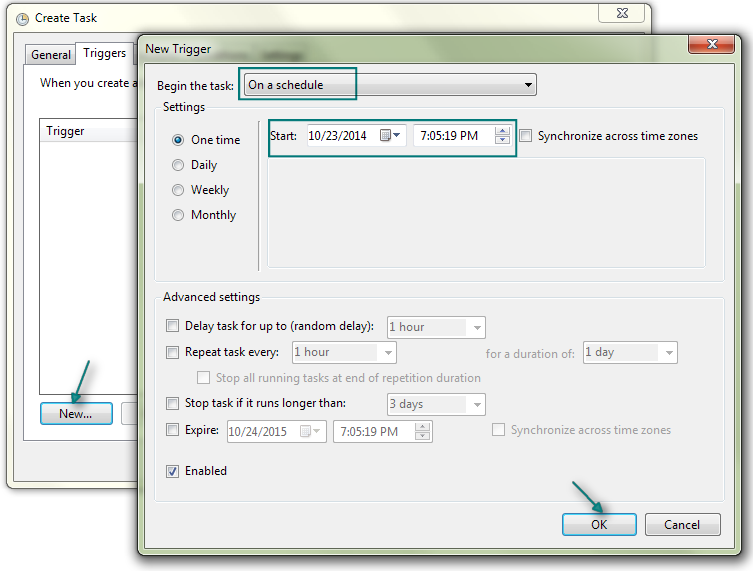
4) Click "OK" in this window and "OK" button in the "Creating Task" window and close the Task Scheduler.
As a result of these steps, recording of the selected region with HyperCam 3 will start and end automatically at a specified time in the Task Scheduler.
We wish you success in your projects!
 Olga Krovyakova is the Technical Support Manager in Solveig Multimedia since 2010.
She is the author of many text and video guidelines of company's products: Video Splitter, HyperCam, WMP Trimmer Plugin, AVI Trimmer+ and TriMP4.
She works with programs every day and therefore knows very well how they work. Сontact Olga via support@solveigmm.com if you have any questions. She will gladly assist you!