 Jap
Jap  Eng
Eng  Rus
Rus  Deu
Deu  Ital
Ital  Esp
Esp  Port
Port  Chin
Chin WMVファイルの編集方法

オルガ・クロヴャコワ著 - 2019年3月27日
SolveigMM ビデオ スプリッター ビデオ/オーディオの品質を損なうことなく、ビデオファイルから不要なフラグメントを削除できます。このガイドでは、WMV ファイルを編集する方法について説明します。

Understanding of some basic terms used in this guide will help you to start using SolveigMM Video Splitter in most comfortable way.
|
|
Marker is set to a current cursor position. |
|
|
The selected marker is highlighted with blue color. |
Markers can be added or deleted. Such operations as deleting and positioning are applied to the selected markers only.
Fragment is a part of video (or audio) file limited by two markers to be removed or kept in a final movie, e.g. commercial block you want to cut off. Fragments marked as 'cut off' are colored with brown-red color.
Examples of fragments are provided in table below:
| Color of Fragment | Description |
|---|---|
 |
This fragment was set to be deleted. It will not be presented in final movie |
 |
This fragment was set to be kept. It will be presented in final movie |
 |
This fragment was set to be deleted. It will not be presented in final movie. Yellow slider on it means you can edit it (delete, set it to be kept, etc.) |
 |
This fragment was set to be kept. It will be presented in final movie. Yellow slider in it means you can edit it (delete, set it to be cut off, etc.) |
Control Panel contains main tools for file processing.
| Window Element | Description | Shortcut Key |
|---|---|---|
|
|
Button "Add Marker": Adds a new marker to current slider cursor position. |
M
|
|
|
Button "Remove Marker(s)": Removes a current marker or fragment. |
Delete
|
|
|
Button "Invert": Inverts time line fragments. |
I
|
|
|
Button "Set audio silence": Sets the audio silence for the selected fragment. | |
|
|
Button "Save": Starts trimming or Batch Processing (if batch queue has any task). |
Ctrl+T
|
|
|
Edit box of a left marker cursor time position. You can edit this value by manually. | |
|
|
Edit box of a right marker cursor time position. You can edit this value by manually. | |
|
|
Button "Zoom In/Out": Increases/descreases a slider timeline resolution for more comfortable editing neighbor markers (*). |
Num+ Num- |
|
|
Button "Browse output file(s)": opens folder in the File Explorer with the output file. | |
|
|
Audio off/on: turns off/on sound of the whole video track Story board or audio wave off/on: turns off/on the story board or audio wave
|
|
|
(*) - To view timeline areas after Zoom In you can use a scroll bar (below a timeline slider) and "Alt + Left arrow" and "Alt + Right Arrow" hot keys. |
||
In our example we will edit initial WMV file by cutting off two fragments with frame accuracy in one pass. In our final movie only the video stream will present, the audio stream will be disabled .
この例では、1 回のパスでフレーム精度で 2 つのフラグメントを切り取ることにより、初期 WMV ファイルを編集します。最終的なムービーでは、ビデオ ストリームのみが表示され、オーディオ ストリームは無効になります。
1. を選択します。 メディア ファイルを開く... のコマンド ファイル メニュー。
2. 編集するファイルを選択します。
3. ボタンをクリックして、選択したファイルを開きます。選択したファイルにインデックスがない場合、ダイアログ ウィンドウは次のように表示されます。 図2.1 が表示されます。
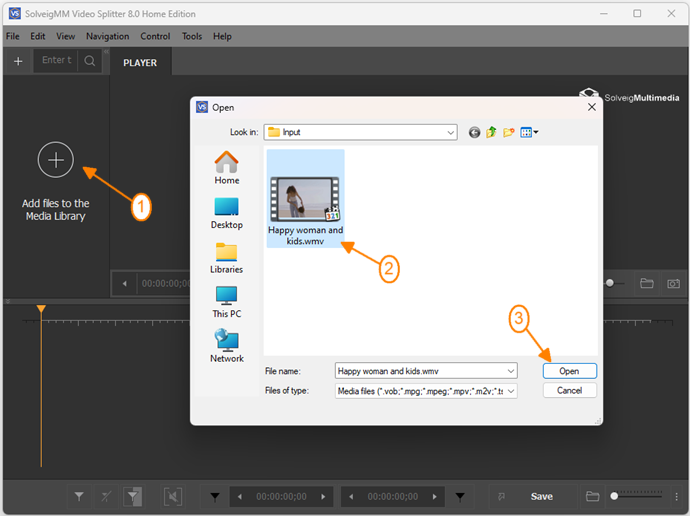
図1
4. Move the file from the Media library to the timeline.
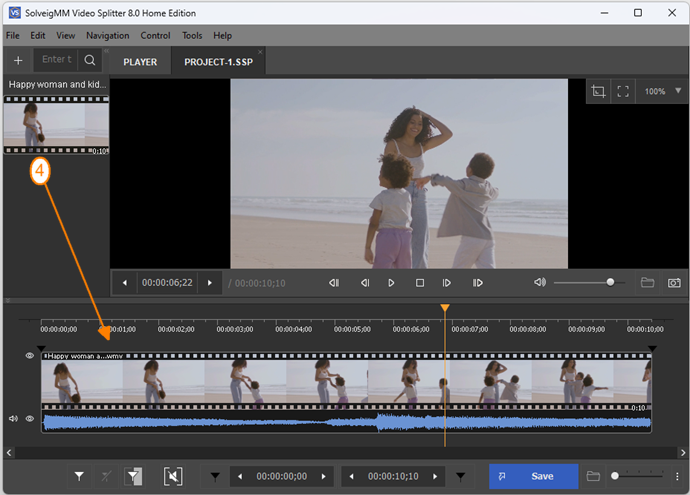
Figure 2
4. 選択を解除します。 オーディオ のチェックボックス コントロール メニューを使用して、最終ムービーのオーディオ ストリームを無効にします。
5. をクリックします。 ズームイン ボタンをクリックして、スライダーのタイムライン解像度を上げます。これにより、隣接マーカーをより快適に編集できるようになります。タイムラインの下にスクロールバーが表示されます。
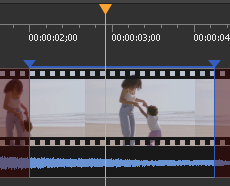
6. を使用してムービーの最初の部分の始まりを見つけます。 ビデオスライダー。
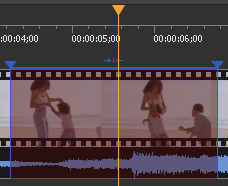
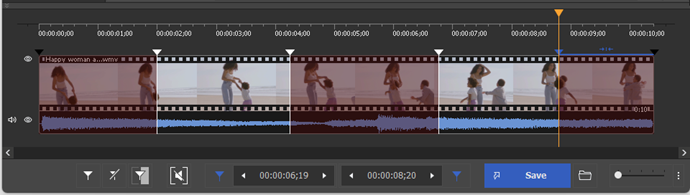
7. マーカーを追加する ボタン。を選択してマーカーを追加することもできます。 新しいマーカーを設定 コンテキスト メニューのコマンド、または [男] 鍵。次に、フラグメントの最後にマーカーを追加します。マーカーはムービーをいくつかのフラグメントに分割します (「 基本用語)。この例では、必要な場所にマーカーを追加して、ムービーを 4 つのフラグメントに分割します。
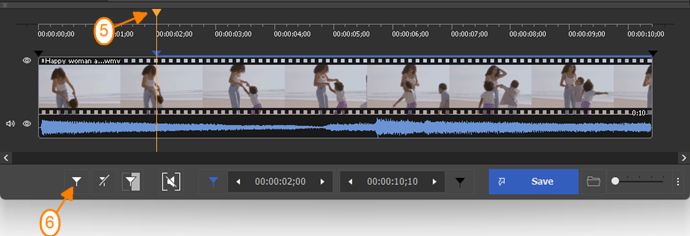
図3
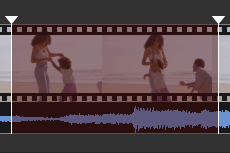
8. マウスの左ボタンをクリックして、ムービーから切り取りたいフラグメントを選択します。
9. マウスの右ボタンをクリックしてコンテキスト メニューを開き、 選択した断片を切り取る 指示。選択したフラグメントは白色でマークされます (「 基本用語)。
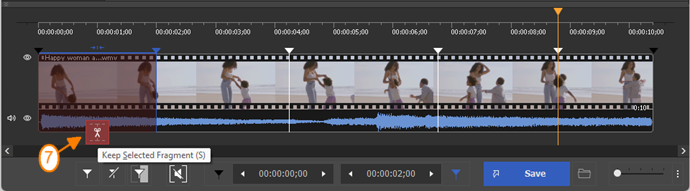
図4
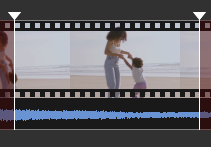
10. ムービーから切り取りたい他のフラグメントを選択します。 この例では、9 で説明したように 2 番目のフラグメントを「カットオフ」としてマークしました。
11. [ツール] -> [バッチ マネージャー] -> [タスクをバッチ キューに追加] コマンドを押すか、 [A] キーを押してタスクをバッチキューに追加します。
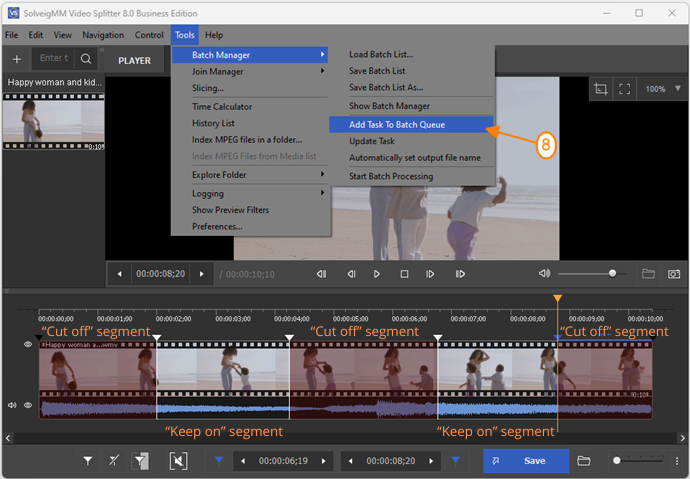
図5
12. 表示されたフィールドに新しいファイル名を入力します 名前を付けて保存 窓。
13. 保存 ボタン。現在の分割の進行状況が表示されます。複数のタスクをバッチ キューに追加できます。
14. [ツール] -> [バッチ マネージャー] -> [バッチ マネージャーを表示] 開くコマンド バッチマネージャー。表示されたウィンドウ(図7 )に、追加されたタスクのリストが表示されます。
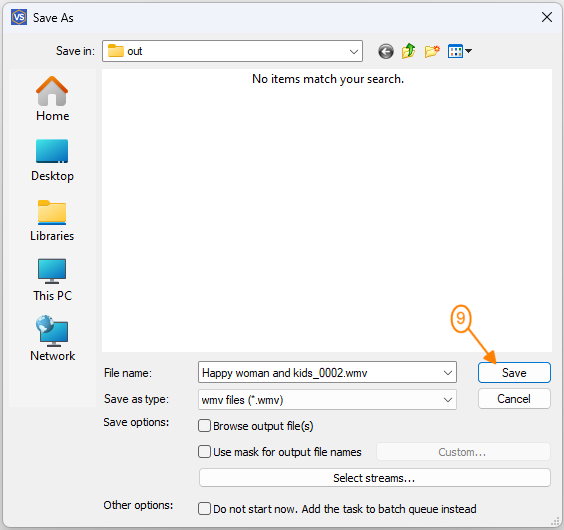
図6
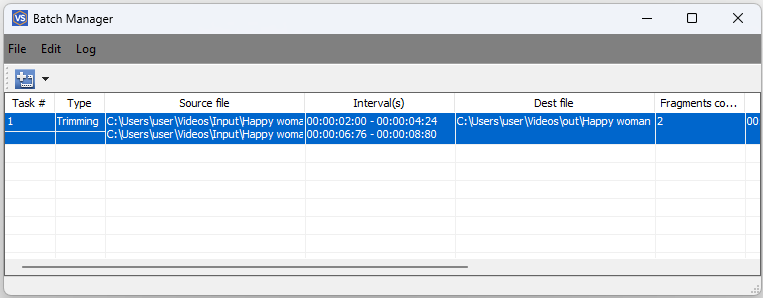
図7
15. コンテキストメニューを開きます。 バッチマネージャー マウスの右ボタンをクリックしてウィンドウを開きます。
16. 次に、 バッチ処理の開始 コンテキストメニュー(図8 )のコマンドを選択して、タスクの実行を開始します。
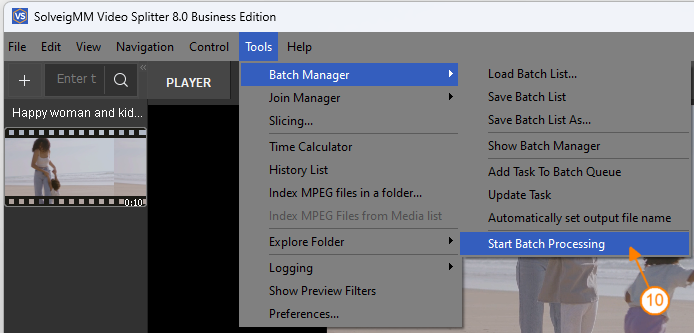
図8
分割プロセスに関する情報を含むウィンドウ(図9.1 )が表示されます。トリミング処理が完了すると、次のようなウィンドウが表示されます。
図 9.2が開きます。
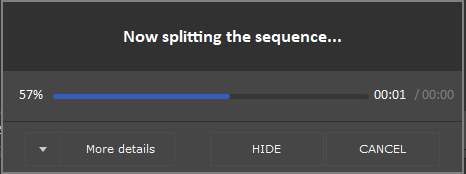
図9.1
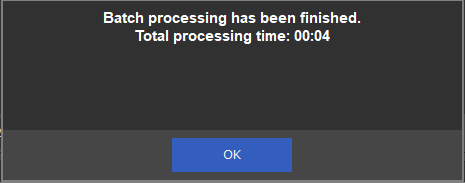
図9.2
リストにあるすべてのタスクを実行する必要があります。このリストには 3 つのタスクが含まれていたため、手順の最後には 3 つの編集済みファイルができています。そのうちの 1 つは 2 つのフラグメントで構成されています。 「カットオフ」として選択された 2 つの断片がムービーから削除されました。
- https://www.solveigmm.com/en/support/howto/how-to-register-solveigmm-video-splitter/
- https://www.solveigmm.com/en/support/howto/how-to-make-ringtone-for-cellphone-with-wmp-trimmer-plugin/
- https://www.solveigmm.com/en/support/howto/how-to-edit-your-video-and-audio-within-windows-media-player/
 Olga Krovyakova は、2010 年から Solveig Multimedia のテクニカル サポート マネージャーを務めています。
彼女は、ビデオ スプリッター、HyperCam、WMP トリマー プラグイン、AVI Trimmer+、TriMP4 などの会社製品に関する多くのテキストおよびビデオ ガイドラインの著者です。
彼女は毎日プログラムを使って作業しているため、プログラムがどのように機能するかをよく知っています。 ご質問がある場合は、 support@solveigmm.com経由で Olga までお問い合わせください。彼女は喜んでお手伝いします!