 Eng
Eng  Rus
Rus  Deu
Deu  Ital
Ital  Esp
Esp  Port
Port  Jap
Jap  Chin
Chin How to slice video by time, size or parts

By Olga Krovyakova - modified February 28, 2024, created March 29, 2019
This is especially convenient if we would like to move files of certain size or duration to any portable storage device or we would like to upload the created file to some online portal with limitation of the size of uploaded files. In almost all projects of video editing this feature of SolveigMM Video Splitter to split a file in parts of given duration, size or number can be helpful.
Just follow the simple steps of this guideline to find out how to slice files of all file formats that this tool supports, such as FLV, AVC/H264, MP4, MOV, AVCHD, MPEG-2, MKV, MPEG-1, AVI, WMV, MP3 or WMA files.

1. Download and install SolveigMM Video Splitter.
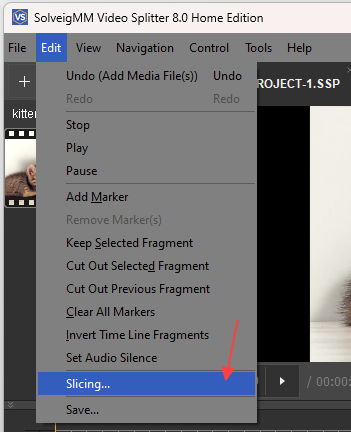
2. Open the product and go to Tools -> Slicing. The "Slicing" window will open.
You can also add several media files or the whole folder with files for slicing using the corresponding commands.
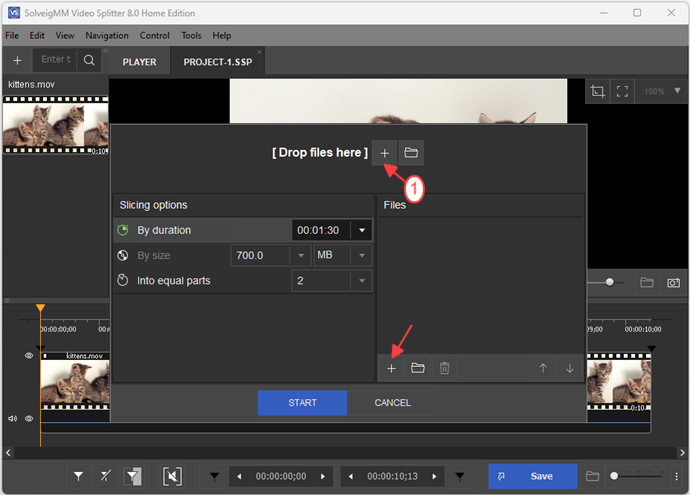
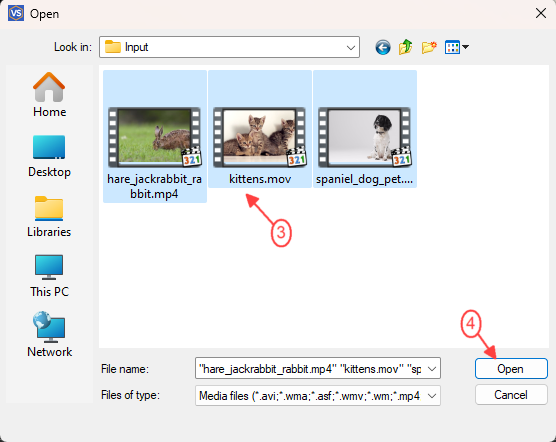
After the file(s) for slicing have been added you'll see the list of them in the "Files:" area.
4. There are three options how we can divide our files: by definite time or size of each output file or by number of parts.
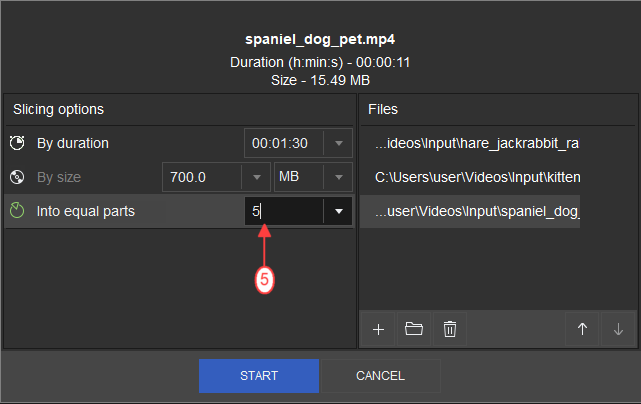
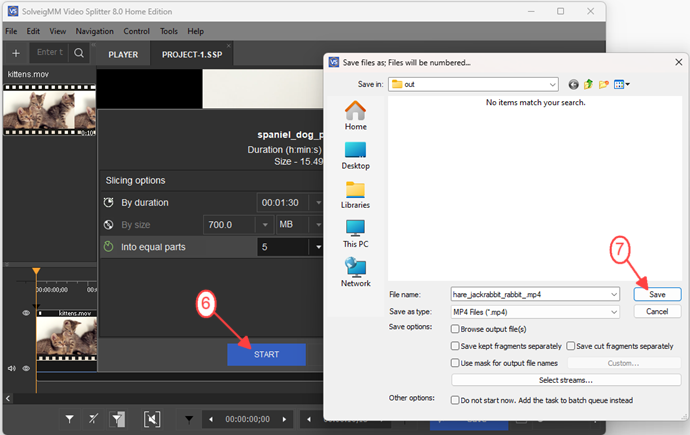
Let's assume we would like to split all files that we have into 5 equal parts. Click on the "Into equal parts" menu and select "5" in the combobox.
Optionally you can change the order of the files for slicing using special buttons with arrows to move files to the upper or lower position in the list.
If you decide to remove any file in the list of file for slicing please click the appropriate "Remove" button or select file by clicking on it in the list and use "Delete" key.
5. Click on the "Start" button to initiate the process of slicing.
You'll see the "Save files as" window where you can select the folder for saving of the output files and change the name of them if necessary.
Click on the "Save" button of this dialog box to begin the editing.
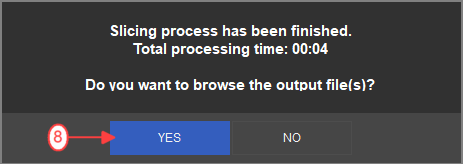
The process of slicing will be shown in the progression window.
After the process of slicing has ended, you will be notified. Click on the "Yes" button if you want to browse the output files.
You will see output files saved in the specified folder.
That's all! Have fun with your editing projects!
- https://www.solveigmm.com/en/howto/how-to-split-video-into-fragments-with-video-splitter/
- https://www.solveigmm.com/en/howto/how-to-edit-avchd-file-with-solveigmm-video-splitter/
 Olga Krovyakova is the Technical Support Manager in Solveig Multimedia since 2010.
She is the author of many text and video guidelines of company's products: Video Splitter, HyperCam, WMP Trimmer Plugin, AVI Trimmer+ and TriMP4.
She works with programs every day and therefore knows very well how they work. Сontact Olga via support@solveigmm.com if you have any questions. She will gladly assist you!